17
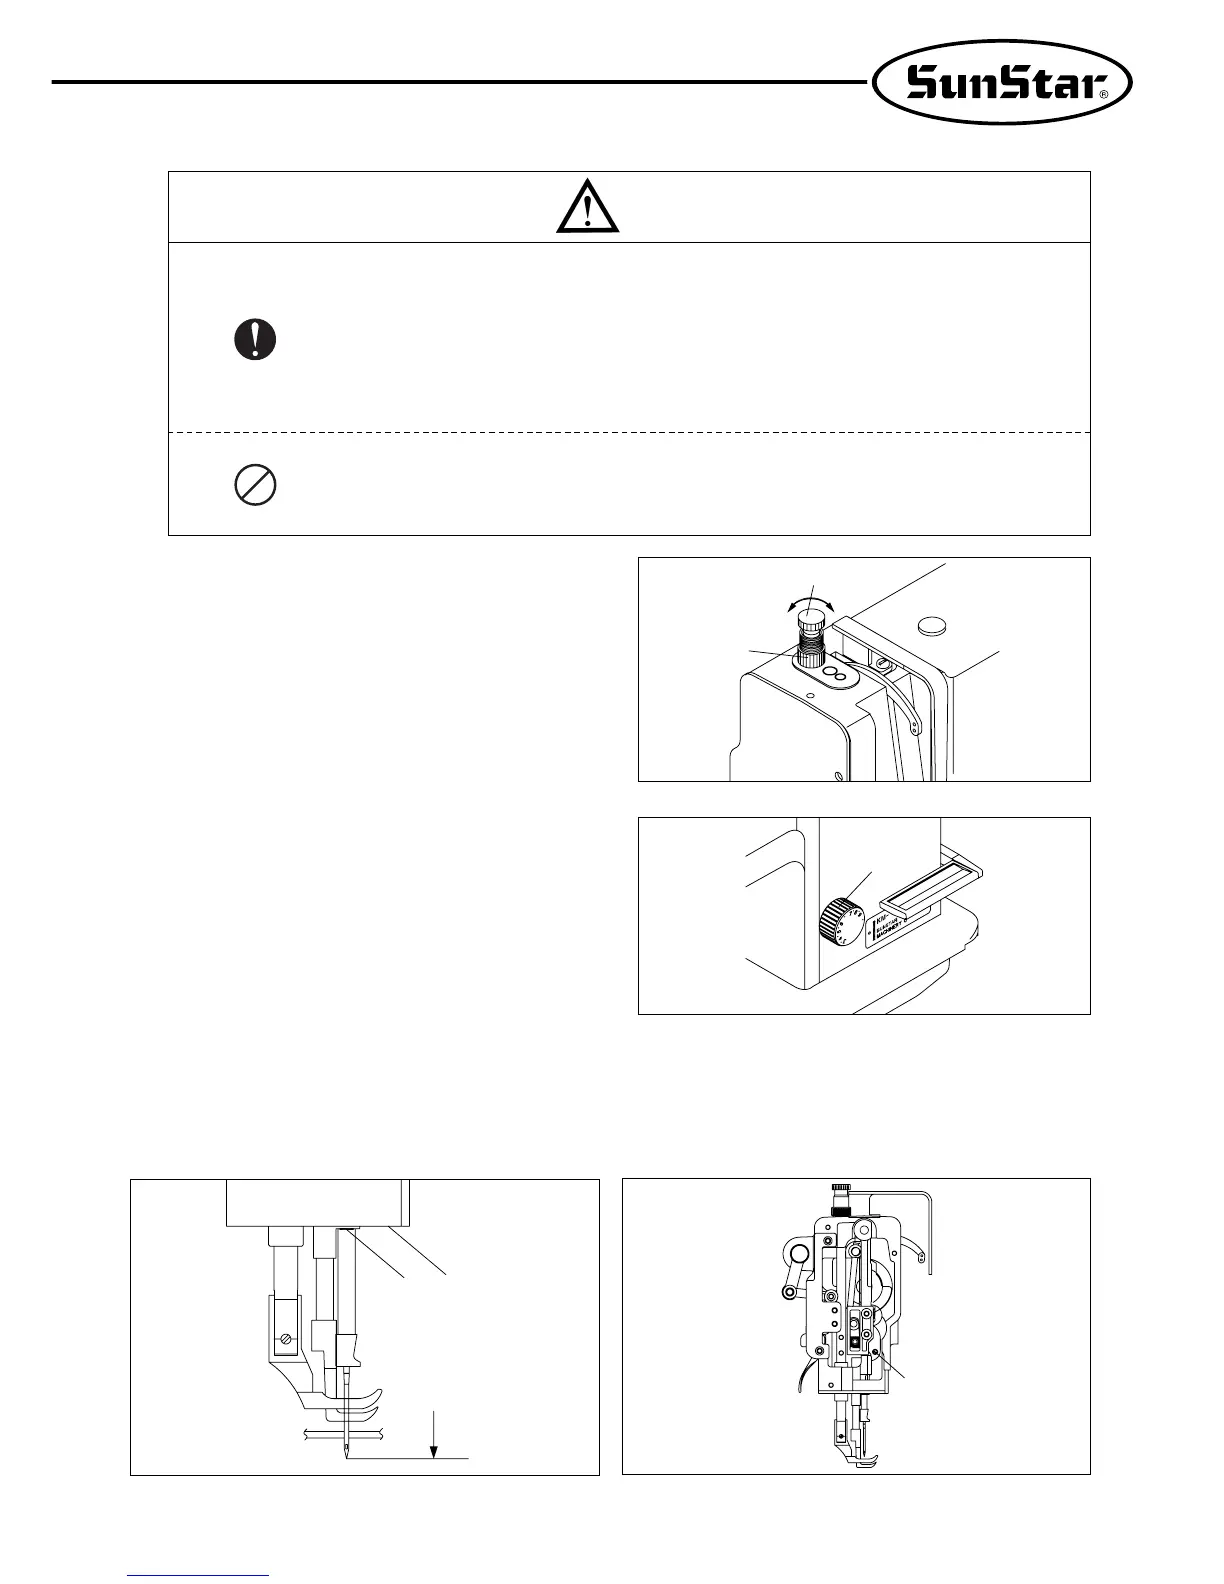
6) Adjusting the tension of the presser foot
As in Figure 20, turning the pressure adjustment screw ①
clockwise makes the presser foot tension stronger, and
turning counter clockwise makes it weaker.
After adjusting, make sure to tighten the fixing nut ②.
[Figure 20]
[Figure 21]
7) Stitch length adjustment
As shown in “Figure 21”, the numbers that are shown in the
stitch length adjusting dial① are the stitch length
represented in “mm”. Find the stitch length you want by
adjusting it from left to right.
8) Adjusting timing of needle and hook
(1) Fixing the height of the needle bar
※ Turn the pulley to make the needle bar be placed in its lowest position. Loosen the needle bar holding screw① in
Figure 23 to make sure that the needle bar carved sign ⓐ meets the end ⓑ of the frame, then tighten the screw.
[Figure 22] [Figure 23]
Caution
▶After finishing dismantling or adjusting the safety devices, be sure to install it in the original
position properly and check whether it functions as desired or not.
▶In case of bending the machine backward or returning to the original condition, be sure to use
both hands. If you use only one hand, it can cause the physical injuries by slipping.
▶In case of adjusting the machine with the switch on, be sure to see that all is right.
▶In case of troubleshooting or checking the machine, it should be performed by the trained engineer.
▶In case of repair and checking related to electricity, be sure to leave the work to an expert or an agent.
①
②
Weaker
Stronger
①
ⓑ
ⓐ
The needle bar in the
lowest position
①
 Loading...