SUNSYNK-BB-300 | User Manual9
Mounting and Interconnecting
This paragraph explains how to attach several Sunsynk Busbar's to each other and how to mount the
Sunsynk Busbar assembly into its nal location.
When mounting onto the wall, please use the drill template and screw pack that are provided. The mounting
positions in the busbar match the drill template guide.
These are the points to take into consideration when interconnecting and mounting the Sunsynk Busbar:
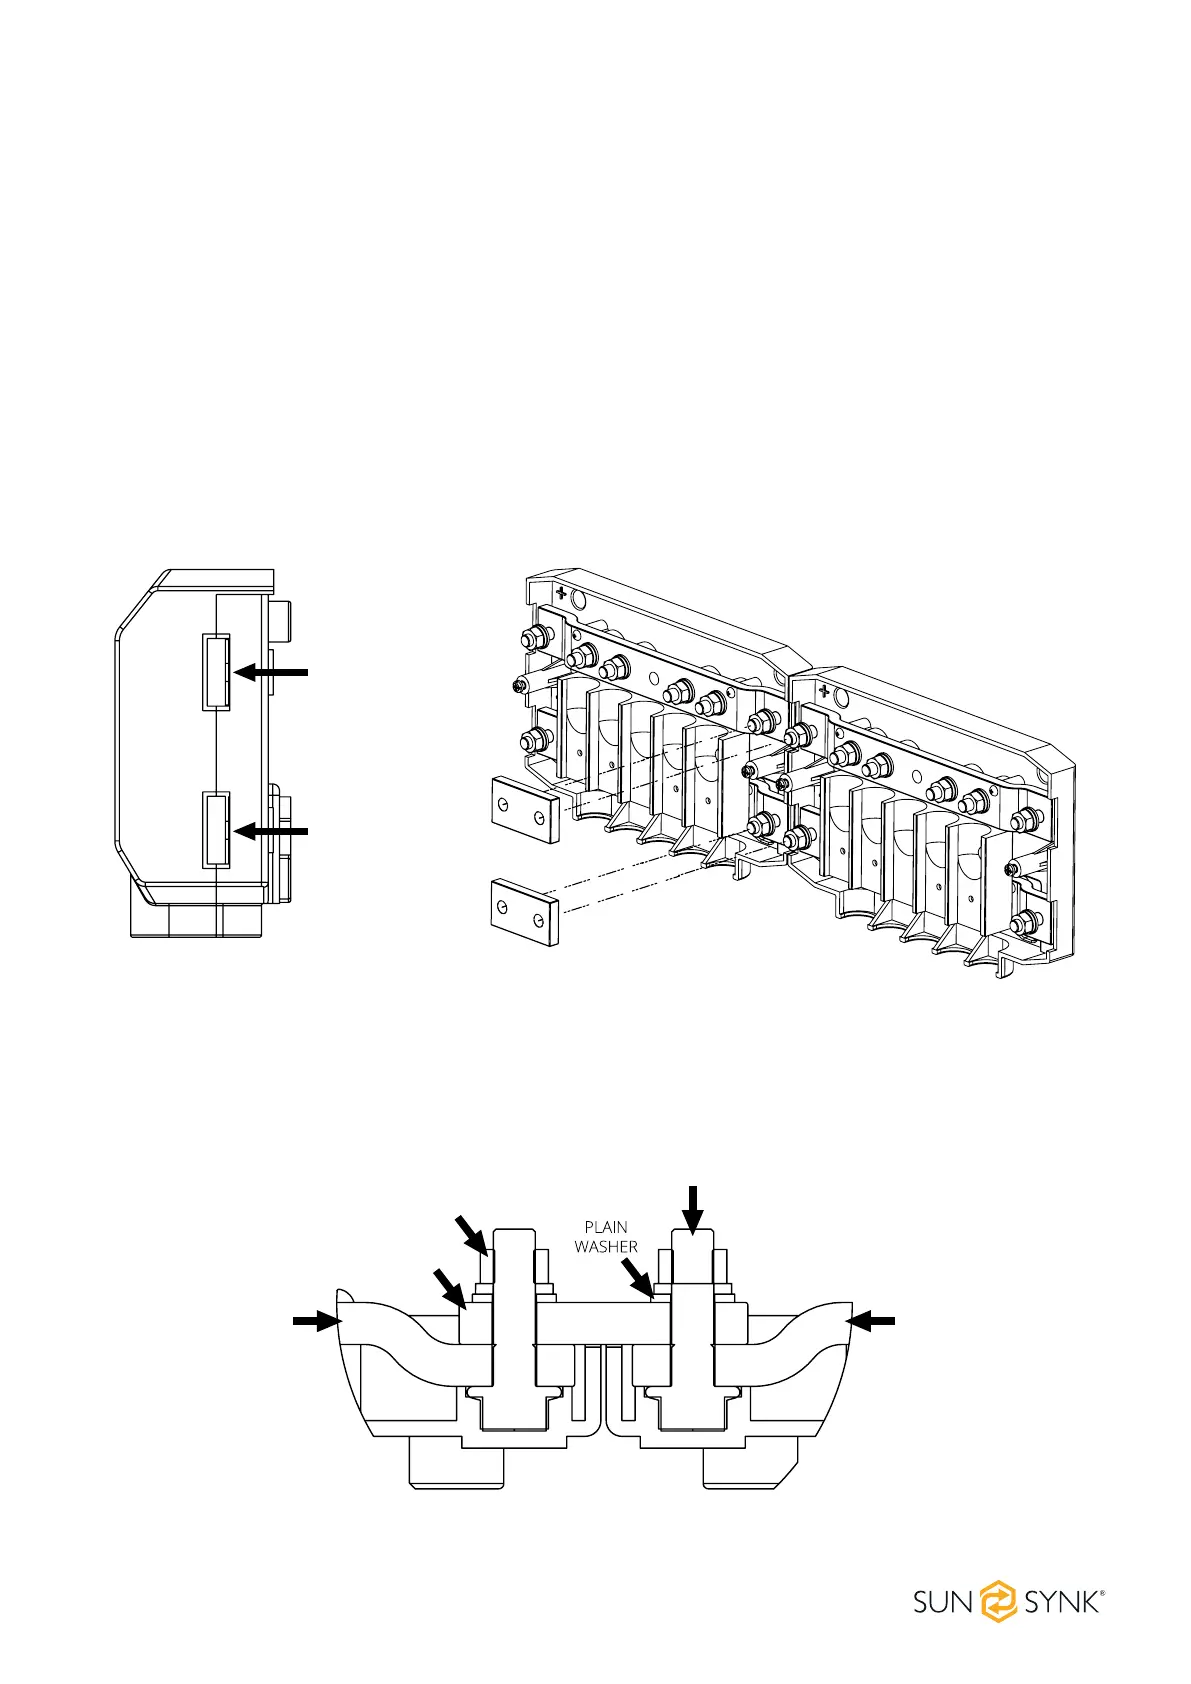
Remove the easy break access windows for linking busbar's shown in the below illustrations.
Connect all Sunsynk Busbar's to each other using the M8 holes, bolts and links provided.
Place the washer and nut on the bolts and tighten the bolts using a torque of 14Nm.
Mount the Sunsynk Busbar in its nal location using the 5mm mounting holes.
Figure 1: easy break access windows and linking position.
BUSBAR BUSBAR
LINK
M8
NUT
M8
BOLT
Figure 2: connection sequence when connecting two Sunsynk Busbar's.
Correct placement of the M8 washer and nut.
EASY BREAK
ACCESS WINDOWS
FOR BUSBAR LINK
FIXING SCREWS
WIRE GUIDES
WALL MOUNT
POSITIONS