43
Chapter 3: Maintenance and Component Installation
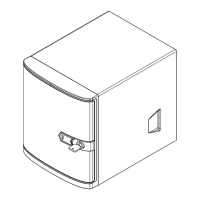
Figure 3-7. Mounting a Drive in a Carrier
Mounting a Drive in a Drive Carrier
1. To add a new drive, install it into the carrier with the printed circuit board side facing
down so that the mounting holes align with those in the carrier.
2. Secure the drive to the carrier with the screws provided, then push the carrier
completely into the drive bay. You should hear a *click* when the drive is fully inserted.
This indicates that the carrier has been fully seated and connected to the midplane,
which automatically makes the power and logic connections to the hard drive.
Removing a Drive from a Drive Carrier
1. Remove the screws that secure the hard drive to the carrier and separate the hard drive
from the carrier.
2. Replace the carrier back into the drive bay.
Locking Clasps
Post

 Loading...