2. Remove
four
nuts
and
lockwashers
secur
ing
exhaust
manifold
, gaskets and
exhaust
air
shroud
to
engine. (See Figure
3-42
.)
Discard
gaskets.
1.
M
ain
Engine
Shroud
2. Impact Driver
Fi
gure
3-41
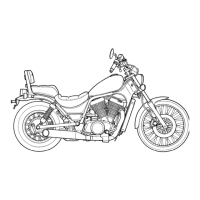
1.
Exhaust
Manifold
2. Gaskets
3. Exhaust
Air
Shroud
Figure
3-42
3. Remove
four
bolts and
flat
washers
securing
carburetor
holders, gaskets and intake air
shroud
to engine. Discard gaskets.
Inspection
1.
Thorough
ly clean air
shrouds
in
a
solvent
and
blow
dry
using compressed air.
2.
Inspect air shrouds
for
cracks, di
stortion
or
rust.
3.
Check carburetor
holders
and
exhaust
mani-
folds for cracks. Check gasket surfaces and
clean using a scraper.
Reassembly
1. Reassembly air shrouds, and
exhaust
man
ifo
ld
to
engine. Using
new
gaskets, assemble one
on
each side of
exhaust
air shroud. Secure
using
hardware
previ
ously
removed. Torque ex-
haust
manifold
mounting
nuts
8 to
10ft
Ib
(1.11
to
1
.38
kg-m).
2.
Positi
on
a
new
gasket
between
cylinder and in-
take air shroud.
Install
the
carburetor
ho
lders
on
the outside
of
the
intake shroud w ith the
silencer
spring
washers
mounted
on
the
out-
board side. Torque
the
bolts to
45
in.
Ib
(0.5
kg-m).
NOTE:
Apply Loctite
to
main
air
shroud screws.
Use an impact driver to assure
main
air shroud
screws
are tight.
Always
use
new
gaskets
during
reassembly
to
en-
sure proper
sealing
between
components.
Fan Housing
Removal
1.
Remove f
our
nu
ts and
washers
securing
fan
housing to crankcase and remove fan housing.
(See Figures
3-43
and 3-44.)
2. Using fa n
pulley
holder
tool No. 57001 -
3506
remove
nut
and
washer
securing
fan
as-
semb
ly to f
an
housing
. (See Figure
3-40
.)
3. Remove
fan
pulley
halves and spacers
from
fan
shaft.
(See Figure 3
-4
5.)
FAN
HOUSING
3 -
49
 Loading...