7
QUICKSTART
I
A
B
G
C
D
E
F
H
J
K
L
A
H
D
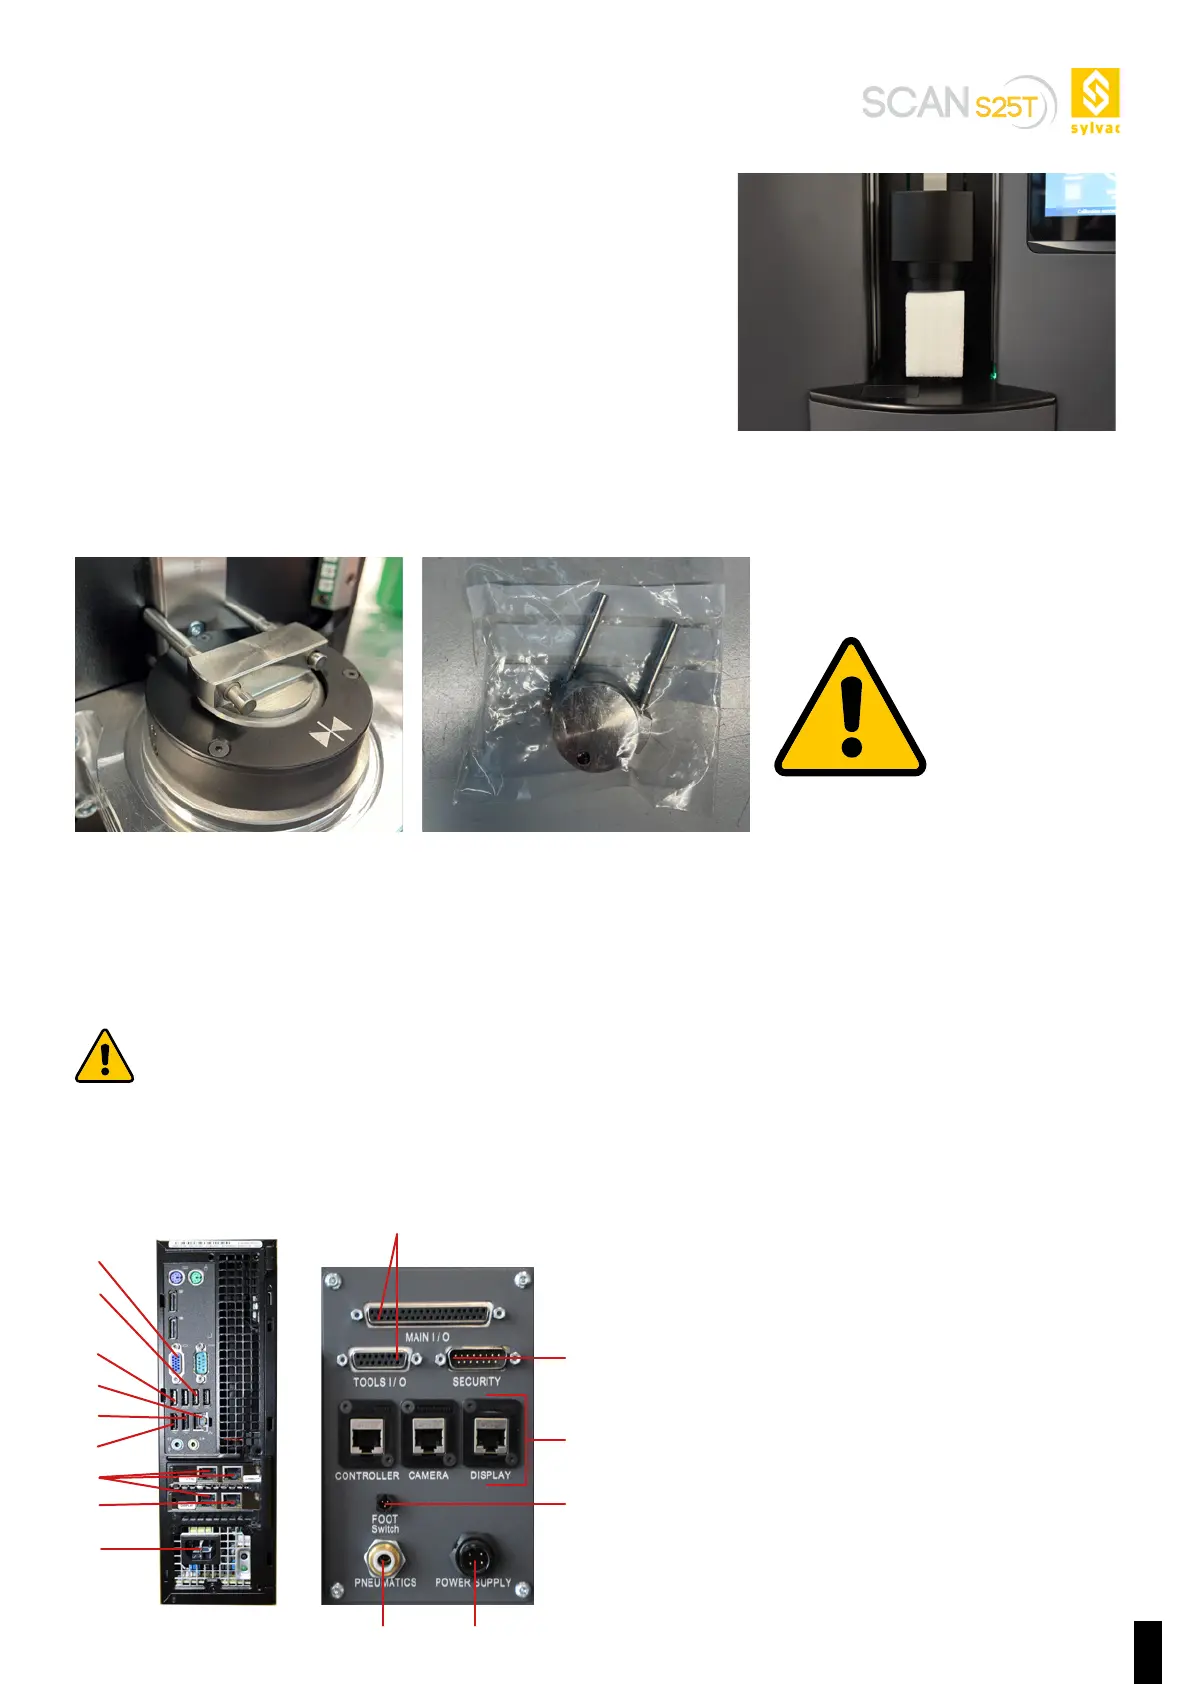
The tailstock is settled on a foam to avoid eventual shocks during
transport. As it is motorized, use the software to unlock it and move it.
1.4. Electrical connections
The machine has to be unplugged to proceed to electrical connections.
The cabling below indicates a typical environment and can vary depending on the computer used. The physical position of
every connection depends on the characteristics of the chosen computer.
Check the voltage of the computer and the monitor before plugging them into the mains!
Do not attempt to alter the mains supply voltage of the computer/controller. Contact your SYLVAC agent if the voltage
indicated does not match your mains supply.
A. Main power supply
B. Keyboard
C. Mouse
D. Automation Ethernet Plug (OPC/UA or Profinet)
E. Touch screen (if supplied)
F. Dongle
G. VGA Screen
H. CTRL, CAMERA and Display Ethernet Plug
I. I/O connector
J. Security connector
K. Pneumatic input
L. Footpedal input
‘Tilt Align’ Part : installed in the
headstock to control optical align-
ments during transport.
Image of the tilt alignment part
The tilt alignment part
should be kept with the
machine to control Tilt
misalignment during the
transport. This part is not
used once the machine
installed.