14 Multitone Paging Interface Fitting Instruction
© Tait Electronics Limited July 2008
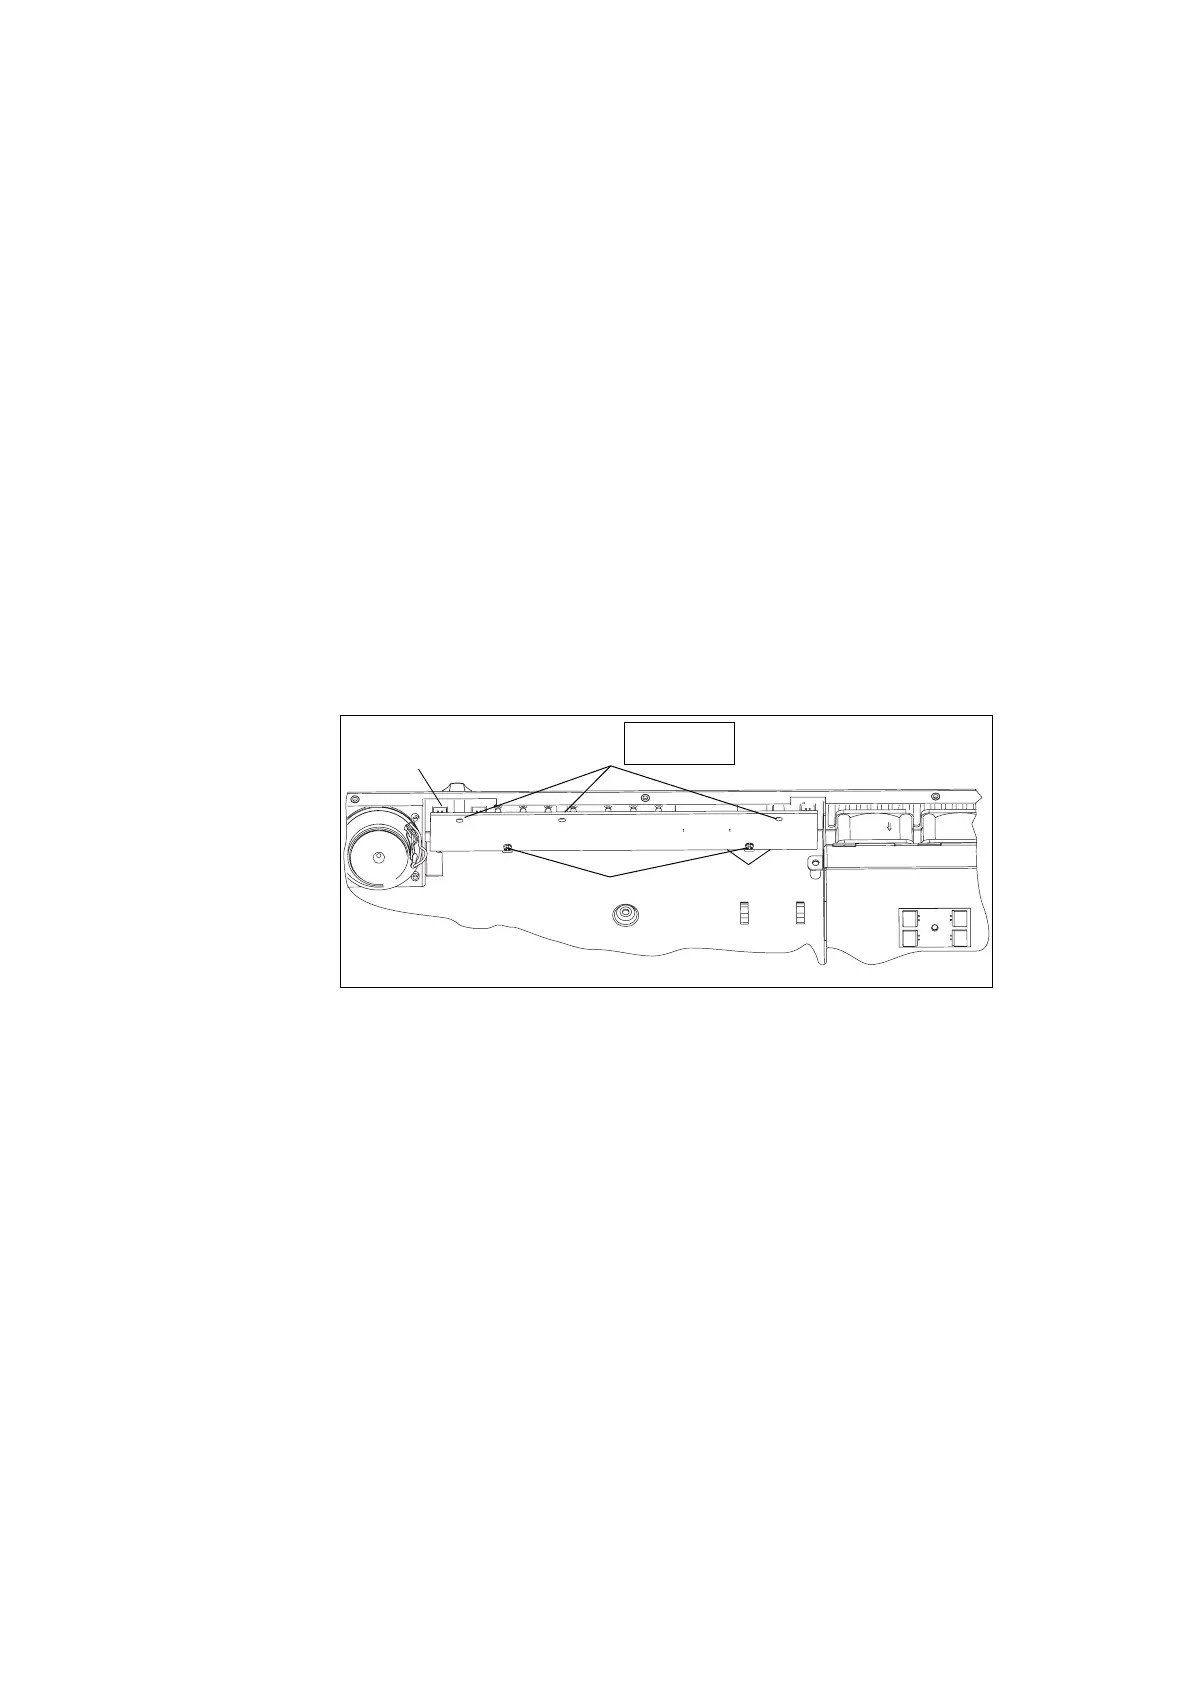
Refitting UI board
1. Plug the two Micro-MaTch connectors e into the UI board.
The Micro-MaTch connector for the transmitter is closest to the
edge of the UI board.
2. Align the volume-control shaft
with the hole in the front panel, also
align the programming/microphone connector and function buttons
as the board is slid into place.
3. Gently slide the UI board into position so that the spring clips
d are
engaged. Press firmly around the spring clips to ensure they are
engaged fully.
4. Use a Torx T10 screwdriver to fasten the three screws
c to 4.5lb·in
(0.5N·m).
5. Plug the speaker connector
b into the UI board.
6. On the front panel peel off the two decals and fit the new Multitone
label (365-01891-00).
7. Fit the volume knob onto the shaft and press firmly until fully seated.
8. Using the cable ties (369-00010-14) fix down the cables.
1.6 Programming
1. Run the TB7100 programming application (PGM) version 1.14.00
or later. Select radio model as TB7100 Tx.
Figure 1.12 Removing the UI board
e
d
c
b
Cables not shown.
Torx T10
4.5lb·in (0.5N·m)

 Loading...


