14 Adjusting the Frequency Setup © Tait Electronics Limited February 2007
Selecting the Exciter Sub-band
The lock band of K-band exciters does not normally need adjusting. Instead
you select a sub-band. These exciters have two VCOs and the one you select
determines the sub-band that is displayed on CSS monitoring screens and that
has its lock range determined in diagnostic tests. However, exciters can always
operate on frequencies in either sub-band.
Equipment ■ Murata tuning tool
■ CTU
To select the exciter sub-band
1. Ensure you are already connected to the reciter (see “Connecting to a
Reciter Outside the Subrack” on page 8).
2. Select the Frequency Setup tab, and double-click Set/Select Exciter
VCO. The Set/Select Exciter VCO Wizard appears.
3. Select the check box to skip the tuning steps and then click Next.
Alternatively, if the reciter RF board has been repaired, you need to adjust
the lock band. Select one of the two available lock bands and then click
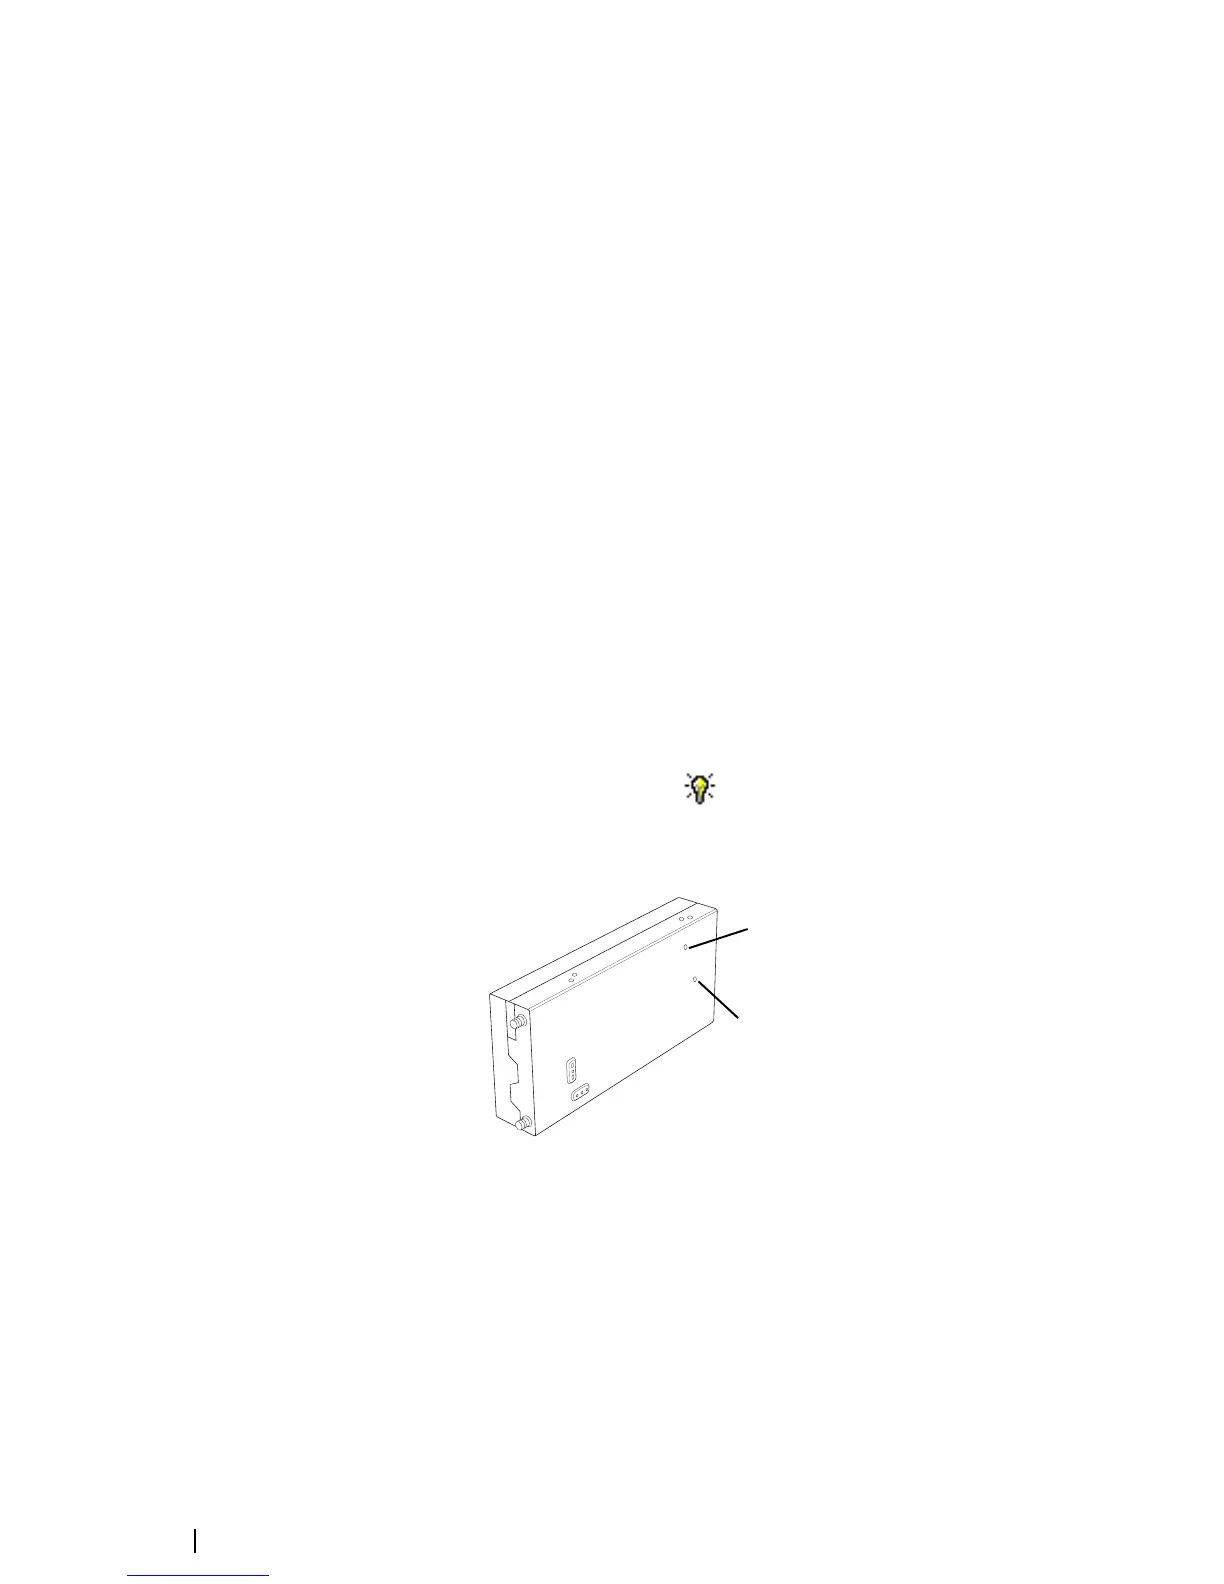
Next. Insert the Murata tuning tool into the correct exciter VCO tuning
hole (see below) and adjust the trimmer until the actual band matches the
desired band. The bands turn green. Click Next.
4. Select one of the two available lock bands. This specifies the lock band used
for display and for diagnostic tests.
5. Click Finish.
If you adjusted the lock band, the icon on the Frequency Setup tab
indicates that this task is complete. If you simply selected the sub-band, the icon
is unchanged, indicating that there was no adjustment.
Exciter VCO tuning hole for
K band (850-869 MHz)
Exciter VCO tuning hole for
K band (762-776 MHz)

 Loading...


