Rollshutter Installation Instructions, 14
©Copyright TALIUS
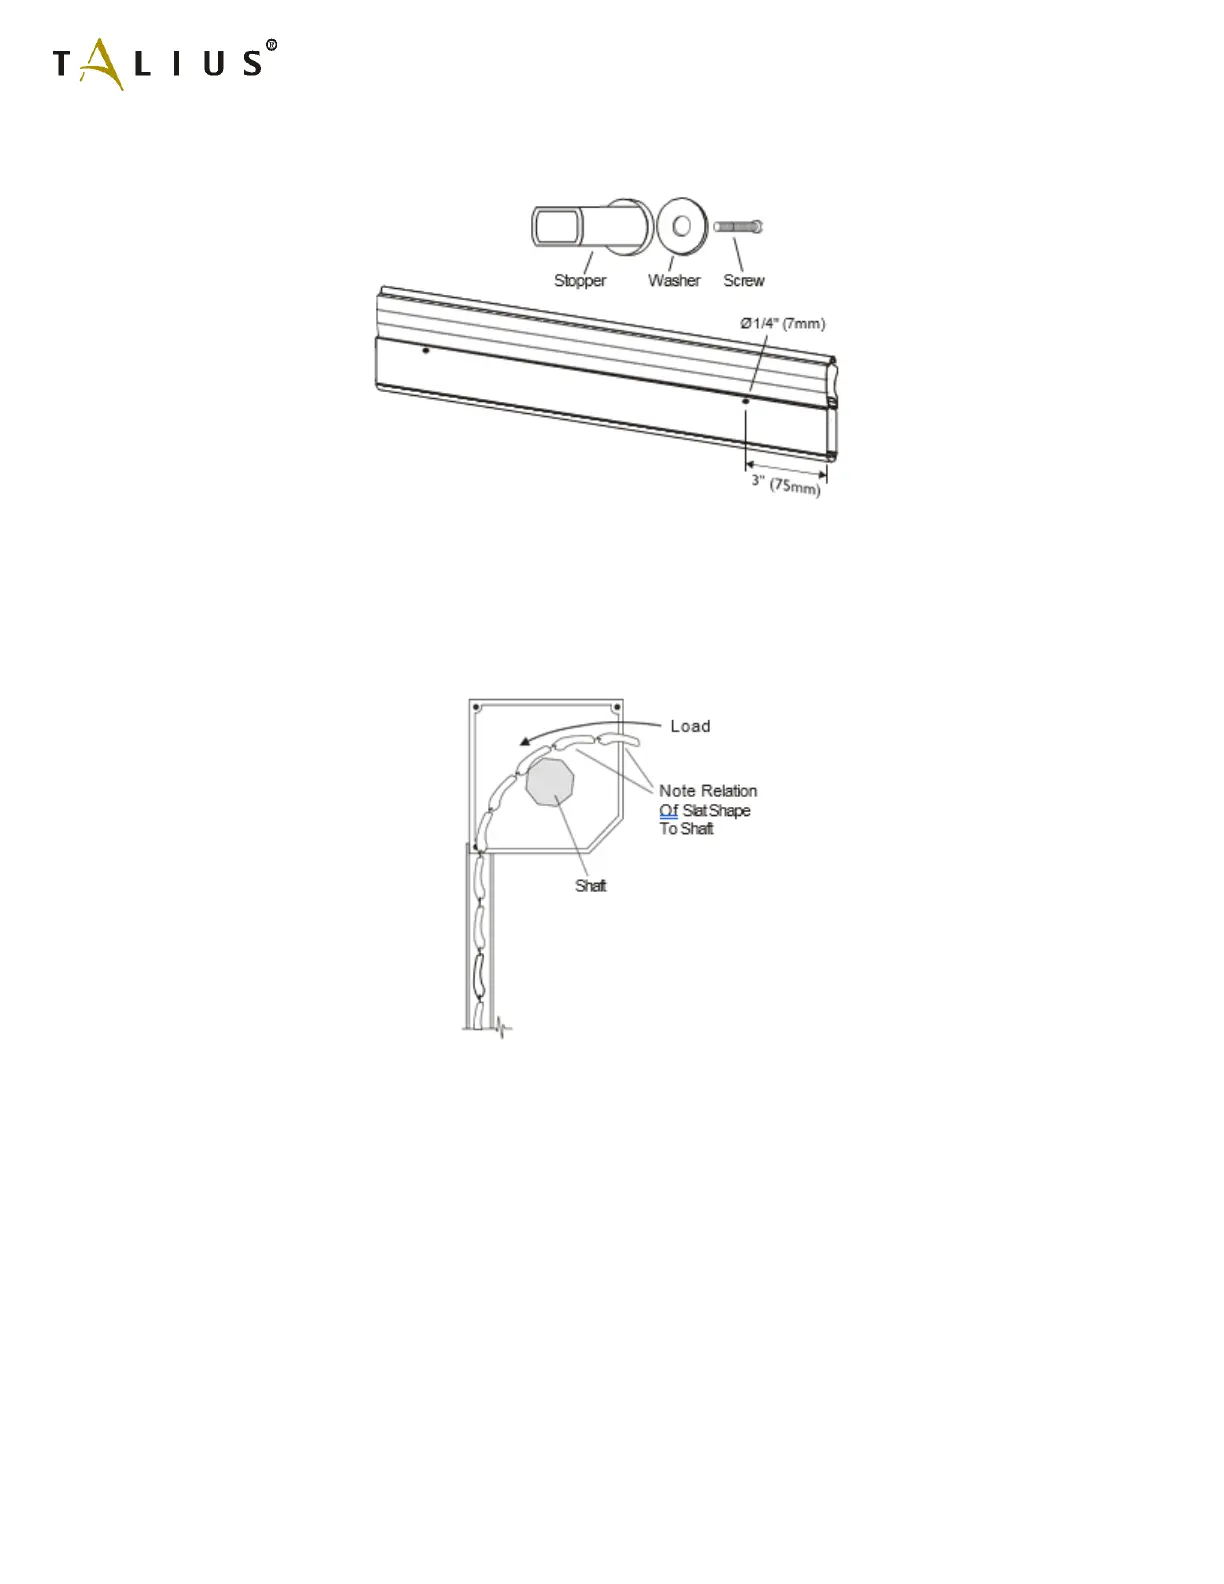
8.1c) Surface stoppers: Drill two holes approximately Ø1/4" (Ø7mm) diameter about 3" (75mm) from the ends of the
bottom profile, close to the top. Do not install until Section 11.
Section 9: Loading the Curtain into the Guide Rails
Slide the Rollshutter curtain carefully over the shaft fully into the guide rails. It is recommended to cover the shaft with
plastic or cardboard to prevent scratching of the curtain. If there is no natural sill for the curtain to rest on, proceed to
Section 12 to install the sill before feeding the curtain over the shaft. If the Rollshutter was supplied with concealed
stoppers with fixed heads (Section 8.1b), once the curtain is in the rails and the hangers have been attached to the shaft
in Section 10, the sill may need to be removed to allow for stopper installation in Section 11.
Section 10: Attaching Curtain to the Shaft
In most cases the Rollshutter will be supplied with an octagonal galvanized steel shaft.
10.1) If the Rollshutter is spring-loaded, the spring needs to be pre- loaded now. If the rollshutter is not spring
loaded (torsion spring operated) proceed to 10.2 a or b. From the relaxed state, turn the shaft (which includes
the spring) by hand in the "down" direction by the number of layers that had been previously counted in Section 8 plus
one additional turn. Carefully hold the shaft while the hangers are being attached. It is recommended to wear protective
gloves.