Rollshutter Installation Instructions, 13
©Copyright TALIUS
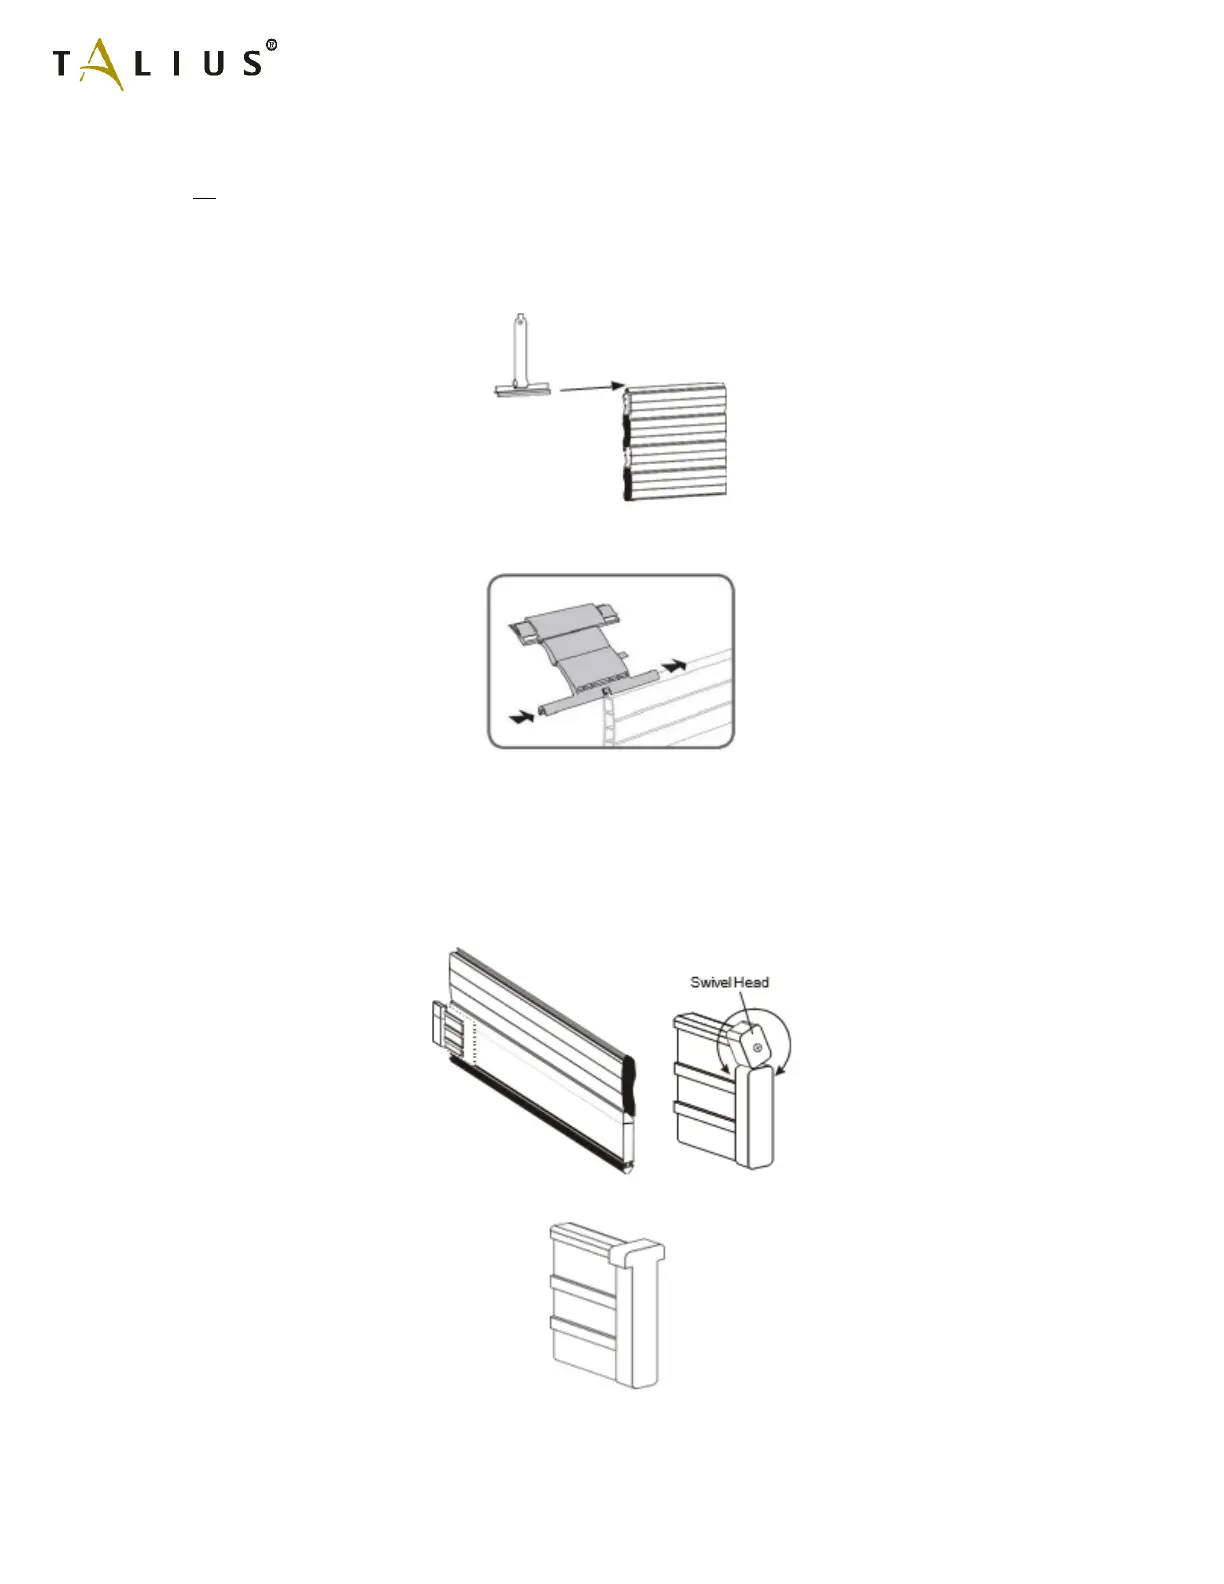
Section 7: Hanger Installation
Unpack the Rollshutter curtain. If the Rollshutter is spring-loaded, count the number of layers in the roll. Note the
number here: . This information will be used in section 10.
7.1a) Steel Hangers: Slide the T-shaped metal hangers onto the first profile at the top of the curtain. Use at least one
hanger for every 16" (40cm) of width and space them evenly. Similarly, if there are plastic spacer rings on the shaft
distribute them evenly as well. Later the hangers will be attached to the shaft between these rings.
7.1b) Hanger Locks: Slide the Talius hanger locks onto the top profile of the rollshutter curtain, spacing them evenly and
no further than 16” in from the end.
Section 8: Stopper Installation
NOTE: If the Rollshutter unit is motorized there will be no stoppers needed, proceed to next section.
Determine which type of stoppers the factory has supplied. There are three possibilities:
8.1a) Concealed stoppers with swivel head: Insert one on each side of the bottom profile with the head swiveled flush in
line with the bottom of the stopper.
8.1b) Concealed stoppers with fixed head: Do not install until Section 11.