Tally Dascom DT-210/230 User Guide V1.3
56
4 SETTING DIP SWITCHES
On this printer, you can make various settings such as printer density, baud rate, and auto-cutter
enable/disable etc. with switches. For DT-210/230, there are two kinds of switched: DIP switch and
memory switch.
4.1 DIP Switch Setting
The DIP switches are already set for the current interfaces. Change the setting if necessary.
Functions of the DIP switches differ depending on the interface.
Follow the steps below to change the DIP switch settings.
Before you remove the DIP switch cover, turn the printer off. Otherwise, short-
circuit may cause the printer to malfunction.
DIP switch settings are enabled only when the power is turned on or the printer
is reset via the interface. If the settings are changed after that, the functions will
not change.
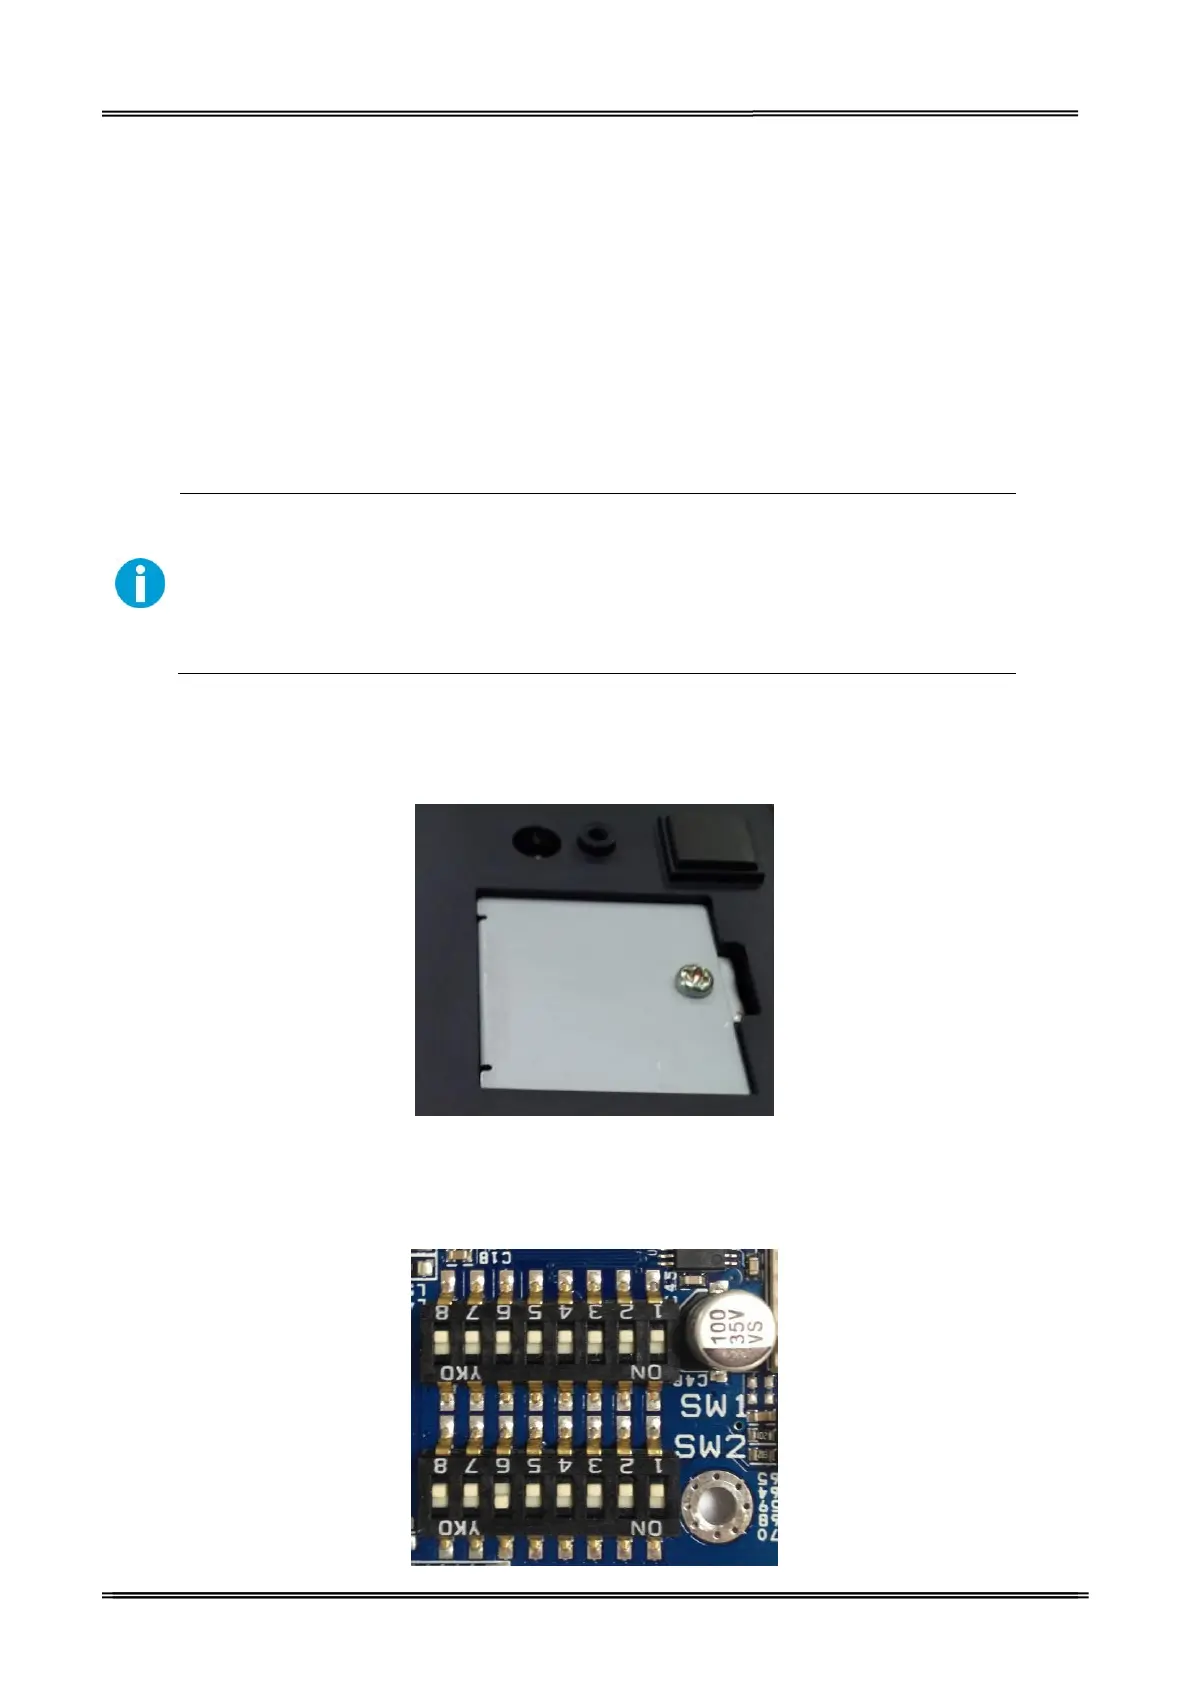
1. Make sure the power supply for the printer is turned off.
2. Unscrew the screw to remove the DIP switch cover from the base of the printer.
Metal Plate
3. Set the DIP switches, using the tip of a tool, such as a small screwdriver. There are
two DIP switch banks on the main controller board (SW1 and SW2), eight DIP
switches for each bank.
DIP Switch 1 & Switch 2
 Loading...