17
Step 2: Assembly of the upright
side frame
Guide the control cable that comes
out of the base frame through
the left side frame (C) from the
bottom to the top. In order to
make this step easier for you, a
wire was already led through the
side frame (C), which is mounted
on the upper and lower end of the
side frame. Loosen the wire on the
lower end and attach the control
cable to it. Now pull it upwards with the help of the wire. In order to prevent the
control cable from sliding down, mount it in the upper area of the side frame (C) with
the wire. Now plug the left side frame (C) into the left adapter of the base frame (B)
and mount this then with the screws (c). Then proceed exactly the same for the right
upright side frame (D). Once you have tightened all screws (a), press the cover caps (f)
onto the heads of the screws.
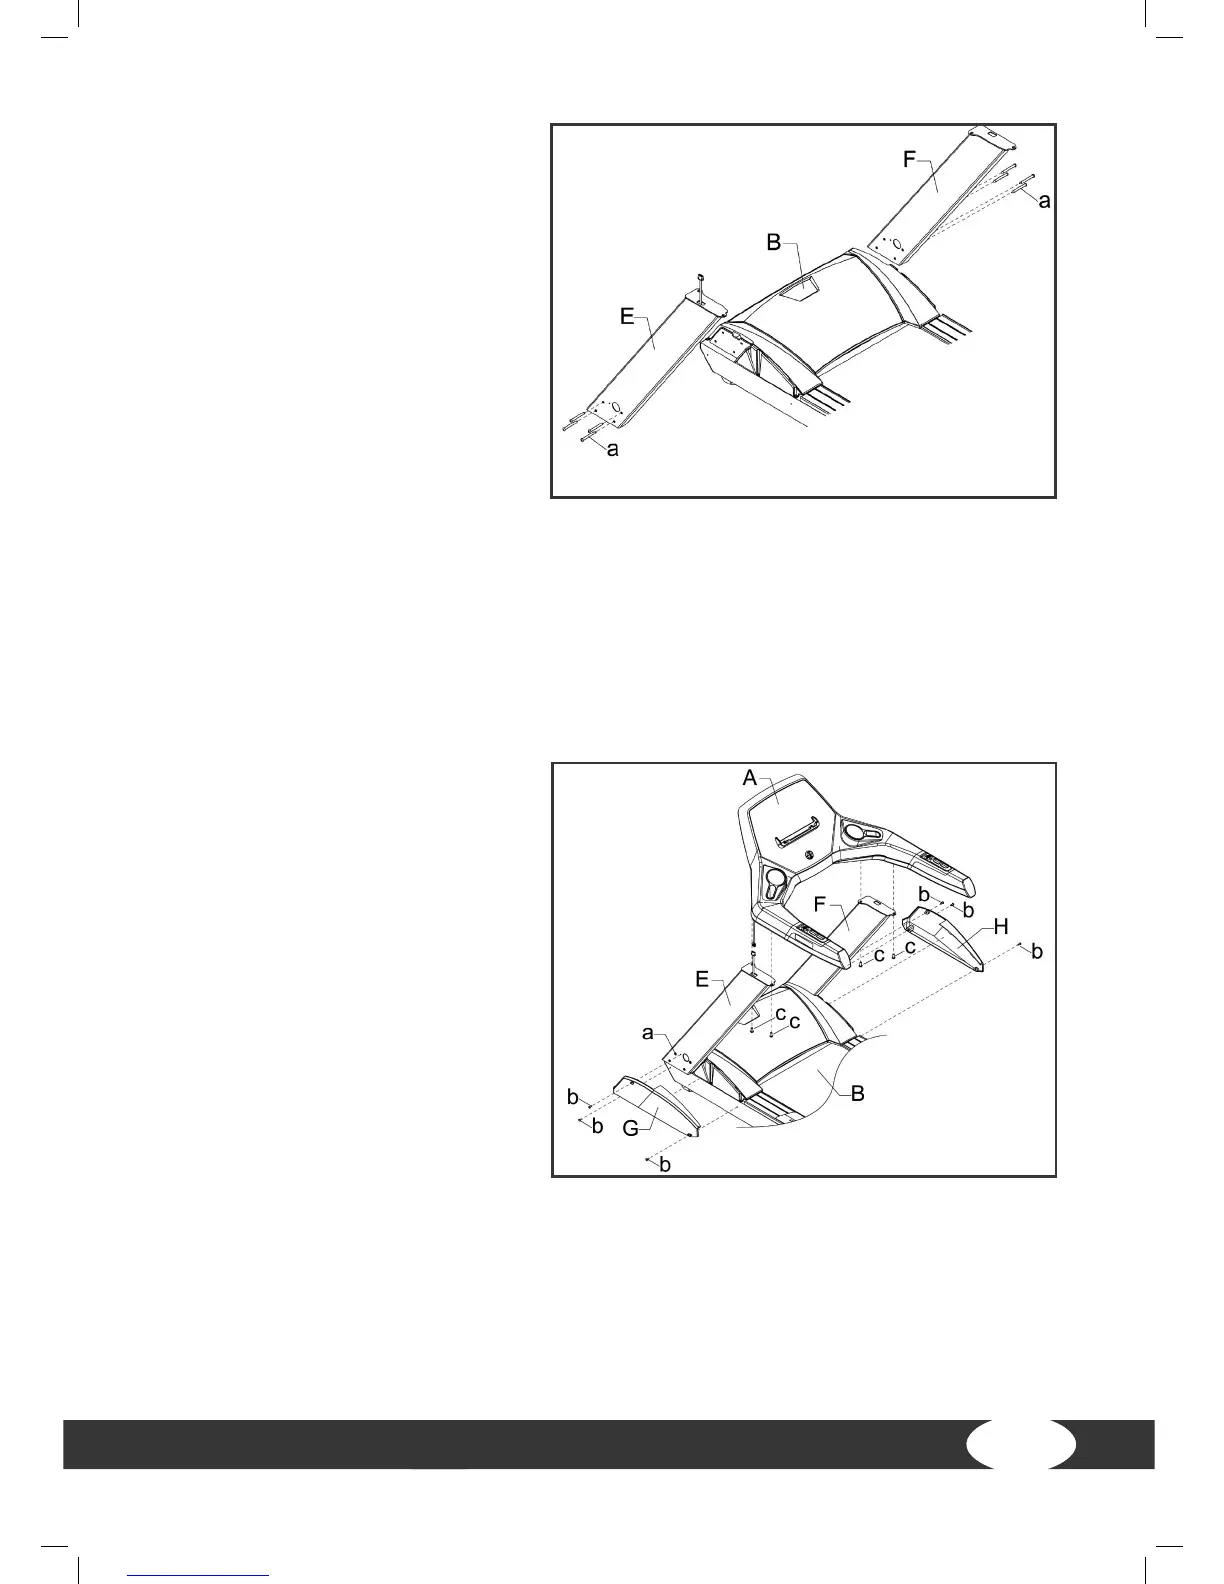
Step 3: Assembly of the cockpit
Connect the console cable (A) rst
with the cable from the left console
mast (E) and mount the console on
the left and right console mast (E
and F) with four screws (c). Then
tighten the screws (a) in order to
mount the console masts on the
frame. Finally, mount the left and
right cover (G and H) on the frame
(B) with six screws (b).