10
5. Software Functions
Following operations can be seen by clicking the right button of the mouse on the display
monitor.
5.1 Split screen
To change the number of views on the monitor right clicks on the monitor with the mouse.
Select: x1 = 1 channel view, x4 = 4 channel view, x6 = 6 channel view, etc.
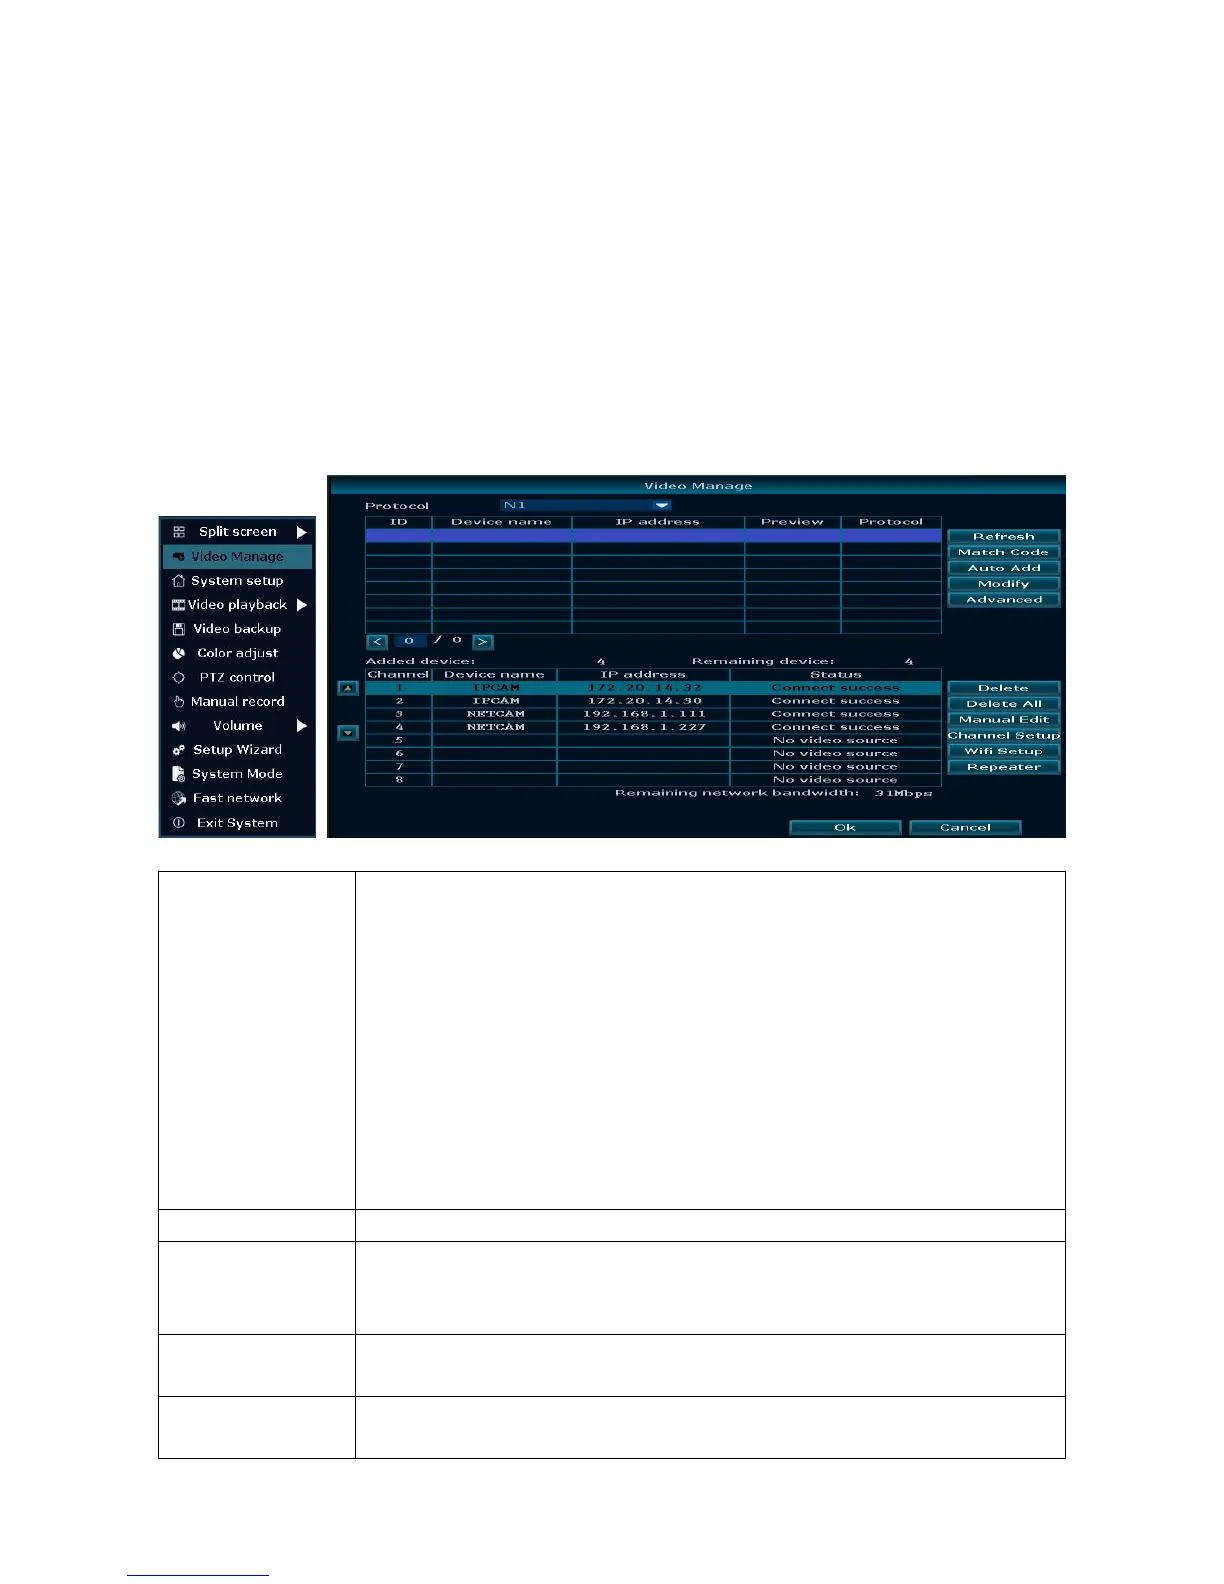
5.2 Video manage
Select the camera from the upper list you want to add. See chapter 4.4.
There are three different protocols to select Standard, N1 and ONVIF.
Standard: Shows mostly all IP cameras that are connected to the
network after pressing refresh.
N1: Shows the IP cameras of the TX-29 & TX-30 system that are not
connected to NVR (WiFi: But have already matched to NVR) after
pressing refresh. IP cameras that have matched via WiFi with NVR
can only connect to one NVR (TX-29 or TX-30). IP cameras that are
connected over the Ethernet cable to the network can be connected
to more than one NVR.
ONVIF: Shows all the IP cameras with activated ONVIF protocol after
pressing refresh
Search IP CAM information. The list will be updated.
Is for adding new IP cameras to the NVR, the NVR and the IP camera
need to match together via the password key process. After that we
can connect the wireless NVR device.
All cameras you see in the list will be added automatically, when the
network connection of the cameras are under good condition.
Select a camera from the search list. You can edit the IP Address of
the selected camera, Username & Password.