The PL-380 is a versatile DSP receiver designed for FM stereo, SW, MW, and LW bands, utilizing Silicon Labs' si4734 microchips to digitize analog AM/FM broadcasting signals. This advanced technology significantly enhances the radio's sensitivity, selectivity, signal-to-noise ratio (S/N), and anti-interference capabilities.
Function Description:
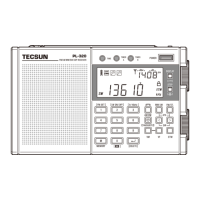
The PL-380 features a comprehensive set of controls and indicators. On the front panel, you'll find the power button, display button, FM ST. button, and dedicated buttons for FM, MW/LW, and SW bands, which also serve as ATS (Auto Tuning Storage) activators. Numeric keys (0-9) allow for direct frequency input. Other front panel controls include the ENTER/DELETE button, Memory button (for storing stations and selecting battery type), AM/BW button (for AM IF bandwidth selection), VM (View Memory) & Scan button, VF (View Frequency) & SCAN button, and the ETM (Easy Tuning Mode) button. The top of the radio houses the LIGHT/SNOOZE, LOCK, TIME Setting, and ALARM On/Off & Setting buttons. On the side, there's an earphone jack, USB 5V DC-IN jack, FM & SW telescopic antenna, a multifunctional tuning knob, and the volume knob. The back of the device features a back stand and a battery compartment.
The LCD display provides a wealth of information. When the radio is off, it shows world time, alarm time, and temperature. When on, it displays frequency, band, signal strength (dBu), signal-to-noise ratio (dB), alarm time, temperature, local time, memory address, and meter band. Key indicators include battery consumption/charging, sleep timer, alarm on/off (radio or buzzer), temperature, AM/PM for 12-hour clock, signal indicators, alarm time, SW meter band, ETM indicator, tuning speed (slow or fast), frequency units (kHz for MW/LW/SW, MHz for FM), digital number display (4 digits), preset memory address, key-lock indicator, FM stereo status, band indicator, and rechargeable battery indicator.
Usage Features:
Time and Alarm Setting:
To set the time, long-press the [TIME] button until the hour flashes, then rotate the [TUNING] knob to adjust. Short-press [TIME] again for minutes, adjust with [TUNING], and press [TIME] to confirm. You can also use numeric keys for direct input.
For the alarm, long-press the [ALARM] button until hour and "AL" flash, adjust with [TUNING]. Short-press [ALARM] for minutes, adjust with [TUNING], and short-press [ALARM] again. Rotate [TUNING] to set the alarm duration (1-90 minutes), then short-press [ALARM] to confirm. An alarm set to radio-on is indicated by "()" and to buzzer by "()". No symbol means the alarm is off. To turn off an active alarm, press [POWER] twice for radio alarm or once for buzzer alarm.
Listening to the Radio:
Turn on the radio with a short press of the [POWER] button. Select your desired band (FM, MW/LW, SW) by pressing the corresponding button. Extend the telescopic antenna for better FM/SW reception. Tune to stations using the [TUNING] knob or direct frequency input with numeric keys. Adjust volume with the [VOLUME] knob.
Tuning Methods:
- ETM (Easy Tuning Mode): Short-press [ETM] to enter ETM mode (indicated by "ETM" on display). Long-press [ETM] to auto-scan and temporarily store stations within the current band (100 for FM/MW/LW, 250 for SW). Rotate [TUNING] to browse scanned stations. Exit ETM by short-pressing [VF] or [VM]. ETM stations are temporary and do not replace regular memories.
- Manual Tuning: Short-press [VF] to enter frequency mode, then rotate [TUNING] to select your station. Tuning speed varies by band (e.g., 0.01 MHz slow, 0.1 MHz fast for FM).
- Auto Browse Station: Short-press [VF] until frequency flashes. Long-press [VF] to scan stations, pausing for 5 seconds on each. Press [VF] again to stop.
- Auto Browse Memory: Short-press [VM] until memory page appears (and disappears after 5 seconds). Long-press [VM] to scan stored stations, pausing for 5 seconds on each. Press [VM] again to stop.
- Direct Key-in Frequency: Short-press [VF] to enter frequency mode, then use numeric keys to input the frequency directly. Ignore decimal points for FM (e.g., 89.0 MHz is 890). An "Err" symbol indicates an out-of-range frequency.
Working with Memories:
The PL-380 has 550 preset memories (100 for FM, MW, LW each; 250 for SW).
- ATS (Auto Tuning Storage): Long-press the [FM] or [MW/LW] button to auto-scan and store stations. "PRESET" and the memory number (P001) will appear. For SW, Mode A (long-press [A/]) scans all meter bands, replacing existing memories. Mode B (long-press [B/^]) scans only the present meter band, storing new stations in blank memories without overwriting.
- Manually Storing Station: Tune to a station, short-press [M] (memory address flashes), then press [M] again to confirm. To store in a different memory, rotate [TUNING] before the second [M] press.
- Semi-Auto Storing Station: Short-press [VF] to enter frequency mode. Long-press [VF] to activate Auto-browse. When on a desired station, press [M] (with "PRESET" flashing) to store it in the next available memory. Auto-browsing continues until [VF] is pressed again.
Delete Memory:
- Manual Delete: Press [VM] ("PRESET" appears). Rotate [TUNING] to select the memory to delete. Long-press [DELETE] ("DEL" flashes), then press [DELETE] again to confirm.
- Semi Auto-Delete: In VM mode, long-press [VM] to activate Auto-Browse. When previewing an unwanted station, press [DELETE] ("DEL" shows for 2 seconds) to delete it while browsing continues. Press [VM] to stop browsing.
- Delete All Memory: Short-press [VM]. Long-press [DELETE] for 3 seconds ("DEL" appears). Press [DELETE] again to remove all memories. If "DEL" flashes for more than 3 seconds without confirmation, the delete function exits automatically.
Sleep Function:
The radio can be set to turn off automatically. Default sleep timer is 30 minutes when turned on by short-pressing [POWER]. To change, long-press [POWER] ("ON / 01~120" and "SLEEP" appear). Rotate [TUNING] to select 1-120 minutes or "07" for permanent on. Wait 3 seconds for "SLEEP" symbol to stop flashing to confirm. Short-press [POWER] turns on the radio with the previous sleep timer; long-press changes it.
Snooze / Light Function:
If the alarm activates (buzzer or radio), press [LIGHT/SNOOZE] for a 5-minute snooze.
For LCD backlight, short-press [LIGHT] for 3 seconds of illumination. Long-press for permanent illumination. Press again to turn off.
Key Lock Function:
Long-press the [LOCK] button ("()" appears) to lock all keys/buttons. Long-press again to unlock ("()" disappears).
FM Stereo / AM Bandwidth:
- FM ST.: While listening to FM with stereo earphones, short-press [FM ST.] ("()" appears) to activate stereo mode when a stereo signal is received.
- AM BW: Short-press [AM BW] to select AM IF bandwidth (6, 4, 3, 2, 1 kHz). Wider bandwidth (WIDE) offers better audio fidelity but may increase interference; narrower bandwidth limits fidelity but can reduce interference. Applicable to MW, LW, and SW.
System Setting:
- FM Frequency Range: With radio off, long-press [FM SET] to cycle through 87.5-108MHz, 64-108MHz, 76-108MHz, or 87-108MHz.
- Clock Format: With radio off, long-press [12/24] to switch between "12H" and "24H" formats.
- MW(AM) Step Setting: With radio off, long-press [9/10kHz] to switch between "9kHz" and "10kHz" steps. The temperature display also changes (Celsius for 9kHz, Fahrenheit for 10kHz). 10kHz with Fahrenheit is default for North America.
- LW On/Off Setting: With radio off, press and hold [MW/LW] until "LW ON" or "LW OFF" appears to enable or disable LW.
"Bi" Sound Functions:
With radio off, press and hold the [0] button until "OFF" or "On" appears. "OFF" turns off the "Bi" sound.
Intelligent Lighting Function:
The backlight turns on for 3 seconds when tuning or pressing any key. With radio off, press & hold the [] key ("OFF" appears) to deactivate; long-press again ("On" appears) to activate. The [LIGHT/SNOOZE] button still controls the backlight manually.
Maintenance Features:
Installing Batteries:
The battery compartment is on the back. Slide the cover off. Install 3 AA alkaline batteries, observing polarity. The display will show battery capacity and time. If the radio doesn't turn on, check battery installation, capacity, or if the lock function is active.
Using the External Antenna:
An external FM/SW antenna is included to improve reception. Clip one end to the telescopic antenna and the other to a window. Do not install in areas prone to thunder and lightning.
Intelligent Charging Function:
With the radio off, install 3 UM3 (AA) rechargeable batteries. Press and hold the [] key ("CHA On" and "Ni-MH Battery" appear) to activate the charging function.
- Connect a 5V external adaptor with a USB plug. The "Ni-MH Battery" symbol will animate during charging and stop when fully charged.
- You can also charge via a USB cable connected to a PC.
For optimal battery life, fully discharge rechargeable batteries before recharging. Use 3 batteries as a set and do not mix with other batteries or capacities. Do not charge non-rechargeable batteries, as this can be hazardous.
Battery Consumption Display:
The radio defaults to alkaline battery mode. If using rechargeable batteries, press and hold the [] key ("CHA On" and "Ni-MH Battery" appear) to switch to rechargeable battery mode for accurate power capacity display. Press and hold again ("CHA OFF" and "Ni-MH Battery" disappear) to revert to alkaline battery mode and turn off the charging function.
Important Battery Matters:
- If no battery is installed for a long time, the clock will stop, but stored frequencies remain.
- A flashing "()" symbol indicates low battery. The radio will turn off automatically when power is depleted.
- Mixing old and new batteries can damage the radio and lead to incorrect capacity readings.
- Remove batteries if the radio will not be used for an extended period to prevent leakage and damage.
Troubleshooting:
- Radio not turning on: Check battery power, installation, or if the power button is locked.
- Radio turns off while listening: Check battery power or if the sleep timer is activated.
- Cannot store stations with ATS or noisy stations: Stations may be too weak, or there might be local interference. Try manual search, lowering the antenna, or moving to a different location.
- Limited FM stations in Japan: Adjust FM frequency range to 76-108MHz in system settings.
- Poor AM reception in USA: Change MW(AM) step setting to 10kHz.
- Alarm activated with only noise: Ensure a proper alarm radio station is set and broadcasting in your location, or set the alarm to buzzer.
- Radio malfunction: Remove and reload batteries. If issues persist, contact your dealer.