EasyManua.ls Logo

Tecsun PL-505 - User Manual

Tecsun PL-505
26 pages
Print Icon
To Next Page IconTo Next Page
Loading...
TECSUN TECSUN
TECSUN ELECTRONIC IND. LTD.
OPERATION MANUAL
PL-505
FM stereo / SW / MW / LW DSP RECEIVER
TECSUN ELECTRONIC IND. LTD.
.,
PL-505
FM STEREO / SW / MW / LW DSP RECEIVER
2011.9 VER.1
www.tecsunradio.com
hch@tecsunradio.com
Question and Answer IconNeed help?

Do you have a question about the Tecsun PL-505 and is the answer not in the manual?

Overview

The Tecsun PL-505 is a portable DSP (Digital Signal Processing) receiver designed for receiving FM stereo, Shortwave (SW), Mediumwave (MW), and Longwave (LW) broadcasts. It utilizes the Silicon Labs si4734 Microchip to digitize analog AM/FM signals, enhancing sensitivity, selectivity, signal-to-noise ratio, and anti-interference capabilities.

Function Description

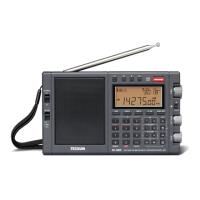
The PL-505 offers a comprehensive range of functions for radio enthusiasts. It features a digital display that shows various information depending on whether the radio is on or off. When off, it displays world time, alarm time, and temperature. When on, it shows world time, signal strength (dBu) / Signal-to-Noise Ratio (SNR) (dB), alarm time, temperature, local time, memory address, and meter band. The display also includes indicators for battery consumption, charging status, sleep timer, alarm on/off, key-lock, temperature, signal strength, SW meter band, ETM (Easy Tuning Mode), tuning speed (slow/fast), and frequency units (kHz for MW/LW/SW, MHz for FM). A dedicated indicator for FM stereo status and rechargeable batteries is also present.

The radio is equipped with a multifunctional tuning knob for frequency and memory selection, a volume knob, and various control buttons for power, display/lock, band selection (FM, MW/LW, SW), ETM, VF (Frequency scan) / Backlight set, VM (Memory scan), Time, Memory, Delete, FM ST (FM Stereo) / AM BW (AM bandwidth), and Alarm. For reception, it has a telescopic antenna for FM and SW, and an external FM & SW antenna jack. It also includes an earphone jack, a USB 5V DC jack for power, and a battery compartment for two UM3 or AA batteries.

Usage Features

Power and Volume Control: To turn the radio on/off, press the [POWER] button. The device features an intelligent volume control system. Speaker volume ranges from 0 to 30, while earphone volume ranges from 0 to 15. If the volume is below level 8, it maintains the current volume when earphones are plugged in. If above level 8, it automatically drops to level 8. When earphones are unplugged, the volume automatically sets to level 15. It is recommended to plug in earphones first before wearing them.

Tuning into Stations: After turning on the radio, select the desired band (FM, MW, SW, LW). For FM/SW, extend the telescopic antenna for better reception. For MW/LW, rotate the radio or change its location. The PL-505 offers several tuning methods:

  • ETM (Easy Tuning Mode): This unique Tecsun feature pre-selects suspected radio stations and temporarily stores them in a dedicated ETM memory. To use, press the [ETM] button (ETM will appear on display). Press and hold [ETM] to auto-scan and store stations within the current band. Once scanning stops, rotate the [TUNING] knob to select stored stations. If interference causes missed stations, manually key in the frequency and press [ETM] to store it.

    • Tips for ETM: For FM, perform ETM again when in a different city/country instead of ATS, as ETM doesn't delete existing memories. For MW, ETM is best at night due to increased broadcasting. For SW, ETM is recommended morning, afternoon, and night due to unstable signals and varying broadcast times.
  • Manual Tuning: Press [VF] to enter frequency mode, then rotate the [TUNING] knob to select a station. Tuning speed (fast/slow) varies by band.

  • Auto Browse Stations: In frequency mode (press [VF]), press and hold [VF] to scan through stations, staying on each for about 5 seconds. Press [VF] again to stop. During auto-browsing, you can press [MEMORY] to store a station while the radio continues browsing.

  • Memory Searching: Press [VM] to enter memory mode, then rotate the [TUNING] knob to select stored stations.

Working with Station Memories: The PL-505 has 550 preset memories (100 each for FM, MW, LW, and 250 for SW).

  • ATS (Auto Tuning Storage):

    • FM ATS: Extend the antenna, press [FM]. Press and hold [FM] until "PRESET" flashes and frequency advances. The unit scans and stores available stations. Rotate [TUNING] to browse.
    • MW/LW ATS: Press [MW] to select the band, then follow FM ATS steps.
    • SW ATS: Extend the antenna, press SW[^] or SW[✓].
      • Mode A: Press and hold SW[^] to ATS stations within the current meter band. Existing memories are not replaced.
      • Mode B: Press and hold SW[✓] to ATS stations within all meter bands. Existing memories are replaced.
    • ATS Notes: During ATS (FM, MW/LW, SW Mode B), pre-stored stations are replaced. For SW Mode A, existing memories are not replaced; new stations are stored in blank addresses. If interference or mirror/blank stations are stored, contract the antenna (FM & SW) or rotate the radio (MW & LW).
  • Storing Stations Manually: Select a band and tune to a station. Press [MEMORY] (PRESET flashes). Press [MEMORY] again or wait 3 seconds to store.

  • Semi-Auto Storing Station: While auto-browsing, press [MEMORY] (PRESET flashes) to store the current station. The radio continues browsing until [VF] is pressed again.

Listening to Stored Stations:

  • Manual Memory Tuning: Press [VM] to enter memory mode, then rotate [TUNING] to browse stored stations one by one.
  • Auto Browse Memory: Press [VM] (Memory Page shows). Press and hold [VM] (PRESET flashes) to auto-scan through memories, staying on each for 5 seconds. Press [VM] to stop.

Delete Memory:

  • Delete a Single Memory Manually: In memory mode (press [VM]), rotate [TUNING] to select the memory. Press and hold [DELETE] (DEL flashes), then immediately press [DELETE] again.
  • Semi-Auto Delete Memory: Press and hold [VM] (PRESET flashes) to auto-browse. Press [DELETE] to delete the current station. The radio continues browsing until another button is pressed.
  • Delete All Memories Manually: Press and hold [DELETE] for 3 seconds (ALL appears). Press [DELETE] again to delete all memories within the selected band.
    • Delete Notes: If DEL flashes for more than 3 seconds without confirmation, the function exits automatically.

Sleep Function: Press and hold [POWER] until "SLEEP" and "On" or "1~120" appear. Rotate [TUNING] to select a sleep timer (1-120 minutes) or "On" for permanent. Wait for auto-confirmation.

Clock Setting: Press and hold [TIME] (hour flashes). Rotate [TUNING] to adjust the hour. Press [TIME] again (minutes flash). Rotate [TUNING] to adjust minutes. Press [TIME] again to confirm. If no button is pressed for 3 seconds, it auto-confirms.

Working with Alarm:

  • Setting Alarm Time: Press and hold [ALARM] (hours flash). Rotate [TUNING] to adjust. Press [ALARM] (minutes flash). Rotate [TUNING] to adjust. Press [ALARM] to set "Auto Alarm Off" Timer (1-90 minutes). Press [ALARM] to confirm. To turn off, press [ALARM] repeatedly until the alarm symbol disappears. If no button is pressed for 3 seconds, it auto-confirms.
  • How to Set Alarm by Radio: Turn on the radio, tune to a station, and adjust volume. Press [MEMORY] (PRESET flashes). Immediately press [ALARM] (alarm symbol appears) to confirm the preset alarm station.
  • How to Turn Off When Alarming: Press [POWER] once to continue listening, twice to turn off. If already listening, it auto-switches to the alarm station and turns off after alarming.

How to Change the Display Mode:

  • Radio OFF: Repeatedly press [DISPLAY] to view temperature or alarm time.
  • Radio ON: Press [DISPLAY] to view local time, alarm time, temperature, or signal strength/SNR.

Key-Lock Function: Press and hold the [lock] button until the lock symbol appears to activate. Press and hold again until the symbol disappears to deactivate.

FM ST (FM Stereo): While listening to FM stereo, press [FM ST] (stereo symbol appears) to activate stereo. If the signal is weak, press [FM ST] again (stereo symbol disappears) to turn off stereo. Stereo function is not activated for non-stereo broadcasts.

AM BW (AM Bandwidth): Repeatedly press [AM BW] to select 6, 3, 2, or 1 kHz bandwidth.

  • Wide band: Better audio fidelity for strong signals/local stations.
  • Narrow band: Suitable for weak/distant stations, limits interference, reduces background noise.

System Setting:

  • FM Frequency Range: With radio off, press and hold [FM] until 87.5-108MHz, 64-108MHz, 76-108MHz, or 87-108MHz appears. Quickly press [FM] to select.
  • Turn ON/OFF the LW: With radio off, press and hold [MW/LW] until "LW ON" or "LW OFF" appears.
  • Intelligent Lighting: The backlight turns on for 3 seconds when any key/knob is operated. Press and hold [LIGHT SET] until it flashes, then "OFF/ON" shows.
  • MW (AM) Tuning Step: With radio off, press and hold [9/10 kHz] until "9kHz" or "10kHz" appears to select.
  • Temperature: When AM tuning step is 10 kHz, temperature displays in Fahrenheit (°F). When 9 kHz, it displays in Centigrade (°C).

Maintenance Features

Intelligent Charging Function: With the radio off, install 2 x UM3 (AA) rechargeable batteries. Press and hold the [battery] key until "CHA On" and "Ni-MH Battery" display to activate charging. Connect a 5V external adaptor with a USB plug. The battery symbol will animate during charging and stop when fully charged.

  • Charging Notes:
    • Fully discharge rechargeable batteries before recharging to extend their lifespan.
    • Use two batteries as a set; do not mix with other uses or different capacities.
    • Do not charge non-rechargeable batteries, as this can cause damage or hazard.

Improving FM / SW Reception:

  • Method 1: External Telescopic Antenna: Connect an external telescopic antenna to the built-in FM/SW antenna to extend its length.
  • Method 2: External Wire Antenna: Plug an external wire antenna into the [FM & SW] antenna jack and hang its end outside a window.
    • Caution: Do not install external antennas in areas prone to thunder and lightning.

Important Matters for Using Batteries:

  • If no battery is installed for a long time, the clock will stop, but pre-stored frequencies are retained. The clock will work again after new batteries are installed.
  • When battery power is low, the battery symbol will flash to alert you to replace batteries. The radio will turn off automatically when power is depleted.
  • Mixing used and new batteries can damage the radio and cause incorrect power capacity display.
  • For long-term storage, remove batteries to prevent liquid leakage.

Tecsun PL-505 Specifications

General IconGeneral
FM Frequency Range87 - 108 MHz
SpeakerBuilt-in Speaker
Headphone Jack3.5 mm
TypePortable Radio
AntennaTelescopic Antenna
SelectivityFM: >30 dB, AM: >20 dB
FeaturesAlarm, Sleep Timer

Related product manuals