Getting Acquain
ted with Your Instrument
Getting Acqua
inted with Your Instrument
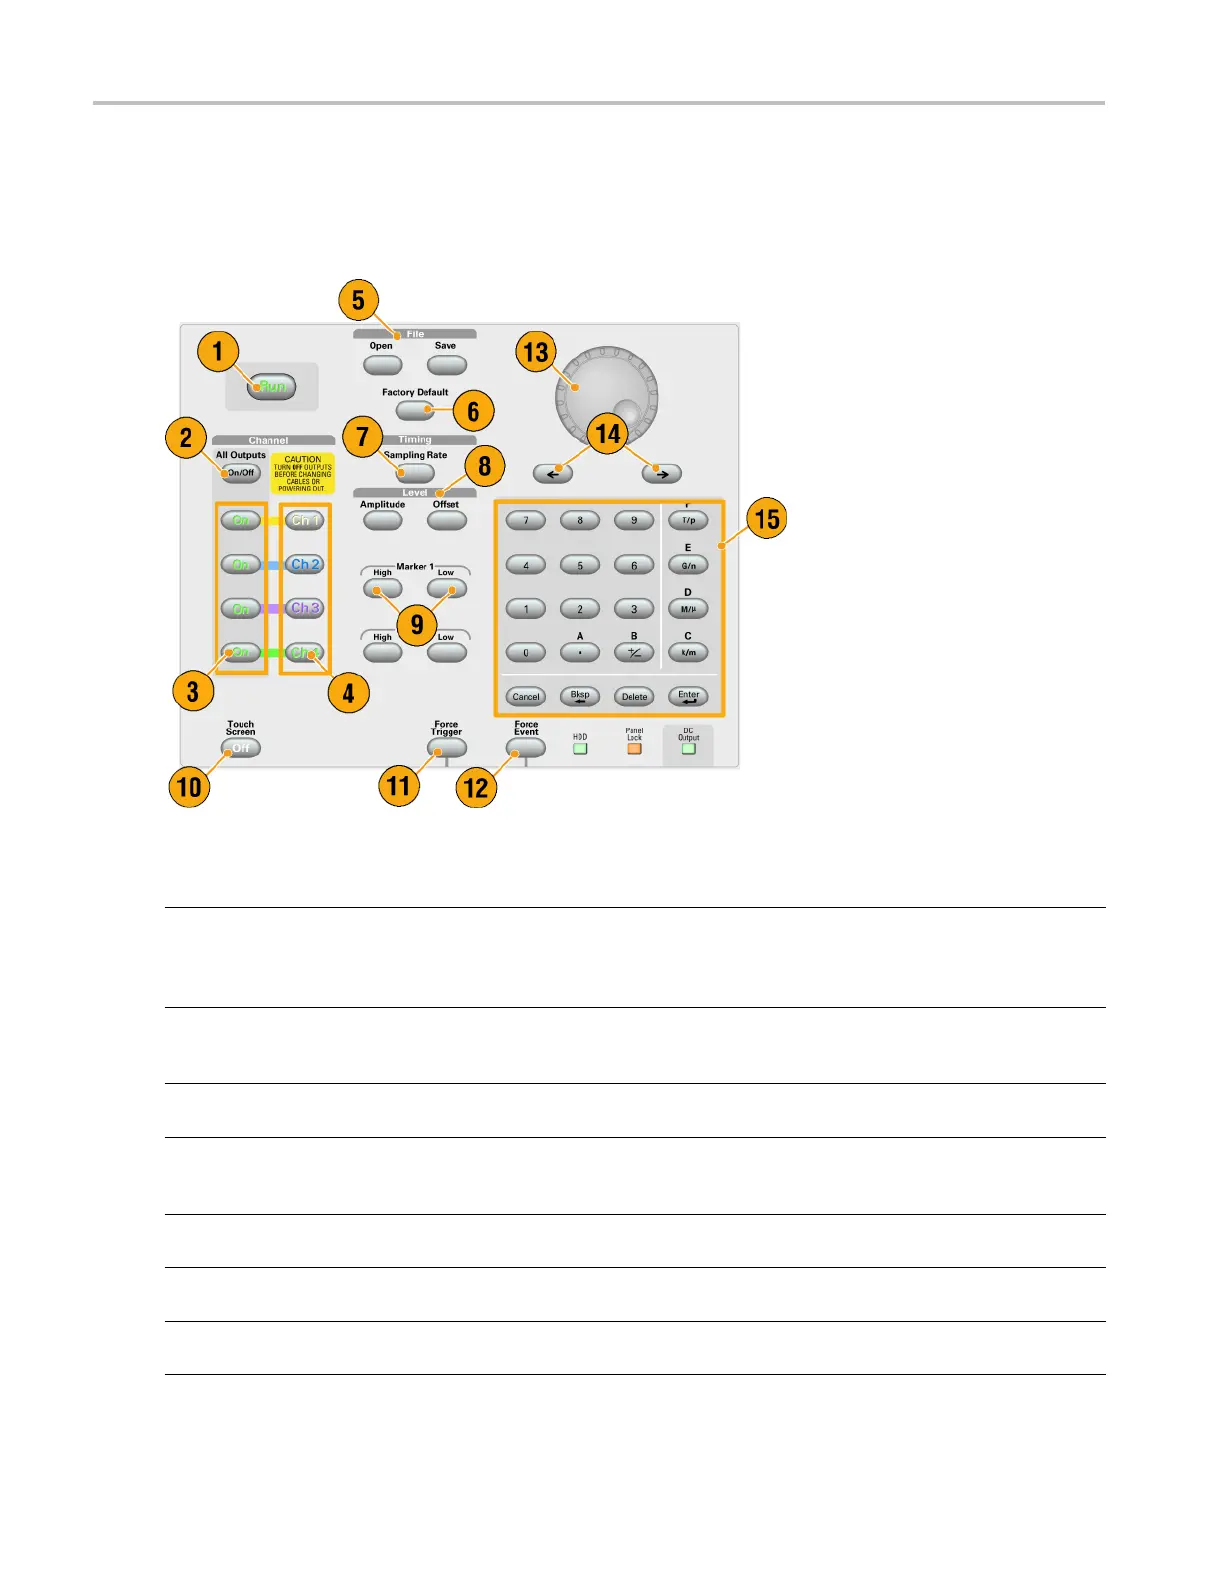
Control Panel
Buttons/Keys Description
1. Run
The Run button is used to start and stop the signal generation. If the signal
is being generated, the LED indicator lights up.
To output the signal through the output connectors, you must push the
front-panel All Outputs On/O ff button or the Channel Output On button.
2. All Outputs On/Off If one or more Outputs are on, they will all be turned off when you push the
All Outputs On/Off button. If all Outputs are off, they will all be turned on
when you push the All Outputs On/Off button.
3. Channel Output On These buttons are used to enable/disable the channel output. If the output
is in the On state, the LED is turned on.
4. Channel Select These buttons are used to select a channel that you want to interact with. If
a channel select button on the front panel is pushed, the selected channel
page in the Settings Window will be activated.
5. File – Open/Save When the Open or Save button is pushed, the corresponding dialog box is
displayed. You can load or save a setup (*.AWG) file using this dialog box.
6. Factory D efault When this button is pushed, the specified default setups are recalled. (See
page 43, Default Setup.)
7. Sampling Rate When you push this button, the sampling rate parameter in the Settings
window is selected. Sampling Rate is common to each channel.
18 AWG5000 and AWG7000 Series Quick Start User Manual

 Loading...