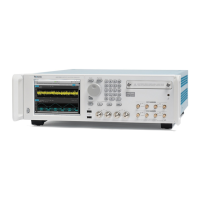
Getting Acquain
tedwithYourInstrument
Buttons/Keys Description
8. Level – Amplit
ude/Offset
When you push t
hese buttons, the amplitude or offset parameter of the
corresponding channel in the Settings window is selected.
Amplitude and offset can be set independently for each channel.
9. Marker 1 and Marker 2 – High/Low When you push one of these buttons, the Marker High or Marker Low
parameter of
the corresponding channel in the Settings window is selected.
Marker High and Marker Low can be set independently for each channel.
10. Touch Screen Off When the Touch Screen is On state, you can use your finger or stylus to
control the screen interface. The LED is lit w hile the Touch Screen interface
is disabled
.
11. Force Trigger When you push this button, the instrument generates an internal trigger
signal.
12. Force Event When you push this button, the instrument generates an internal event
signal.
13. General P
urpose Knob
The knob i
s used to increase or decrease a set value or select an item from
a pop-up menu, pull-down menu, or dialog box. Turn the knob clockwise
to increase the value, and turn the k nob counterclockwise to decrease
the valu
e.
14. Digit Se
lect Arrow Keys
The digi
t select arrow keys are used to move the under bar (cursor) to a
field that contains an editable number. After you specify the digit, you c an
change the number with the knob.
15. Numeric Keypad
Units prefix buttons (T/p, G/n, M/μ, and k/m) are used to complete an input
with t
he numeric keypad. You can determine the units by pushing one of
these prefi x buttons without pressing the Enter key.
If you push the units pre fix buttons for frequency, the units are interpreted
as T (t
era-), G (giga-), M (mega-), or k (kiro-). If you push the buttons for
time, the units are interpreted as p (pico-), n (nano-), μ (micro-), or m (milli-).
CAUT
ION. Do not connect a DUT (Device Under Test) to the front-panel signal output connectors when the instrument
signal outputs are on.
Do not power on or off the DUT when the arbitrary waveform generator signal outputs are on.
Locking and Unlocking the F ront Panel Controls
The front panel may be locked by a remote user while the arbitrary waveform generator is being remotely controlled v ia GPIB
or Ethernet. When the front panel is locked, all keys and buttons are disabled except the power switch. You cannot use your
mouse or keyboard. However, the Windows operations are available even if the instrument front panel is locked.
To unlock the front-panel controls, use a remote command or push the front-panel Cancel button twice. If you exit the
application, the lock state is cleared. When you restart the application, the front-panel controls are unlocked.
AWG5000 and AWG7000 Series Quick Start User Manual 19

 Loading...


