AIRMAN 8+ Maintenance | en 17
Bosch Security Systems, LLC
Customer Maintenance Manual
2024-11 | 07 | F.01U.387.060
5.2.2 Talk test
When performing a talk test, things to be aware of:
– Note any unusual or unexpected noises, static, and oscillations.
– Note any distorted audio.
– Turn ANR on and note noise reduction of fans, ambient noise etc.
– Turn ANR off and note noise levels return to normal.
– Verify sound is heard in both ears.
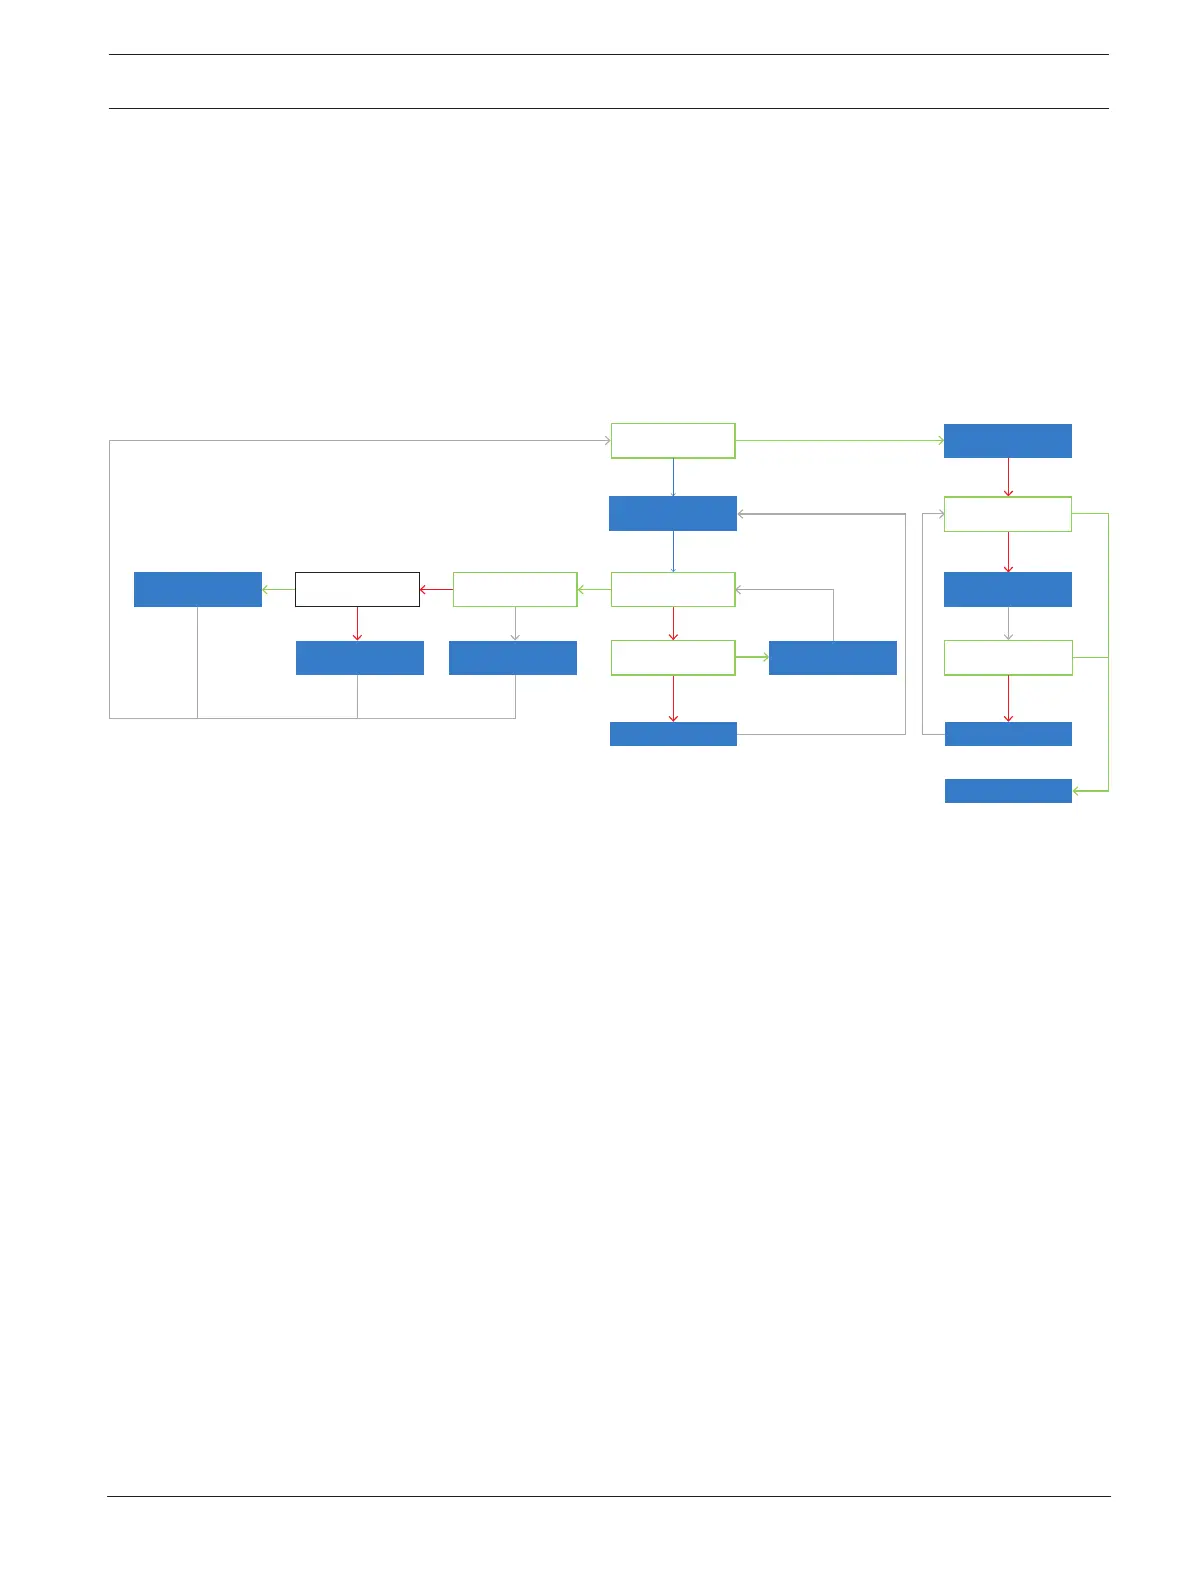
5.3 Microphone troubleshooting
Did mic pass
the talk test?
Check power at
the PCBA
Is there power at
the PCBA?
Are the boom mic
wires broken?
Is mic circuitry
validated?
Replace mic
assembly
Are wires broken at
the PCBA?
Replace main cord
Re-attach
broken wires
Test mic response,
sensitivity, & THD
Does mic meet response,
sensitivity, & THD specs?
Does mic meet response,
sensitivity, & THD specs?
Replace mic
Test complete
Adjust mic
sensitivity
Yes
Yes
Yes
Yes
Yes
Yes
Yes
No
No
No
No
No
No
No
Replace PCBA
Figure5.2: Microphone Troubleshooting
5.3.1 Validate continuity from plug to Boom side PCBA
To validate continuity from the plug to the boom-side PCBA, do the following:
1. Using an Ohmmeter, place one probe on the ring terminal of the PJ-068 plug or pin 3 of
the XLR connector.
2. Place the other probe at J1 on the PCBA.
3. Record the measurement.
4. Using an Ohmmeter, place one probe on the sleeve terminal of the PJ-068 plug or pin 4
of the XLR connector.
5. Place the other probe at J2 on the PCBA.
6. Record the measurement.
If the reading is approximately zero, continuity is good.
If any other reading is seen, the continuity is bad. Replace the cable.