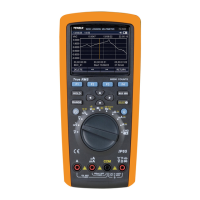
22
• Do not input a voltage above 1000V. Higher voltage may be measured but it poses
the risk of damaging the meter.
• After completing all of the measurement operations, disconnect the connection
between the test leads and the circuit under test.
dBV
• Insert the red test lead into the V terminal and the black test lead into the COM
terminal.
• Set the rotary switch to the Ṽ position and connect the test leads to the power or
load to be tested in parallel.
• Press the MENU function button to enter one of the menu options. Press the
cursor buttons to select the menu option dBV, then press the dBV function button
to enter dBV measurement.
• dBV is primarlily shown and AC voltage value is secondly shown on the display.
AC voltage of the measured signal is displayed on the simulation bar.
dBm
• Insert the red test lead into the V terminal and the black test lead into the COM
terminal.
• Set the rotary switch to the Ṽ position and connect the test leads to the power or
load to be tested in parallel.
• Press the MENU function button to enter one of the menu options. Press the
cursor buttons to select the menu option dBm.
• A reference impedance (resistance) must be used for the measurement of dBm to
calculate dB value on the basis of 1mW.
• Press the function button RES to select a reference impedance value.
• Use the ▲ or ▼ button to scroll between the 10 defined reference values: 4, 8, 16,
25, 32, 50, 75, 600, 1000 and 1200.
• Press the function button EDIT and the cursor buttons to select any one of the
reference impedance values between 4Ω~1200Ω. Press the function button OK to
set reference values.
• Press the function button dBm to enter dBm measurement.
• dBm is primarily shown and AC voltage value is shown secondly on the display.
AC voltage of the measured signal is displayed on the simiulation bar.
MAXIMUM & MINIMUM VALUE
• Press MAX MIN to activate the measurement of maximum and minimum values.
• Real time measurements are primarily displayed.
• Maximum, average and minimum values, elapsed time, start date and time
corresponding to the three values are secondly displayed.
• Press the function button RESTART to re-activate the measurement of maximum
and minimum values.
• Press the function button EXIT to exit the measurement of maximum and minimum
values.
 Loading...