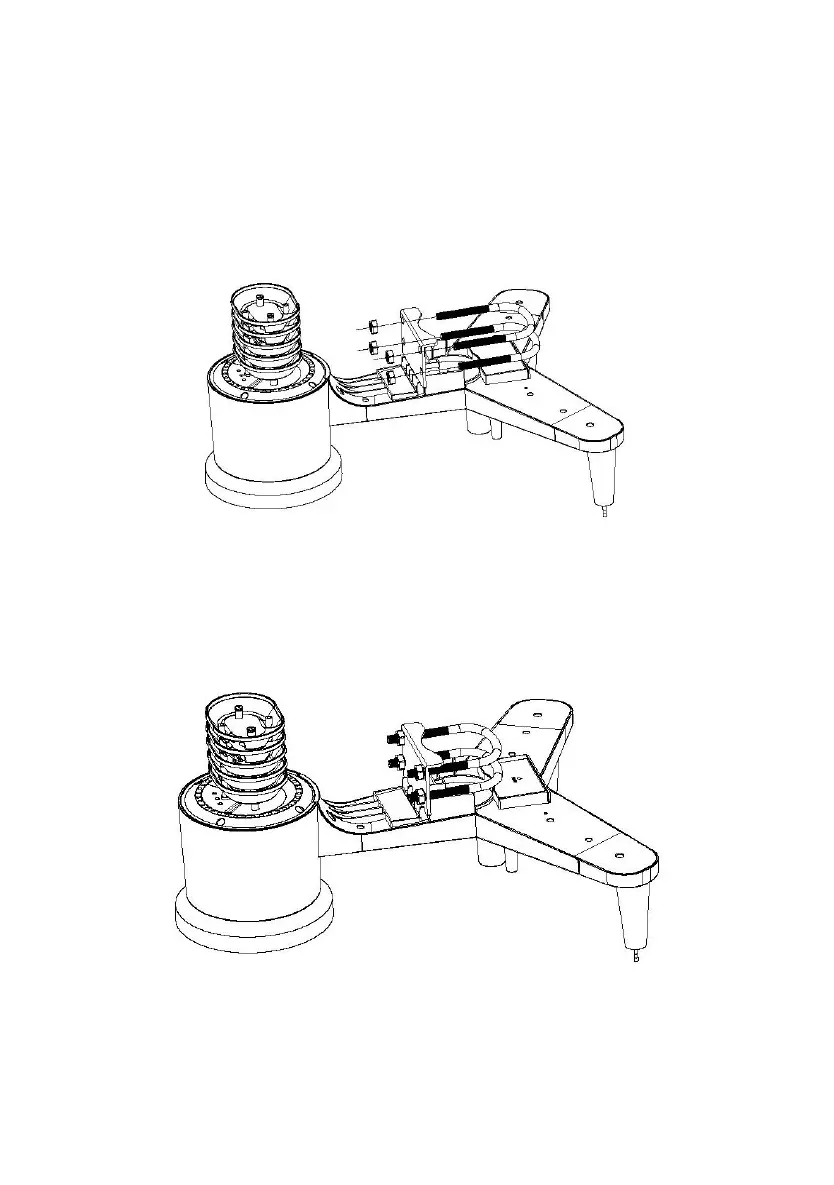
two U-Bolts will fit. The plate itself is inserted in a groove on the bottom
of the unit (opposite side of solar panel). Note that one side of the plate
has a straight edge (which goes into the groove), the other side is bent
at a 90-degree angle and has a curved profile (which will end up
“hugging” the mounting pole). Once the metal plate is inserted, remove
nuts from the U-Bolts and insert both U-bolts through the respective
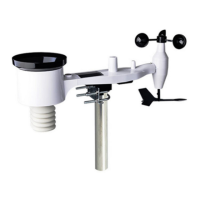
holes of the metal plate as shown in Figure 8.
Loosely screw on the nuts on the ends of the U-bolts. You will tighten
these later during final mounting. Final assembly is shown in Figure 9.
The plate and U-Bolts are not yet needed at this stage but doing this
now may help avoid damaging wind vane and wind speed cups
later-on.