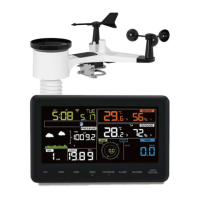
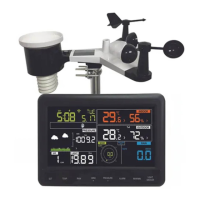
5.2.2 Install wind vane
Push the wind vane onto the shaft on the top of the sensor, until it
cannot move further, as shown in figure 3. Tighten the set screw, with
a Philips screwdriver (size PH0), until the wind van cannot be removed
from the axle, as shown in figure 4. Make sure the wind vane will spin
freely. The wind vane’s movement has a small amount of friction, which
is helpful in providing steady wind direction measurements.
Figure 3 Figure 4
There are four alphabet letter of “N”,”E”,”S” and “W” around the wind
direction, representing for the direction of North, East, South and West.
Wind direction sensor has to be adjusted so that the directions on the
sensor are matching with your real location. Permanent wind direction
error will be introduced when the wind direction sensor is not
positioned correctly during installation when the complete WH65
outdoor COMBI unit is facing North. (see clause 5.2.6.2)
5.2.3 Install wind speed
Push the wind speed into the shaft as shown in figure 5.
Tighten the set screw with as shown in figure 5. Make sure the wind
speed can spin freely.