EasyManuals Logo

TESTO 872 User Manual

TESTO 872
46 pages
To Next Page IconTo Next Page
To Previous Page IconTo Previous Page
Page #25 background imageLoading...
Page #25 background image
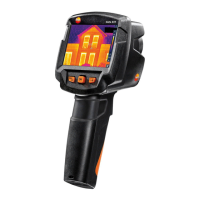
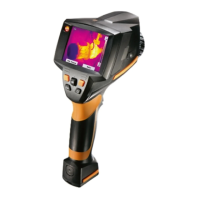
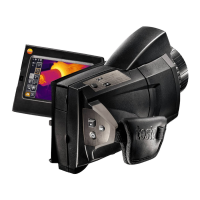
7 Performing the measurement
23
If a radio probe is connected, values are transferred
automatically.
5
- Select and press OK.
Values for current, voltage and power can be transferred from the
testo 770-3 clamp meter.
7.1.5 Activating/disabling the zoom
1
- Open Menu.
2
- Select Measurement settings.
The Measurement settings menu opens.
3
- Select Zoom.
4
- Select zoom level and press OK.
7.2 Activating/disabling the laser
1
- Move the joystick to the right and open the Softkey menu (quick
select button).
2
- Move the joystick up or down and select Laser. Then press OK.
3
- Press to activate the Laser.
7.3 Saving an image
1
- Press Trigger.
The image is automatically saved.
An infrared image is saved with a real
image attached.

Table of Contents

Questions and Answers:

Question and Answer IconNeed help?

Do you have a question about the TESTO 872 and is the answer not in the manual?

TESTO 872 Specifications

General IconGeneral
Resolution320 x 240 pixels
Field of view42° x 30°
FocusManual
Image refresh rate9 Hz
Weight510 g
Accuracy±2°C, ±2% of reading
Digital cameraYes
Laser markerYes
BluetoothYes
WLANYes
IFOV warnerYes
Hot/cold spot recognitionYes
Image storage formatJPEG
Voice recordingYes
Operating temperature-15 to +50°C
Storage temperature-30 to +60°C
Humidity20 to 80% RH non-condensing
Protection classIP54
Dimensions219 x 96 x 95 mm
Thermal sensitivity< 0.06 °C
Temperature range-30 to +650 °C
Display3.5" LCD, 320 x 240 pixels
Battery life4 hours
Battery typeLi-Ion battery

Related product manuals