www.ti.com
Kit Contents
3
SPRUI25D–June 2015–Revised March 2019
Submit Documentation Feedback
Copyright © 2015–2019, Texas Instruments Incorporated
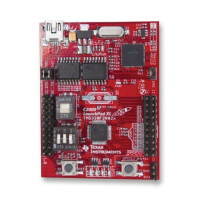
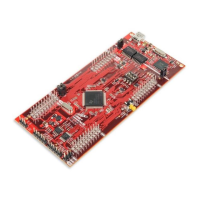
LAUNCHXL-F28377S overview
2 Kit Contents
The LAUNCHXL-F28377S LaunchPad experimenter kit includes the following items:
• C2000 Delfino LaunchPad Board (LAUNCHXL-F28377S)
• Mini USB-B Cable, 0.5m
• Quick Start Guide
2.1 Revisions
The first production revision of the LAUNCHXL-F28377S in 2016 was Revision 1.0.
All Revisions:
• Resistor R7 in the oscillator circuit is incorrectly placed or should not be installed. This resistor may
impact startup time or robustness of the clocking circuit over the full operating range of the MCU or
different physical layouts of this circuit. The probability is low that this resistor will have any impact on
the functionality of this EVM as is not intended to be operated outside of Standard Temperature and
Pressure in a lab or prototype environment. Do not use this circuit as reference. Follow the
requirements for the Oscillator schematic as documented in the MCU Datasheet.
3 Installation
The F28377S LaunchPad is supported in Code Composer Studio.
3.1 Code Composer Studio
3.1.1 Download the Required Software
Code Composer Studio IDE is available for free without any restriction when used with the XDS100 debug
probe on the C2000 LaunchPad. The software can be downloaded from the C2000 LaunchPad page at
ti.com/launchpad. At this site, you can also download a copy of controlSUITE that includes drivers,
examples, and other support software needed to get started.
3.1.2 Install the Software
Once downloaded, install Code Composer Studio and the controlSUITE package.
3.1.3 Install the Hardware
After Code Composer Studio is installed, plug the supplied USB cable into the C2000 LaunchPad board
and into an available USB port on your computer.
Windows
®
will automatically detect the hardware and ask you to install software drivers. Let Windows run
a search for the drivers and automatically install them. After Windows successfully installs the drivers for
the integrated XDS100v2 debug probe, your LaunchPad is now ready for use.
4 Getting Started with the LAUNCHXL-F28377S
4.1 Getting Started
The first time the LAUNCHXL-F28377S is used, a demo application automatically starts when the board is
powered from a USB host. If your board does not start the demo application, try placing S1 in the following
positions and resetting the board: UP - UP - DOWN. To start the demo, connect the LAUNCHXL-F28377S
with the included mini-USB cable to a free USB port. The demo application starts with the LEDs flashing
to show the device is active.
 Loading...