Veritas R8 Plus & Excel Installation Manual Programming the Control Panel
INS045-14 27
Programming Part Sets Zone Changes
The Control Panel has four part sets. Zone Types will only be
changed on selected part sets. For example the Control Panel is
factory set with Part Sets 1 and 3 selected. Thus Zone Types will
only be changed on Part Set 1 and Part Set 3, not on Part Set 2 or
Part Set 4.
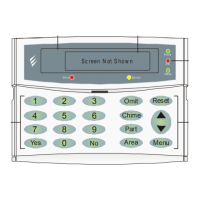
From the Programming Menu, enter
. The part sets currently
selected will indicate.
12
3
4
56
78
Uns et
Ta mpe r
Zones
Press the appropriate numbered button(s) of the part set(s) to
be selected or de-selected. Press
. The system will
chime to confirm that the new selection has been accepted. The
system will then automatically revert to the Programming Menu.
Changing Zones to Entry/Exit
This suite defines the zones which will be changed into Entry/Exit
zones on the selected part sets. For example the Control Panel is
factory set with Zone 2 included. Thus the Zone Type of Zone 2 will
be changed (from Inhibited Entry) into Entry/Exit on Part Sets 1
and 3.
From the Programming Menu, enter
. The zones that are
currently included will indicate.
12
3
4
56
78
Uns et
Ta mpe r
Zones
Press the appropriate numbered button(s) of the zone(s) to be
included or excluded. Press
. The system will chime to
confirm that the new suite has been accepted. The system will then
automatically revert to the Programming Menu.
Changing Zones to Inhibited Entry
This suite defines the zones which will be changed into Inhibited
Entry zones on the selected part sets. For example the Control Panel
is factory set with no zones included. Thus no zones will be changed
into Inhibited Entry.
From the Programming Menu, enter
. The zones that are
currently included will indicate.
12
3
4
56
78
Uns et
Ta mpe r
Zones
Press the appropriate numbered button(s) of the zone(s) to be
included or excluded. Press
. The system will chime to
confirm that the new suite has been accepted. The system will then
automatically revert to the Programming Menu.
Changing Zones to Guard
This suite defines the zones which will be changed into Guard
zones on the selected part sets. For example the Control Panel is
factory set with Zone 1 included. Thus the Zone Type of Zone 1 will
be changed (from Entry/Exit) into Guard on Part Sets 1 and 3.
From the Programming Menu, enter
. The zones that are
currently included will indicate.
12
3
4
56
78
Uns et
Ta mpe r
Zones
Press the appropriate numbered button(s) of the zone(s) to be
included or excluded. Press
. The system will chime to
confirm that the new suite has been accepted. The system will then
automatically revert to the Programming Menu.
Programming the Date and Time -
It is ESSENTIAL to program the current date (
) and
time (
) for correct operation of the service timer(s)
and the 250 Event Extended Log.
Programming the service timers (
,
,
) is
prevented unless the current date (
) has first been
programmed.
If the panel is completely powered down it will attempt to store
the current time and date in NVM and continue from this point
when it is powered up. However it may be also desirable to
select the Engineer Reset on Power Up option (see page 21).
Programming the Date
From the Programming Menu, enter
. The display will look
like this.
12
3
4
56
78
Uns et
Ta mpe r
Zones
Enter the current date as a 6 digit number; Day, Day, Month,
Month, Year, Year (e.g. to program the 1st of June 1998 enter
). The display will indicate as each digit of the
new date is entered. Press
. The system will chime to
confirm the new date has been accepted. The system will then
automatically revert to the Programming Menu and all the zone
lights will illuminate.

 Loading...

