EN
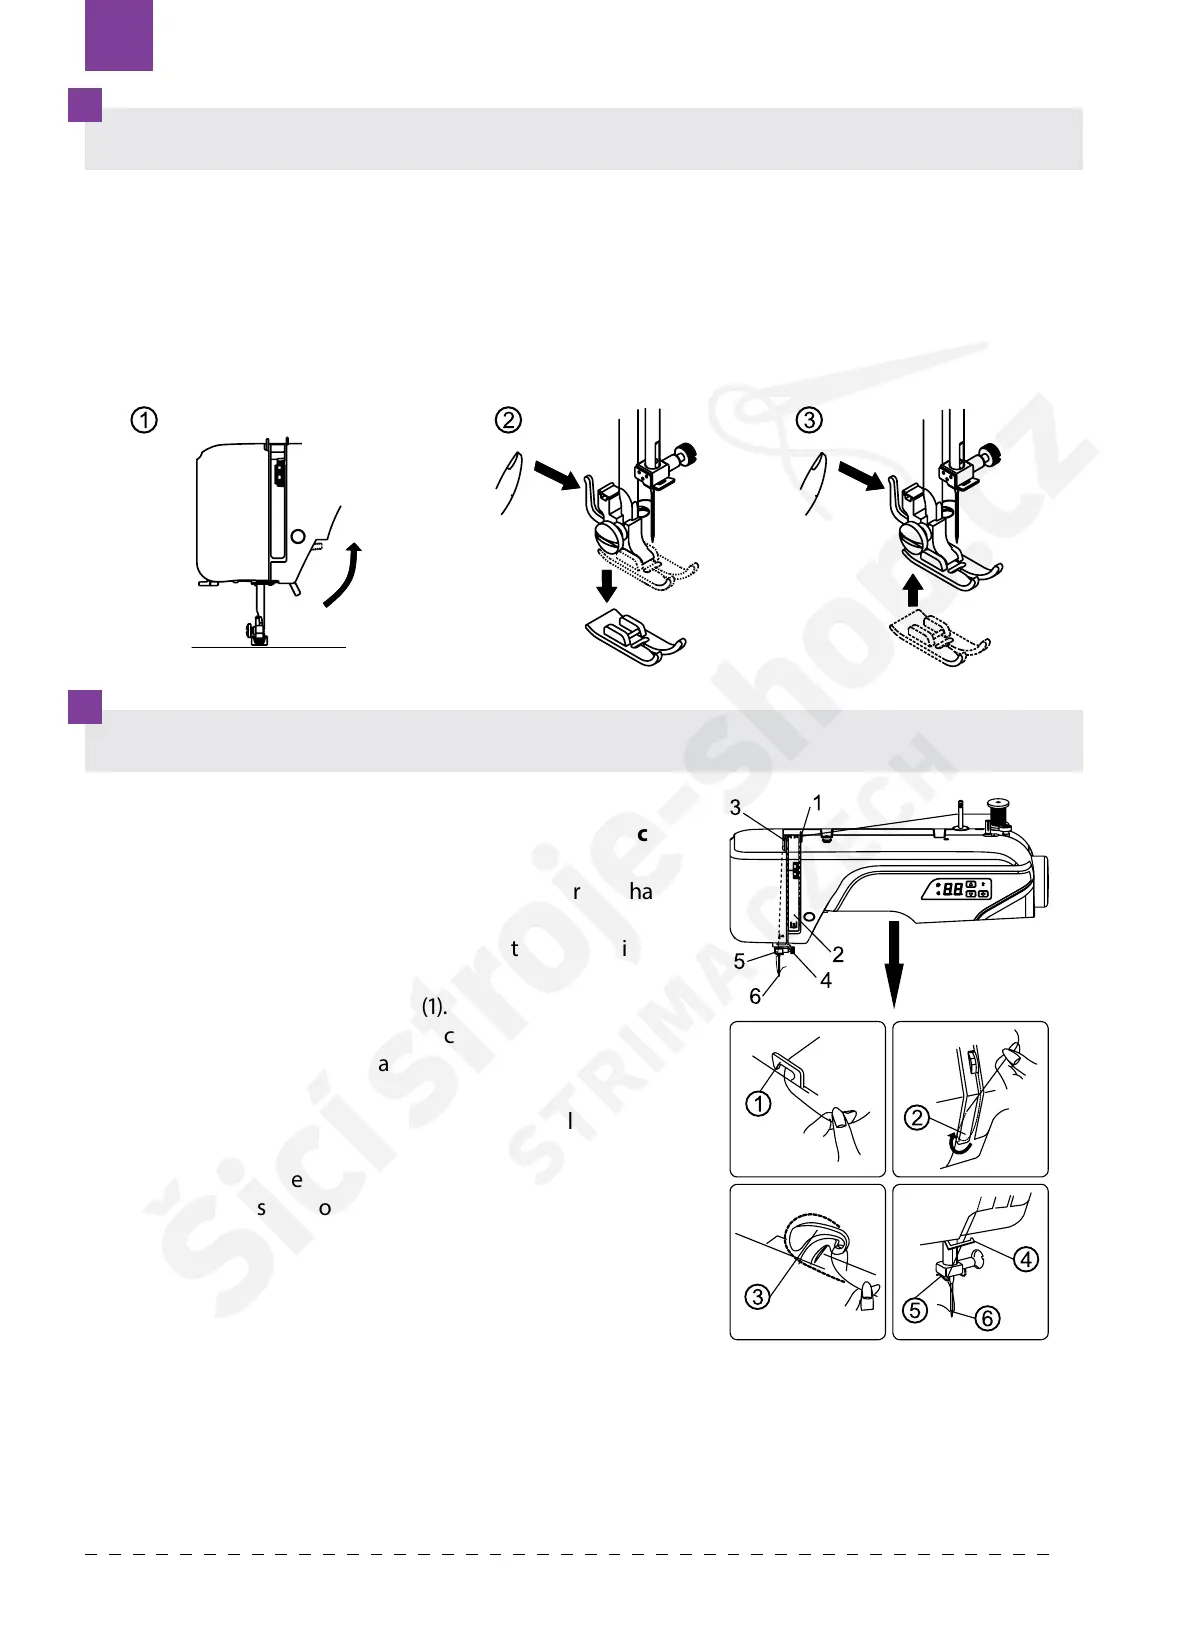
Note : Improper threading sequence , or the wrong
thread running can cause thread tearing, passing stitches,
wrinkling the material.
1. Raise take-up lever to its highest position by turning hand
wheel toward you. Raise presser foot.
2. Place spool on spool pin as shown, with thread coming from
the back of the spool.
3. Draw thread into thread guide (1).
4. Guide thread through tension disc (2) and pull it up.
5. Draw the thread through take-up lever from right to the left
(3).
6. Then draw thread down (4) and slip it into the lower thread
guide (5).
7. Thread needle eye from front to back (6) and pull thread out
under the presser foot about 10 cm.
The presser foot must be changed according to the sewing job or stitch you sew.
CAUTION: Turn OFF the power switch before you change the presser foot.
• Turn the handwheel toward you until the needle is at its highest position.
• Raise the presser foot (1)
• Remove the presser foot by pushing the presser foot release lever toward you (2).
• Place desired foot with its pin directly under the slot (3).
• Lower the presser foot lifter and the presser foot will snap into place.
CHANGING THE PRESSER FOOT
THREADING THE UPPER THREAD
Texi Joy 4868