Refrigeration Maintenance (Rev. 04/03)
64
Set Up and Test of Evacuation Equipment
NOTE: Refer to the previous two pages for the following
discussion.
1. Connect the evacuation system to a 110 V ac power
supply. Connect a gauge manifold and refrigerant sup-
ply to the fitting above valve V-4. Turn the micron
gauge ON.
2. Close valves V-1, V-3 and V-4. Valve V-2 is open.
3. Turn the vacuum pump ON.
4. Open valve V-1 at the pump. The micron gauge needle
will move to the left. (Refer to micron gauge scale dia-
gram—previous page.)
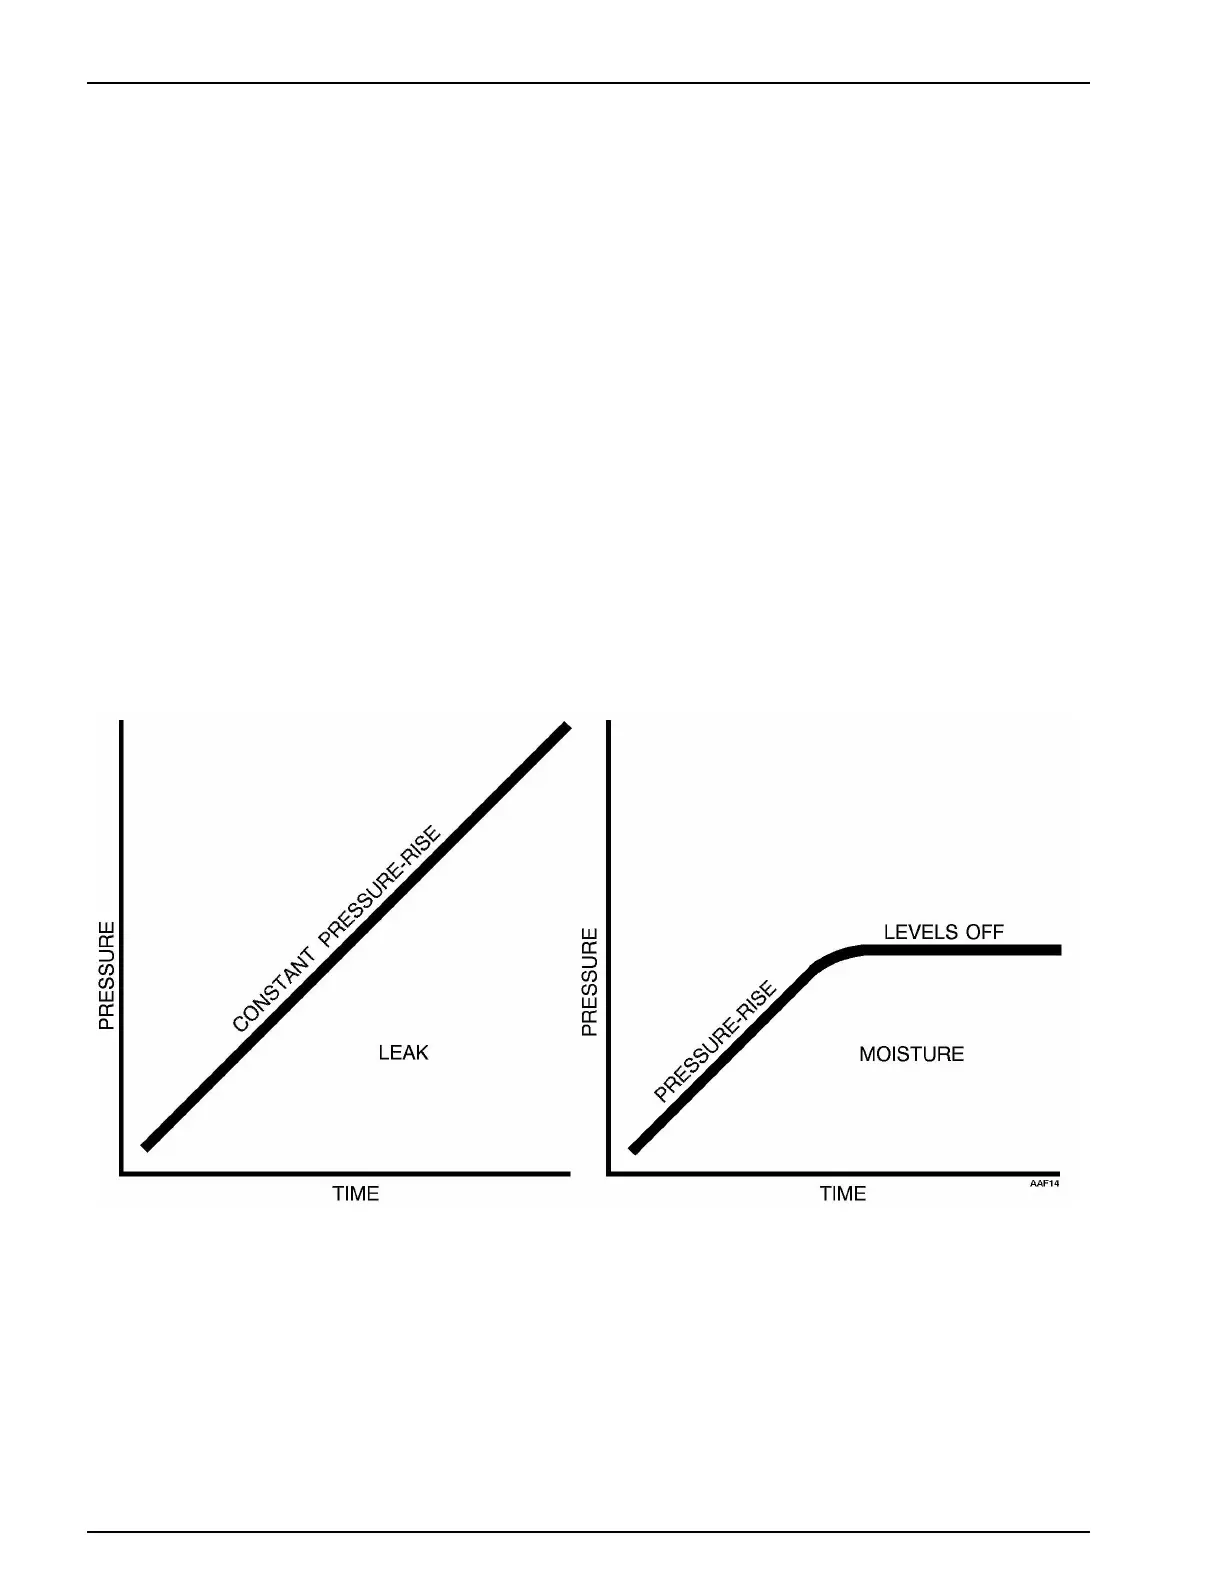
LEAK
Isolate the pump from the system by closing the
proper valve. Watch the movement of the vacuum
gauge needle. If the needle continues to rise, this is an
indication that a leak exists in the unit or the connect-
ing line. The leak must then be located and eliminated.
NOTE: If the vacuum pump is okay, and there are no
leaks between V-1 and V-3, the micron gauge should
show less than 500 microns. If not, locate and correct
the problem.
5. With the pump still operating, open valve V-3. If the
micron reading does not return to a level of less than
500 microns, locate and correct the problem before
continuing.
6. With the vacuum pump still operating, open valve V-4.
The micron level will rise momentarily. If the micron
reading does not return to a level of less than 500
microns, locate and correct the problem before continu-
ing.
MOISTURE
Should the needle show a pressure rise but finally
level off to practically a constant mark, this is an indi-
cation that the system is vacuum tight but is still too
wet, requiring additional dehydration and pumping
time.



 To Next Page