Owner’s Manual
E2010 THYSSENKRUPP ELEVATOR Printed in USA February, 2010
I2®/I3 Valve-2
Introduction
Changes in oil temperature will c ause changes in valve
behavior. Adjust the valve when the oil is at its operating
temperature of 80_ F to 110_ F.
Up side adjustments do not affect down side adjustments nor
do down side adjustments affect up side adjustments.
The power unit should be located in a room that is ventilated
and heated between 50_Fand80_F.
Be EXTREMELY careful when mak-
ing adjustments near moving
belts.
The procedures contained in this
manual are intended for the use of
qualified elevator personnel. In the interest of your per-
sonal safety and the safety of others, do NOT attempt
ANY procedure that you are NOT qualified to perform.
Preliminary Settings
NOTE: If the valve is assembled on a power unit shipped from
the Factory, begin with
Final Adjustments
.
Ensure ALL safety precautions are
followed when operating the ele -
vator from the controller.
Up Section
Preparation
1. Ensure car is empty before making settings.
2. Turn OFF mainline power.
3. Lower the car onto the buffers by opening the MANUAL
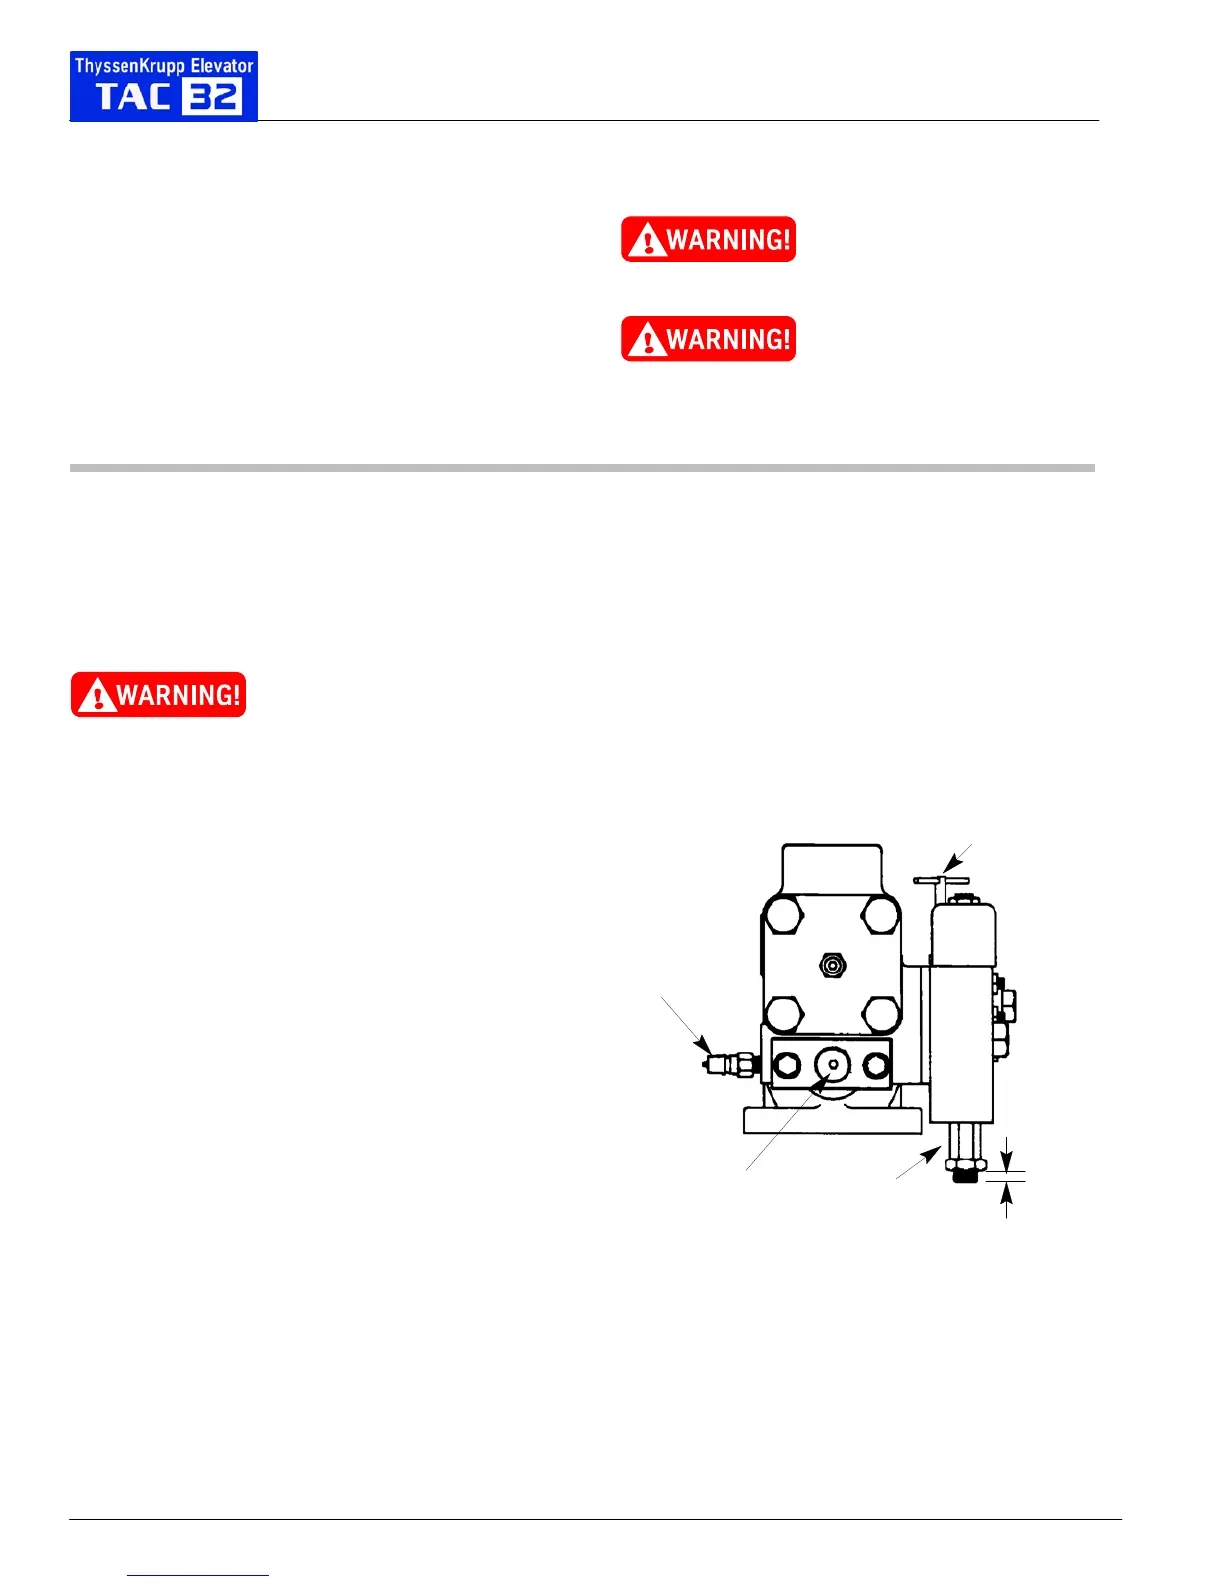
LOWERING valve. See Figure 1.
4. Close the MANUAL LOWERING valve.
5. Install a pressure gauge on the quick connector provided
on far side of valve. See Figure 1.
Relief Pressure Adjustment
1. Turn the RELIEF PRESSURE adjustment screw OUT (ccw)
until
5
/
8
I (15 mm) extends beyond the relief assembly
housing and tighten locknut. See Figure 1.
Low Pressure Adjustment
1. Turn the LOW PRESSURE adjustment screw OUT (ccw)
1
3
/
4
I (45 mm) beyond the cover plate. See Figure 2.
2. Turn IN (cw) by hand until it touches the regulator piston.
Figure 1
Relief Pressure
Adjustment
Quick
Connector
Manual
Lowering Valve
5
/
8
”
Up Leveling
Adjustment
(16mm)