W415-0865 / B / 05.26.11
11
3.0 INSTALLATION PLANNING
Check with local building offi cials for any permits required for installation of this pellet appliance and notify your
insurance company before proceeding with installation.
Before installing we recommend placing the appliance outside and load 5 pounds of pellets inside the hopper.
Plug the appliance in and let it run on HIGH until the pellets run out. This will cure the paint and burn off most
of the oils on the steel, thereby minimizing any smell inside the home.
68.1
!
WARNING
READ ENTIRE MANUAL BEFORE YOU INSTALL OR USE THIS APPLIANCE. FAILURE TO FOLLOW THE
INSTRUCTIONS MAY RESULT IN PROPERTY DAMAGE, BODILY INJURY OR EVEN DEATH.
USE ONLY WOLF STEEL APPROVED OPTIONAL ACCESSORIES AND REPLACEMENT PARTS WITH
THIS APPLIANCE. USING NON-LISTED ACCESSORIES AND REPLACEMENT PARTS (BLOWERS,
DOORS, LOUVRES, TRIMS, GAS COMPONENTS, VENT COMPONENTS, ETC.) COULD RESULT IN A
SAFETY HAZARD AND WILL VOID THE LIMITED LIFETIME WARRANTY.
3.1 INSTALLATION OPTIONS
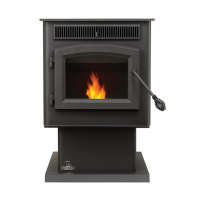
Stove model:
To install in a Residential or Mobile Home see "MOBILE HOME INSTALLATION" section. For alcove instal-
lations see "ALCOVE INSTALLATION REQUIREMENTS" section. For horizontal vent or vertical vent see
"VENTING" section. Outside air, see "OUTSIDE AIR" section.
Insert model:
To install as an insert into an existing masonry appliance or factory built appliance see "VENTING" section. To
install into a combustible enclosure, see "INSTALLATION INTO A COMBUSTIBLE ENCLOSURE" section.
Have an authorized dealer install the appliance. If you install the appliance yourself, have your dealer review
your installation plans and/or installation.
Draw out a detailed plan of the installation including dimensions and verify the dimensions with the require-
ments listed in this manual.
You may wish to adjust the appliance position slightly to ensure the vent does not intersect with a framing
member. Appliance must be positioned so that no combustibles are within, or can swing within (e.g. drapes,
doors), 48” of the front of the appliance.
67.1A
3.2 APPLIANCE PLACEMENT