W415-0865 / B / 05.26.11
31
8.6 CONTROL ADJUSTMENT
FEED TRIM
Both the combustion fan speed and the feed rate have been factory set but may need to be adjusted (trimmed)
on site. Due to the variables (i.e. vent size, length and pellet quality), the factory settings may not be ideal for
every installation. To help keep the fl ame from extinguishing on the minimum heat level, the feed rate can be
trimmed when in normal operation (after the 15 minute ignition cycle). Depress and hold the prime button while
you push the heat level button. This will slightly increase the amount of fuel being fed into the burn pot. When
trimming the feed rate for the fi rst time, the LED’s will display the (#3 and #1 light) indicating that the appliance
is factory set to (#2) with the ability to increase up one level (#3) or decrease down one level (#1) the length
of time between the prime cycle. NOTE: The light that isn't on indicates the trim setting of the appliance,
trimmed down, neutral or trimmed up.
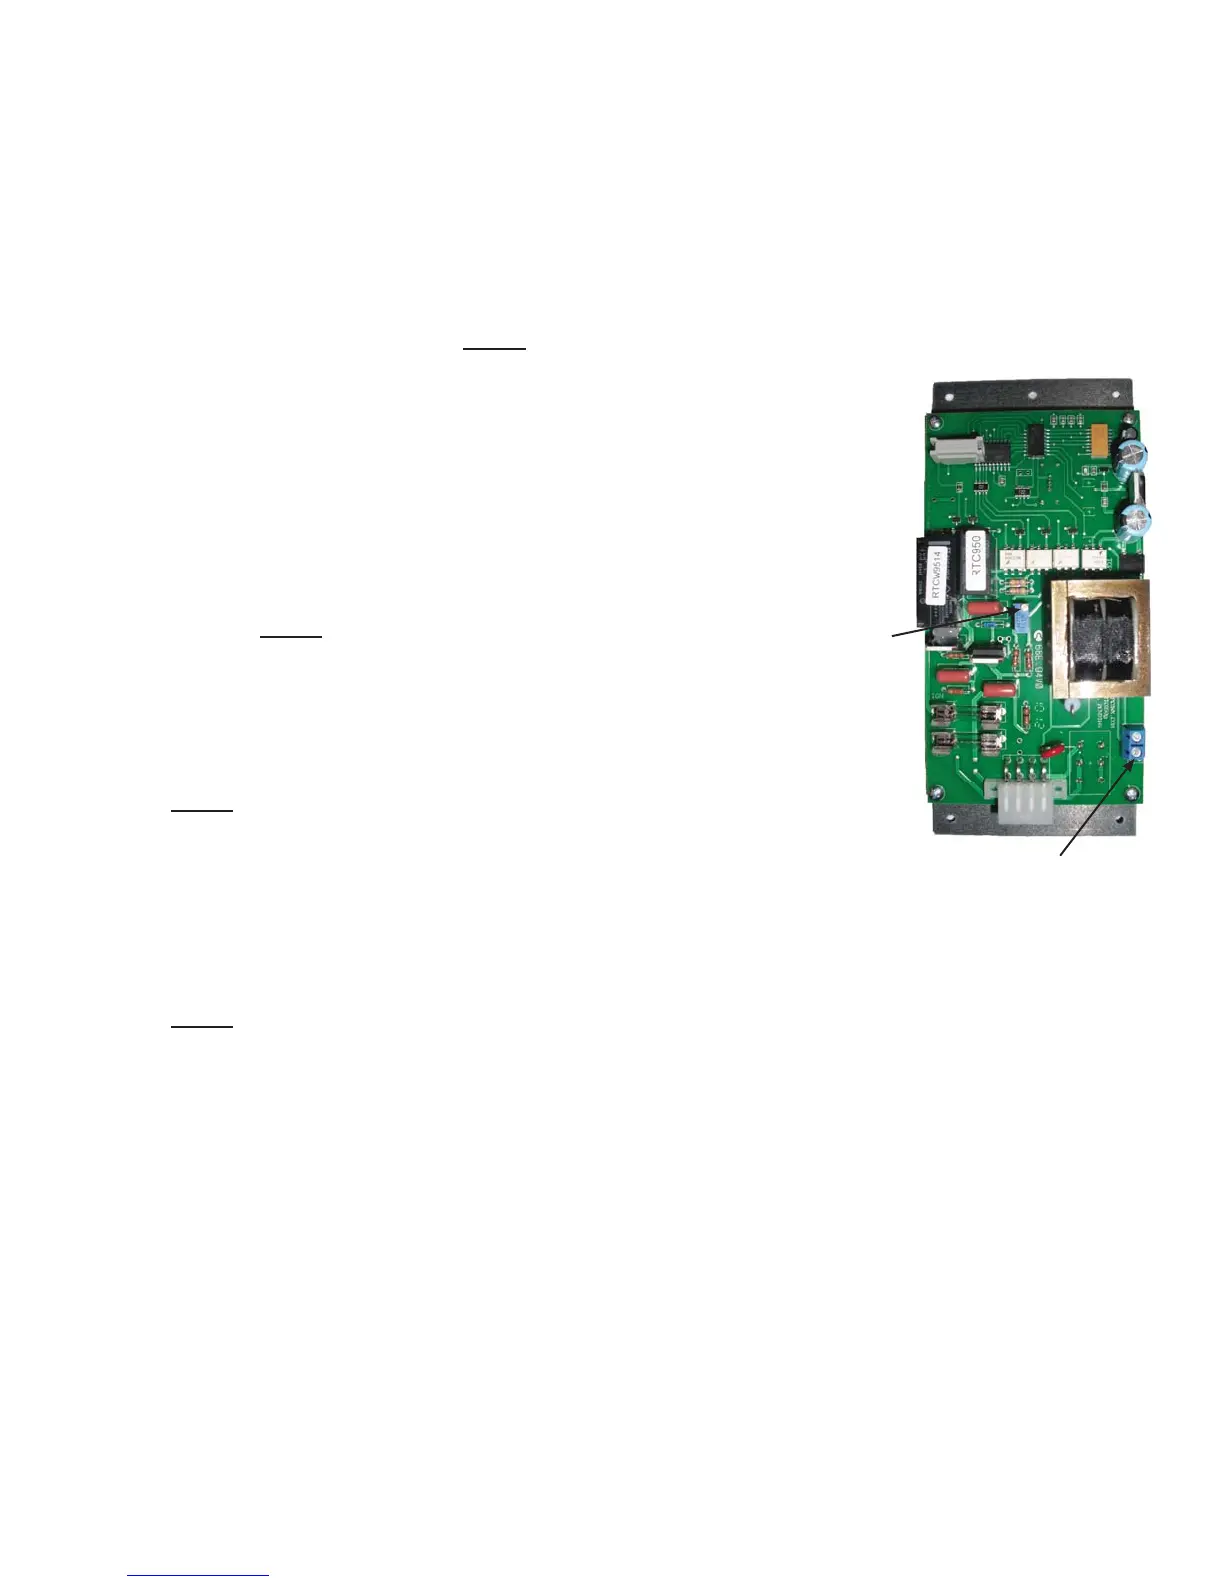
BLOWER TRIM
Similar to the feed rate, it may be necessary to trim the speed of the
combustion blower. Due to specifi c installations, it may be necessary
to increase or decrease the amount of air moving through the burn pot
to achieve maximum effi ciency. In order to adjust the blower trim you
need access to the back of the control panel. Start by either removing
the side panel (pedestal) or behind the fl ashing (insert), using a small
screw driver turn the screw to adjust the blower (clockwise to increase/
counter-clockwise to decrease) and reinstall the panel / fl ashing that was
removed. NOTE: It is recommended to adjust the blower trim prior to
installing the insert.
8.7 INSTALLING A THERMOSTAT
An optional millivolt thermostat is available to help keep the room tem-
perature constant.
NOTE: The thermostat must be installed by a qualifi ed installer.
● Disconnect the power supply.
● Remove the right side panel to gain access to the rear of the
control panel.
● Strip and connect the two thermostat wires to the two screw terminals on the back of the control panel.
NOTE: The control must be in AUTO to control the appliance with a thermostat.
BLOWER
TRIM
SCREW
TERMINALS
8.8 SHUTDOWN INSTRUCTIONS
Slide the "ON/OFF" button to "OFF". Your appliance will cycle down and the blower will remain operating until
your appliance has cooled.