Page 13 of 41
Rev: 2024-10-03
5. Getting Started
5.1 Power Supply Connection
• A facility provided 24 V.D.C. power connection may be used with the 5.08mm, 2-
pin connector that comes in your installation kit, if 24 V.D.C. power is not
provided, a plug-in power adapter may be purchased as an optional accessory.
• Install the 5.08mm, 2-pin connector (see Figure 4 on page 8)
• Apply power to the 24 V.D.C. connector into the model TMC430, the screen
should light up and show a boot-loader screen. Do not press any buttons here
unless told to do so by technical support. After the boot-loader screen, the
Time Mark logo will be shown (this is where you can press the outside two
buttons to either “Factory Reset” or calibrate the input and/or output). After the
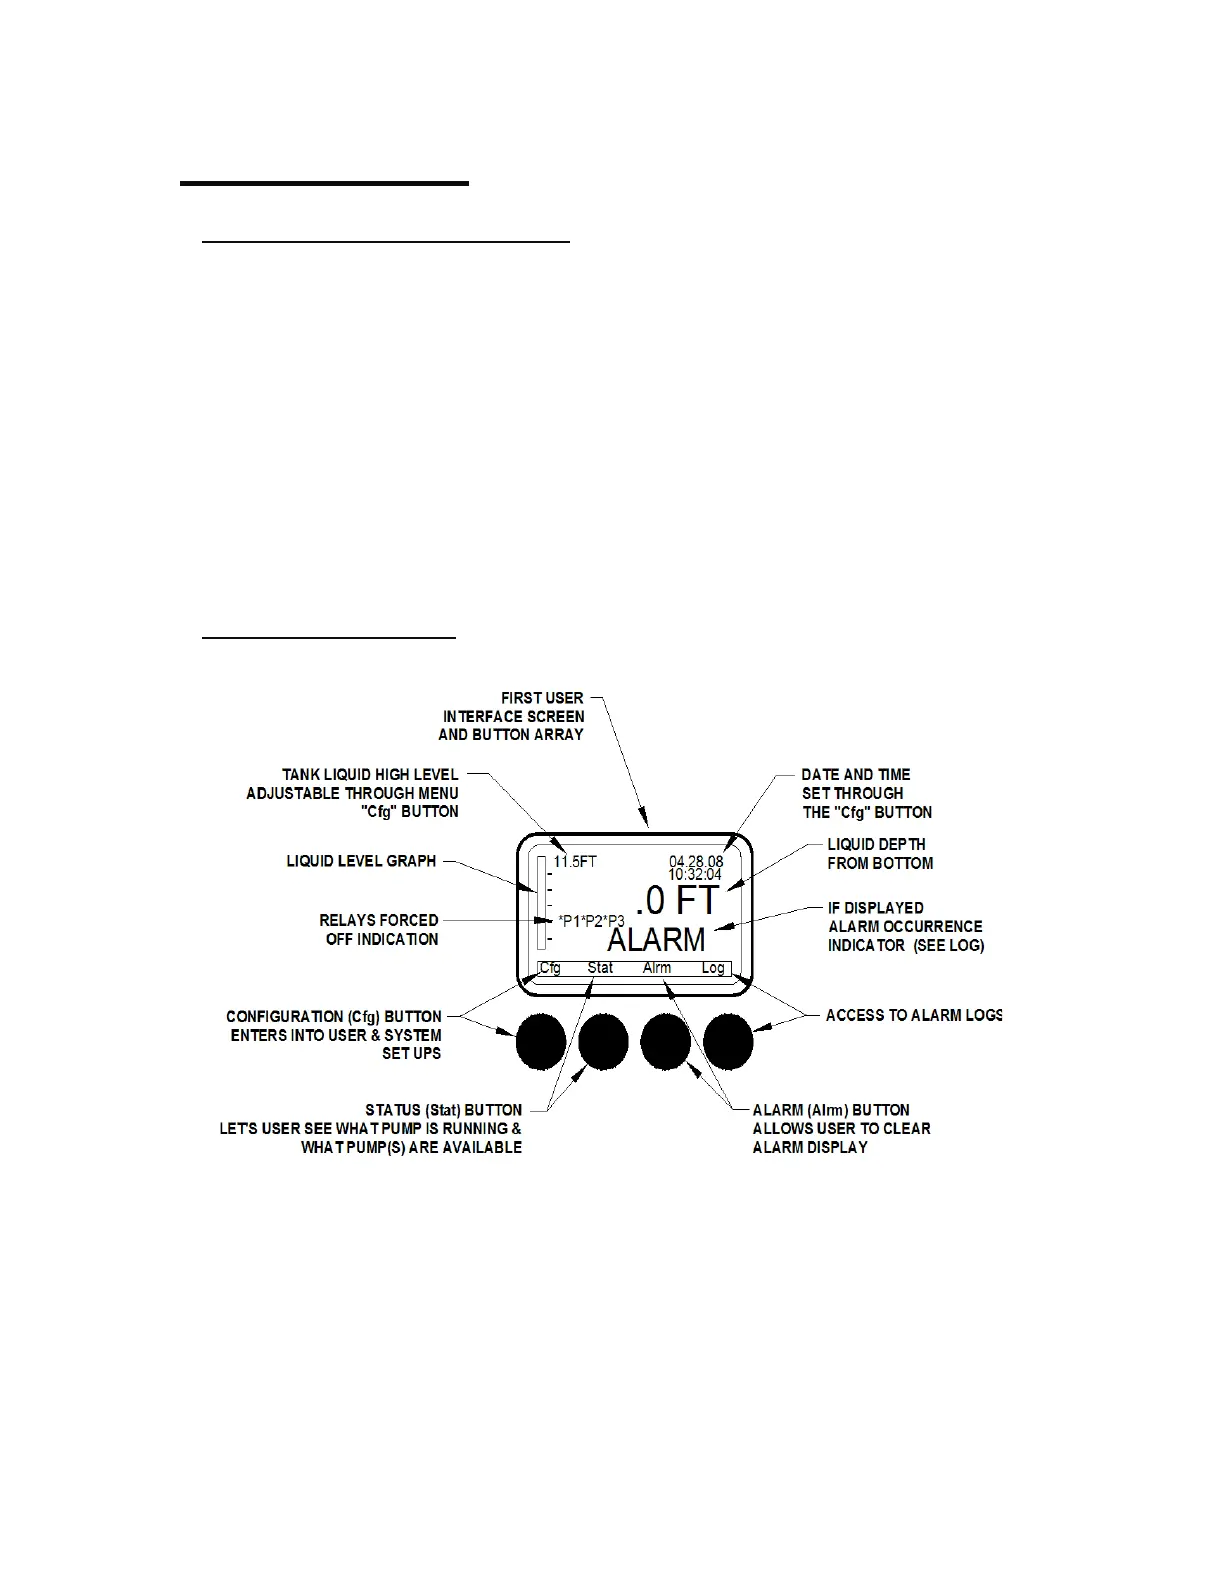
logo screen, the first user-interface screen will be shown. You may begin setup of
the controller when this first screen appears (see figure 8).
5.2 Top Screen Menu