Fig.
12
Fig.
13
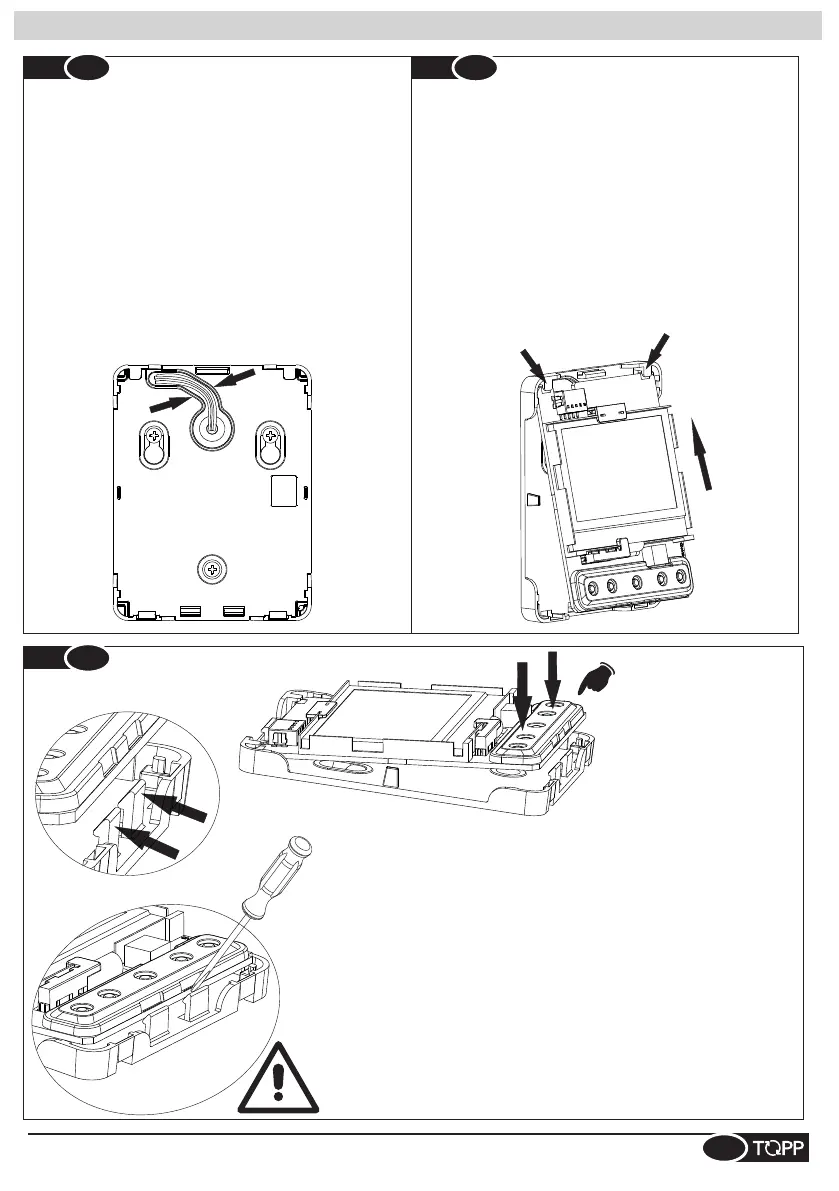
Fig.
11
Installazione selettore - Switch installation - Installation sélecteur - Instalación selector
SP- Después de haber conectado los cables al conector de la
tarjeta, colocarlos en el correspondiente alojamiento tal
como se indica en la figura.
IT- Dopo aver collegato i cavi al connettore della scheda,
posizionarli nell’apposita sede come indicato in figura.
EN- After connecting the cables to the connector on the
board, position them in their housing as shown in the figure.
DE- Nach dem Anschluss der Kabel an den Steckverbinder
der Platine, diese wie abgebildet befestigen.
FR- Après avoir connecté les câbles au connecteur de la
carte, les placer dans la fente prévu à cet effet, comme
indiqué dans la figure
IT- Posizionare la scheda infilando il PCB sotto le due asole
indicate.
EN- Position the board by fitting the PCB underneath the two
slots shown.
FR- Placer la carte, en enfilant le PCB en dessous des deux
fentes indiquées.
SP- Colocar la tarjeta introduciendo el PCB debajo de las dos
ranuras indicadas.
DE- Die Platine positionieren, indem die beiden Einkerbungen
an der PCB unter die abgebildeten Kunststoffnasen
geschoben werden.
IT- Guidaluce
EN- Lightguide
FR- Guide-lumière
SP- Guía de luz
DE- Lichtwellenleiter
IT- Spingere la scheda fino al fissaggio negli appositi incastri indicati in figura.
Flettere leggermente l’incastro con la punta di un cacciavite per facilitare
l’inserimento della scheda. N.B. Premere solamente sul guidaluce.
SP- Empujar la tarjeta hasta su fijación en los correspondientes encajes que
se indican en la figura. Doblar ligeramente el encaje con la punta de un
destornillador para facilitar la introducción de la tarjeta. N.B. Pulsar sólo en la
guía de luz.
DE- Auf die Platine drücken, bis sie an den abgebildeten Stellen einrastet. Die
Klemmlaschen mit der Spitze des Schraubendrehers biegen, um das
Einrasten der Platine zu vereinfachen. Hinweis: Nur auf den Lichtwellenleiter
drücken.
EN- Push the board until it fits in the special housings shown in the figure.
Bend the fitting slightly with the tip of a screwdriver to facilitate fitting the board.
Note: Press only on the lightguide.
FR- Pousser la carte jusqu'à sa fixation dans les articulations
correspondantes indiquées dans la figure. Fléchir légèrement l'articulation
avec la pointe d'un tournevis pour faciliter l'insertion de la carte. N.B. Appuyer
seulement sur le guide-lumière.
Installazione selettore - Switch installation - Installation sélecteur - Instalación selector - Installation des Schalters
7