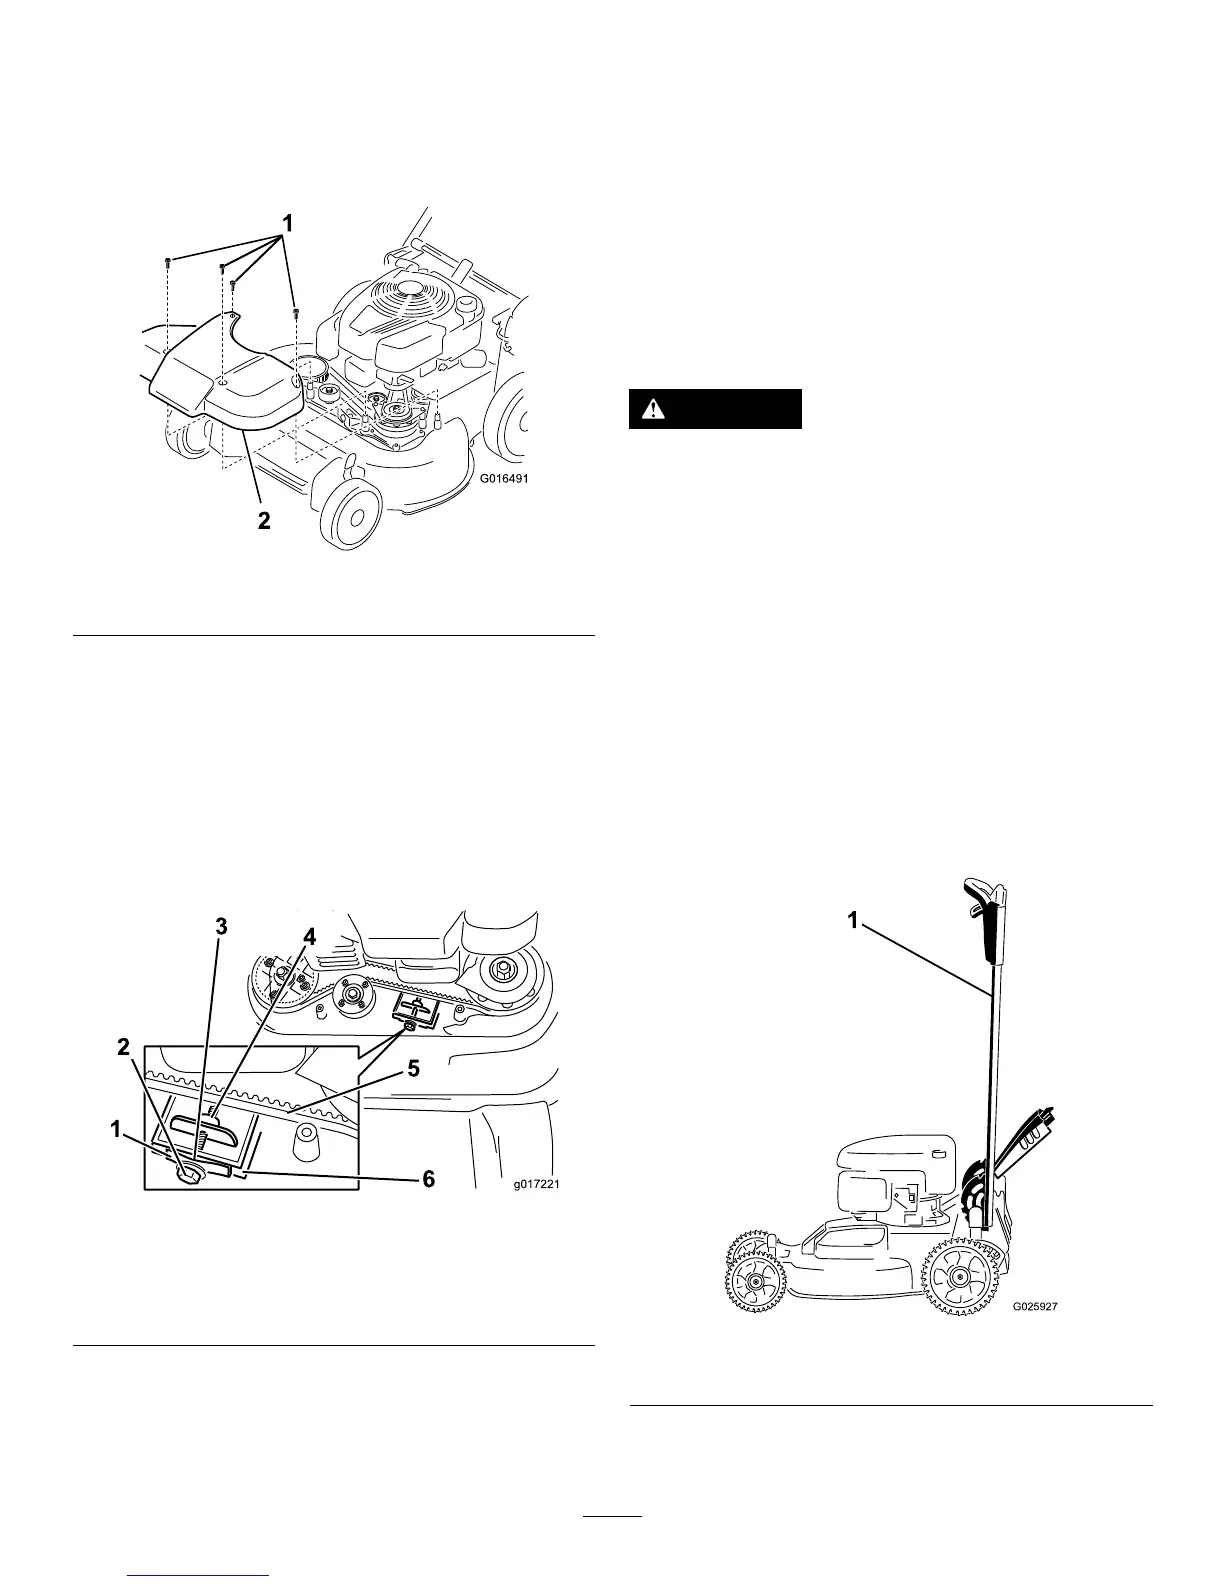
Figure39
1.Bolts
2.Cover
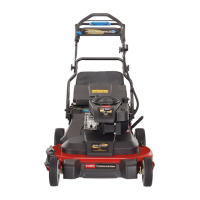
2.Brushorblowoutdebrisfromtheinsideoftheshield
andaroundalltheparts.
3.Holda0.25mm(0.010-inch)feelergauge,apieceof
paper,oranotecardagainstthewallandslideitdown
behindthebelttensionspring.
Note:Ifthereisavisiblegapbetweenthegaugeand
thespring,tightentheadjustingboltandthenutuntil
thepaperbarelyslidesfreelyinandoutofthegap
(Figure40).
Figure40
1.Belt-tensionspring4.Adjustingnut
2.Adjustingbolt5.Blade-drivebelt
3.Gap
6.Wall
Important:Donotovertightentheadjustingbolt.
Thiscoulddamagetheblade-drivebelt.
4.Installtheblade-drivesystemcoverthatyoupreviously
removed.
ServicingtheCuttingBlades
ServiceInterval:Yearly
Important:
Y ou will need a torque wr ench to install the
blades pr oper l y .
Ifyoudonothaveatorquewrenchor
areuncomfortableperformingthisprocedure,contact
anAuthorizedServiceDealer.
Examinethebladesforsharpnessandanywearordamage
wheneveryourunoutofgasoline.Ifthebladeedgesare
dullornicked,havethemsharpenedorreplacetheblades.
Ifabladeisworn,bent,damagedorcracked,replaceit
immediatelywithagenuineTororeplacementblade.
DANGER
Awornordamagedbladecanbreak,andapiece
ofthebladecouldbethrowntowardtheoperator
orabystander,resultinginseriouspersonalinjury
ordeath.
•Inspectthebladesperiodicallyforwearor
damage.
•Replaceawornordamagedblade.
Note:Maintainsharpbladesthroughoutthecuttingseason,
becausesharpbladescutcleanlywithouttearingorshredding
thegrassblades.
PreparingtoServicetheCuttingBlades
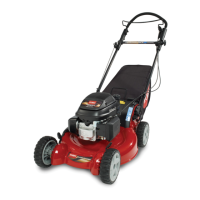
1.Lockthehandleintheverticalposition(Figure41);
refertoAdjustingtheHandleHeight(page11).