Figure47
1.Blade(2)
4.Tightenthesecondblade;refertostep2.
5.Rotatethebladesbyhandafull360°turntoensure
thattheydonottouch.
Note:Ifthebladestoucheachother,theyarenot
mountedcorrectly.Repeatsteps1through3,untilthe
bladesnolongertoucheachother.
WARNING
Incorrectlyinstallingthebladescoulddamagethe
machineorcauseaninjurytotheoperatororto
bystanders.
CleaningundertheMachine
ServiceInterval:Beforeeachuseordaily
1.Movethemachinetoalevelsurface.
2.Stoptheengineandwaitforallmovingpartstostop
beforeleavingtheoperatingposition.
3.Lowerthemachinetoitslowestcutting-heightsetting.
RefertoAdjustingtheCuttingHeight(page10).
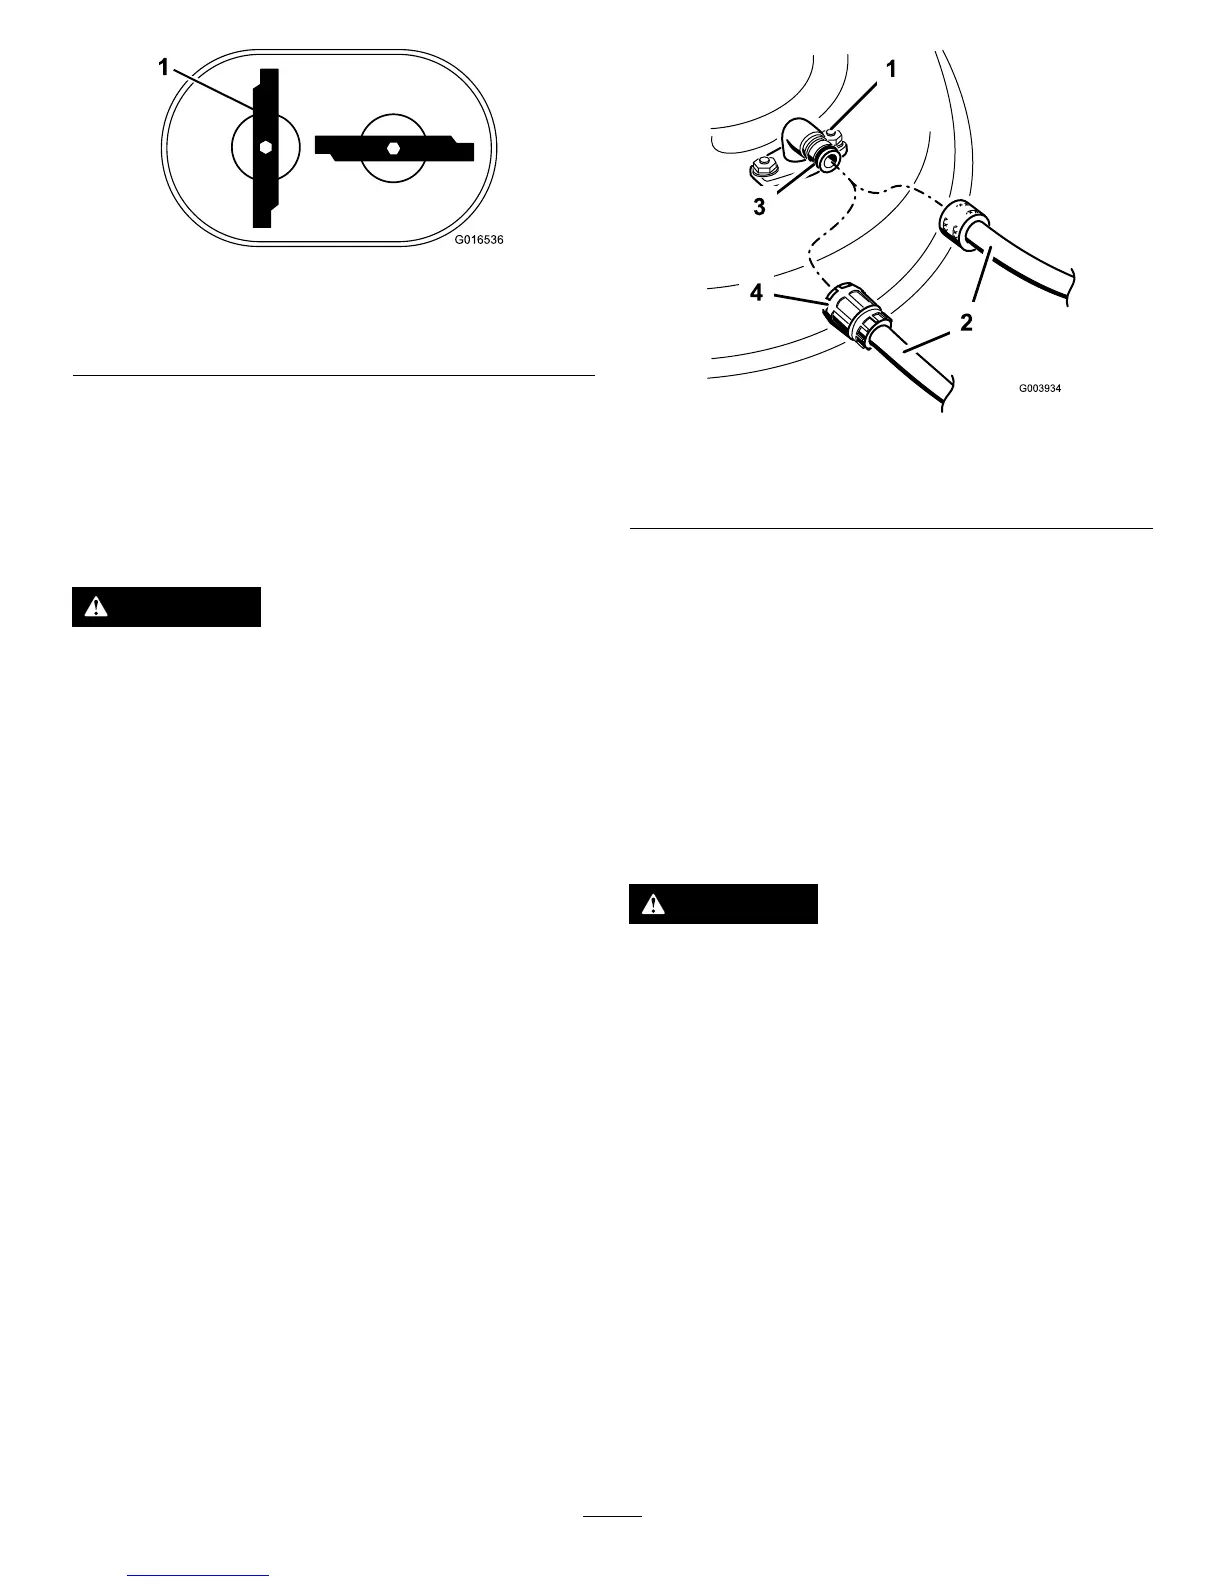
4.Attachahosetothewashouttting,andturnthewater
onhigh(Figure48).
Note:Spreadpetroleumjellyonthewashouttting
O-ringtomakethecouplingslideoneasierandprotect
theO-ring.
Figure48
1.Washouttting3.O-ring
2.Hose
4.Coupling
5.Starttheengine,engagetheblade-controllever,andlet
themachinerunfor1to3minutes.
6.Disengagetheblade-controllever,stoptheengine,and
waitforallmovingpartstostop.
7.Shutoffthewaterandremovethecouplingfromthe
washouttting.
Note:Ifthemachineisnotcleanafterasingle
washing,soakitandletitstandfor30minutes.Then
repeattheprocess.
8.Runthemachineagainandengagethebladesfor1to3
minutestoremovetheexcesswater.
WARNING
Abrokenormissingwashoutttingcouldexpose
youandotherstothrownobjectsorbladecontact.
Contactwithabladeorthrowndebriscancause
injuryordeath.
•Replaceabrokenormissingwashouttting
immediately,beforeusingthemachineagain.
•Neverputyourhandsorfeetunderthemachine
orthroughopeningsinthemachine.
23