ConnectingtheReamerandProduct
WARNING
Ifthedrillrotatesorextendswhileyouorothersare
manuallyworkingonthedrillbitorpipeinfrontof
themachine,theworkercouldgetcaughtinthebit
orpipecausingseriousinjury,amputation,ordeath.
•Enabletheexit-sidelockoutonthe
exit-side-lockouttransmitterbeforeapproaching
thedillbitorpipewhenattachedtothemachine.
Thiswilldisablethedrillcarriage.
•Donotwearlooseclothingorjewelrywhen
workingonadrillbitorpipeattachedtothe
machine.Tielonghairupandoutoftheway.
1.Usingtheexit-side-lockouttransmitter,enabletheexit
sidelockout.
2.Removethedrillheadfromtheleadbar.
3.Doublecheckthereamertoensurethattheuidports
arecleanandfreefromobstructions.
4.Installthereamerandswivelontotheendofthelead
barasdirectedbythereamermanufacturer
5.Connecttheproducttothereamerusinganappropriate
pullingconnection;refertoyourAuthorizedToro
Dealertoacquiretheappropriatepullertomeetyour
requirements.
RemovingDrillPipes
1.Usingtheexit-side-lockouttransmitter,enabletheexit
sidelockout.
2.Installadrill-pipewiperaroundthepipeandintothe
retainingbracketonthefrontofthemachine.
Thiswillremovemostofthedirtandmudfromthe
pipeasyoupullitbackintothemachine,keepingthe
machineclean.ContactyourAuthorizedToroDealer
topurchasedrill-pipewipers.
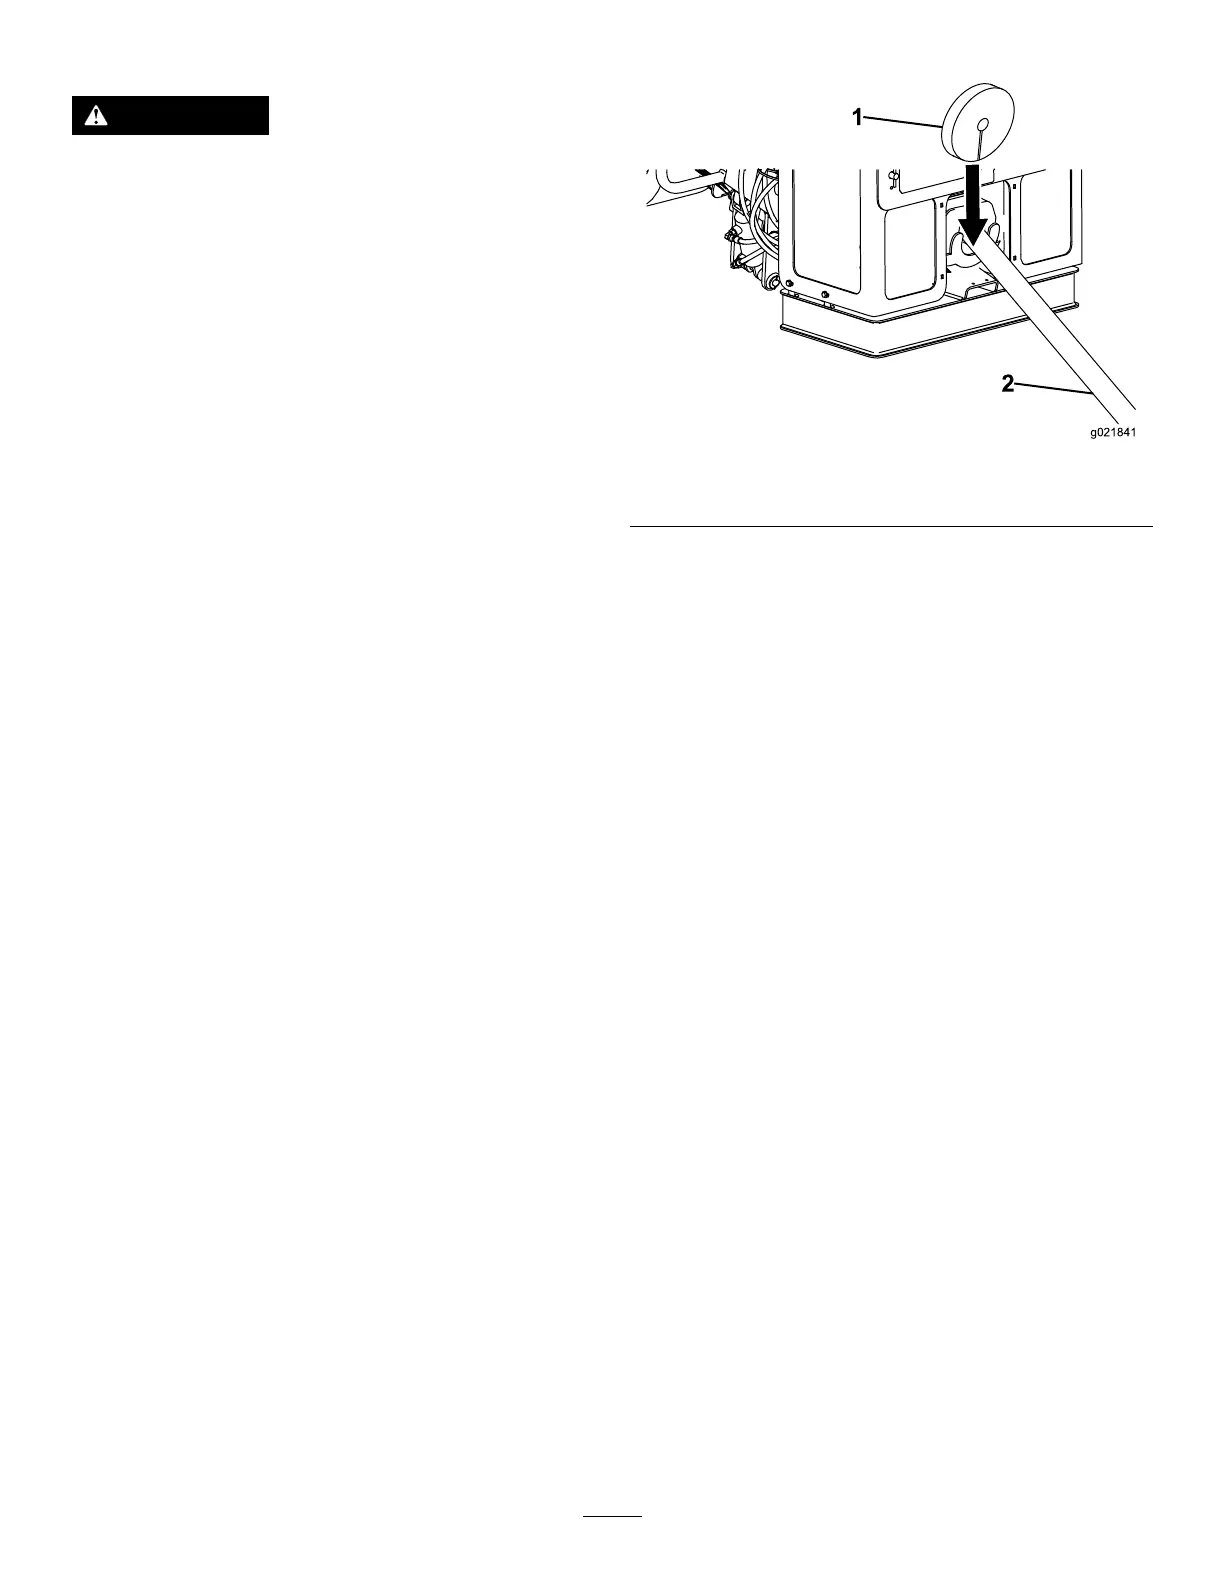
Figure53
1.Drill-pipewiper2.Drillpipe
3.Disengagetheexit-sidelockoutandresetthesystem.
4.Beginrotatingthedrillspindleclockwiseandslowly
retractthedrillcarriagetopullthepipebackintothe
machine
5.Whenthejointbetweenthepipesiscenteredbetween
thetwowrenches,thedrillcarriagewillstop,anda
greenlightwillilluminatebelowthesprayvalve.
6.Closethelowerwrenchontothepipejoint.
Note:Thedrillinguidwillautomaticallyshutoff
whenyouclosethelowerwrench.
7.Rotatethepipegrippertothedrillframe,extendthe
pipe-gripperarmstothepipe,andgripthepipeto
supportit.
8.Closetheupperwrenchontothepipejoint.
9.Rotatetheupperwrenchcounterclockwiseuntilthe
jointisloosened.
10.Releasetheupperwrench.
11.Pullbackthecarriageapproximately12.7mm(0.5
inch).
Note:Thiswillallowthecarriagetooat,andwillnot
damagethepipethreads.
12.Rotatethedrillspindlecounterclockwisemoving
rearwardslowlyuntilthepipesareseparated.
13.Movethedrillcarriagebackuntilthemale-pipethreads
justclearthefemaleendofthelowerpipe,thenclose
theupperwrenchontothepipeend,butnotonthe
threads.
14.Rotatethedrillspindlecounterclockwiseuntilthe
upper-pipejointisloosebutnotseparated.
15.Releasetheupperwrench.
16.Movethedrillcarriagebackuntilthepipeislinedup
withthepipeholder.
53