Step
4
Checking and Adjusting the
Shift Lever Plate
No Parts Required
Procedure
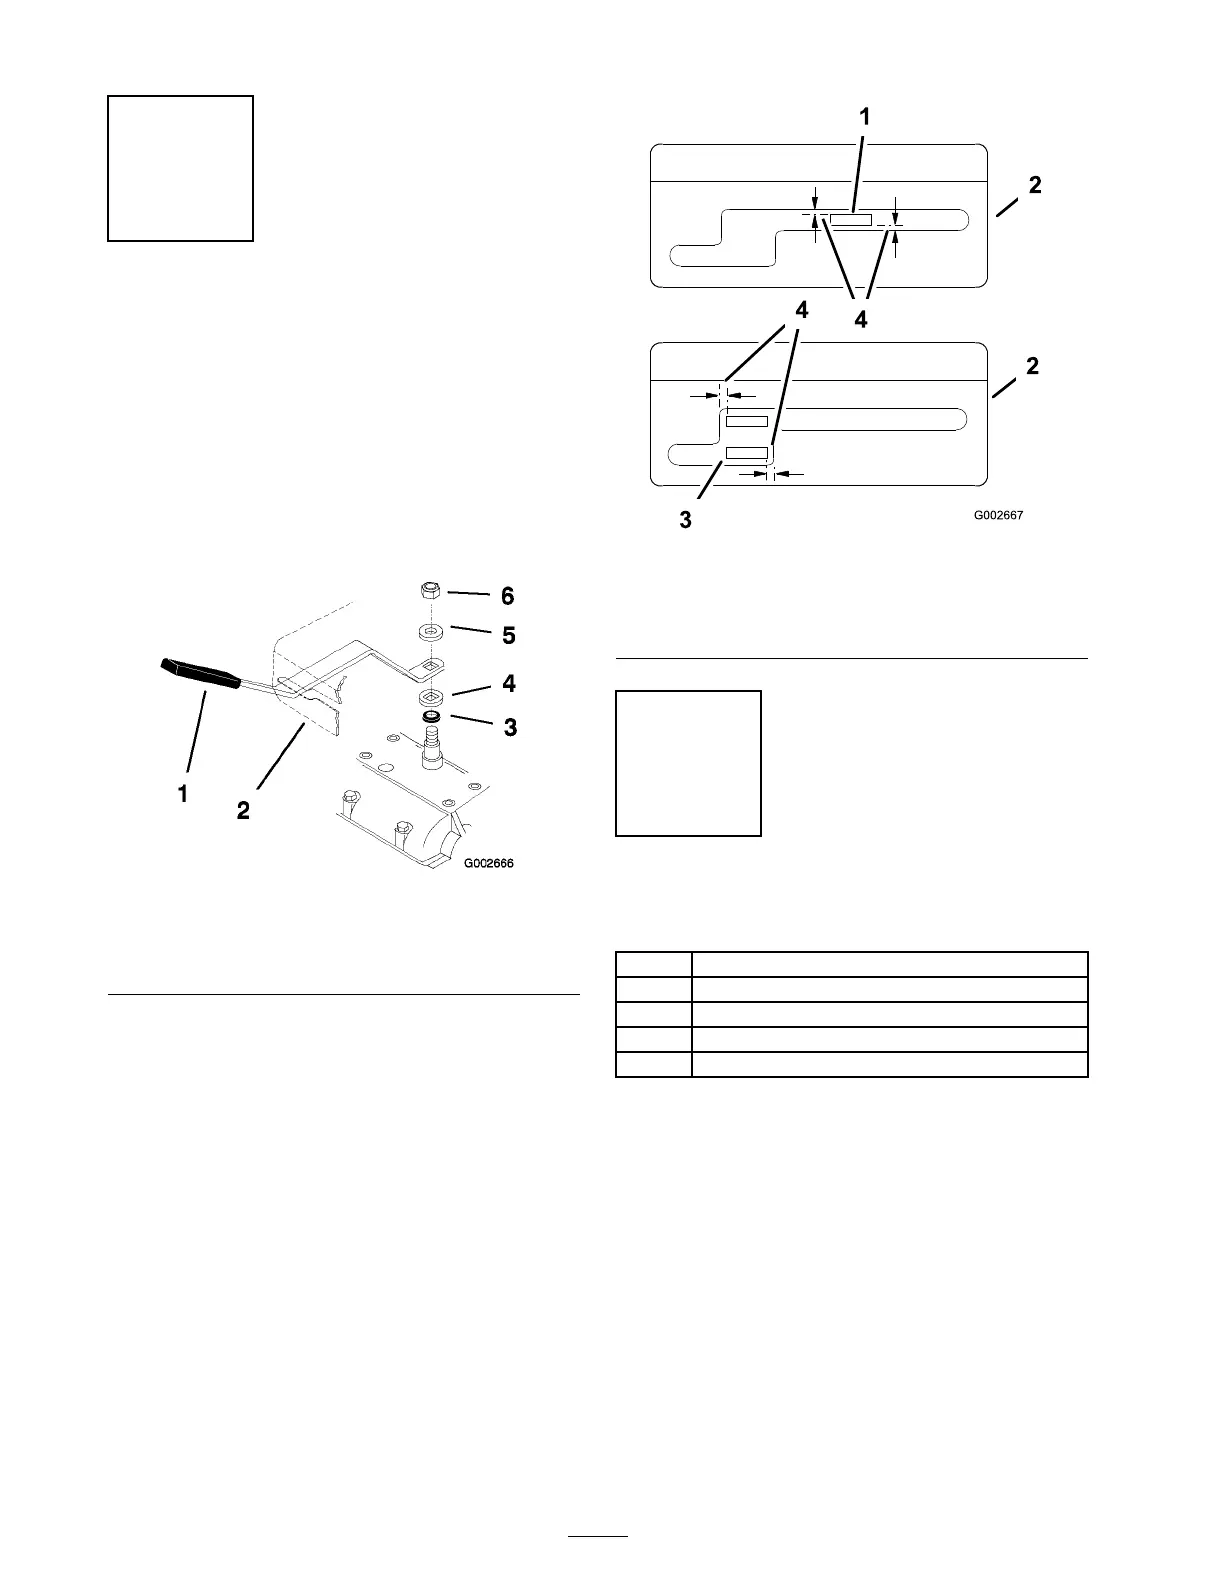
1. Shift lev er to second g ear and c hec k alignment
of lev er in slot of shift lev er plate . T he
clearance betw een top and bottom of the shift
lev er should be equal ( Figure 8 ).
Figure 8
1. Shift lever 4. Square hole washer
2. Shift lever plate 5. Spring washer
3. Rubber seal washer 6. Locknut, 3/8 inch
2. If clearance is not cor rect, remo v e lev er and
bend it slightly to adjust ( Figure 8 ).
Note: Do not bend lev er while it is attac hed
to the transmission shaft or damag e ma y occur .
3. Shift lev er to neutral and c hec k alignment of
lev er in slot of shift lev er plate . T he clearance
on the sides of shift lev er should be equal
( Figure 8 ).
4. If clearance is not cor rect, loosen shift lev er
plate and adjust it side-to-side . Tighten the
shift lev er plate .
Figure 9
1. Shift lever in 2nd gear 3. Shift lever in neutral
position
2. Shift lever plate 4. Equal distance
Step
5
Installing the Control Rods
Parts needed for this step:
2
Control rods
2
Cotter pin
2
Clevis Pin
2
Washer
2
Hairpin cotter pin
Procedure
1. Install the control rods into the upper control
bar and the blade control bail. Secure the
control rods with 2 cotter pins ( Figure 10 ).
14