Installing the Foam and Paper
Elements
Important: T o pr ev ent engine dama ge,
al w ays operate the engine with the complete
f oam and paper air cleaner assembl y installed.
1. Carefully slide the foam element onto the
paper air cleaner element ( Figure 31 ).
2. Place the air cleaner assembly onto the air
cleaner base ( Figure 31 ).
3. Install the air cleaner co v er and secure with
co v er n uts ( Figure 31 ).
Servicing the Engine Oil
Chang e the engine oil after ev er y 100 operating
hours .
Note: Chang e the oil more frequently when the
operating conditions are extremely dusty or sandy .
Oil T ype: Deterg ent oil (API ser vice SF , SG or SH)
Crankcase Capacity: w/filter , 64 oz. (1.9 l)
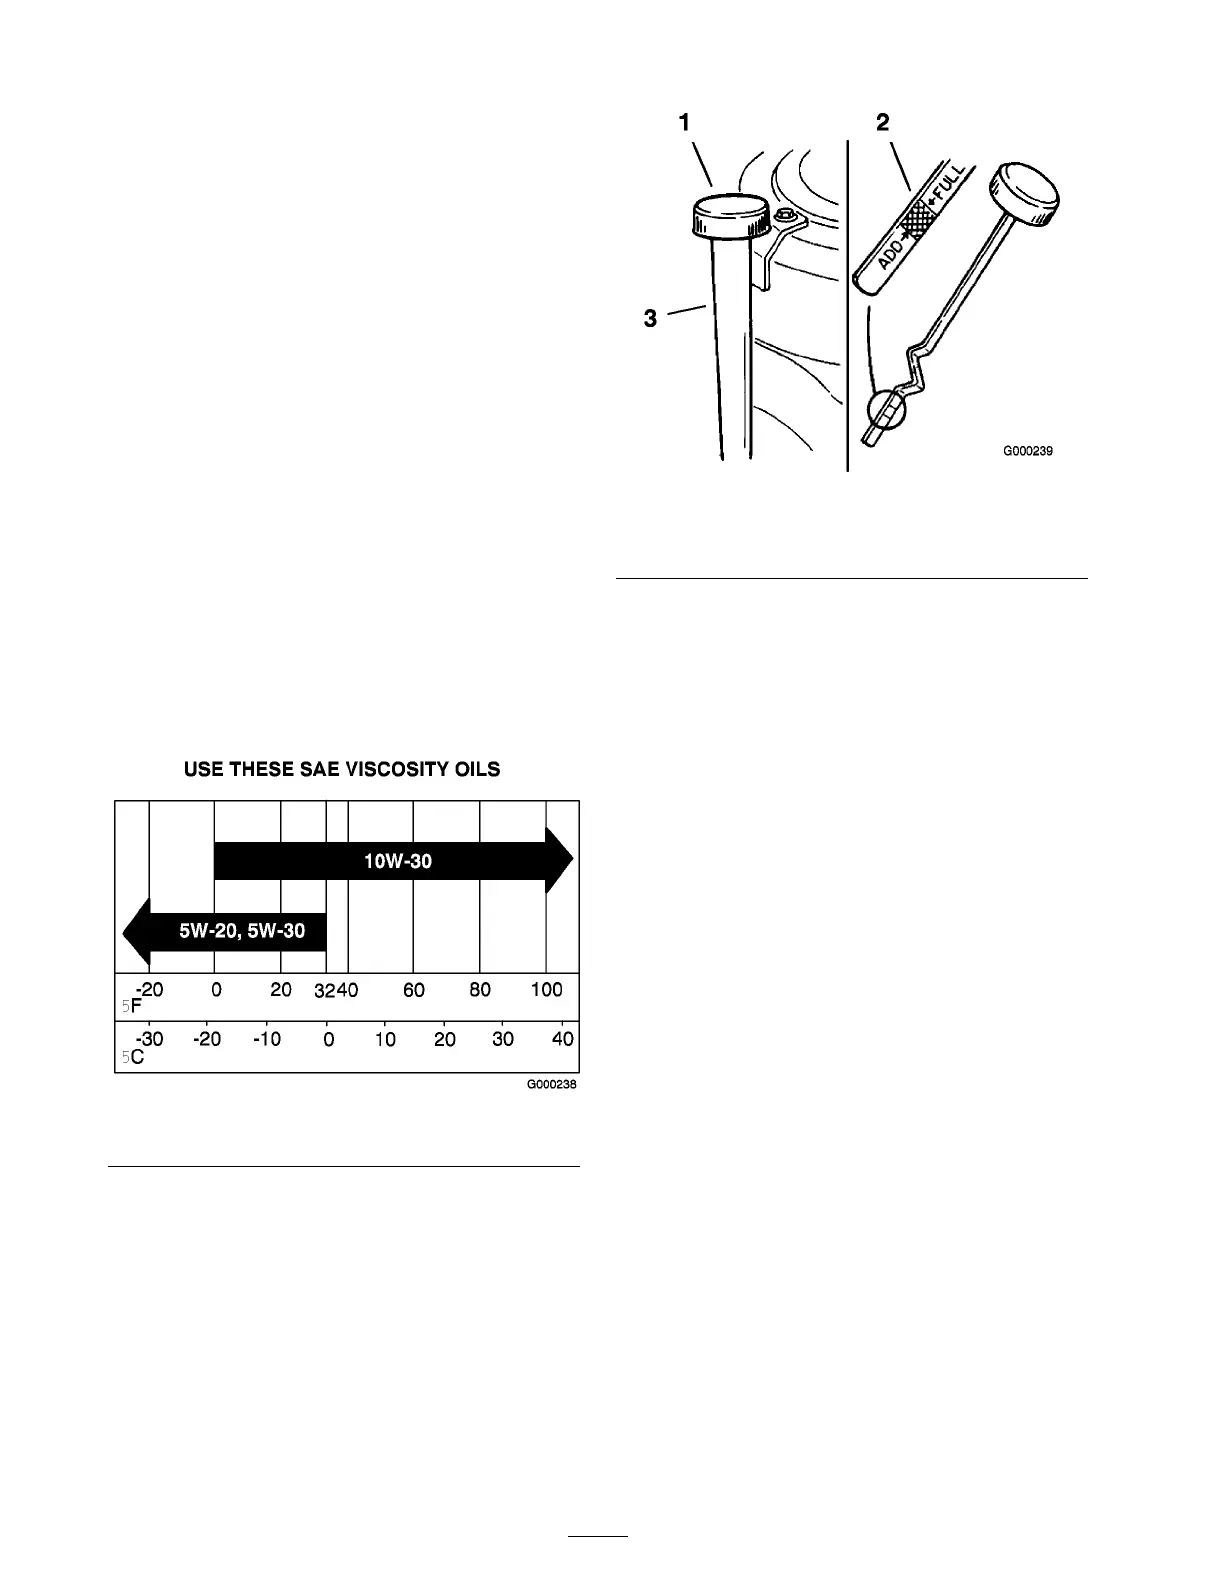
Viscosity: See table belo w
Figure 34
Checking the Engine Oil Level
1. P ark the mac hine on a lev el surface .
2. Diseng ag e the PTO and set the parking brak e .
3. Stop the engine , remo v e the k ey , and w ait for
all mo ving par ts to stop before lea ving the
operating position.
4. Clean around the oil dipstic k ( Figure 35 ) so
that dir t cannot fall into the filler hole and
damag e the engine .
Figure 35
1. Oil dipstick 3. Filler tube
2. Metal end
5. Unscrew the oil dipstic k and wipe the end
clean ( Figure 35 ).
6. Slide the oil dipstic k fully into the filler tube ,
but do not thread onto tube ( Figure 35 ).
7. Pull the dipstic k out and look at the end. If the
oil lev el is lo w , slo wly pour only enough oil into
the filler tube to raise the lev el to the full mark.
Important: Do not o v erfill the crankcase
with oil and r un the engine; engine dama ge
can r esult.
Changing the Oil
1. Star t the engine and let it r un fiv e min utes .
T his w ar ms the oil so it drains better .
2. P ark the mac hine so that the drain side is
slightly lo w er than the opposite side to assure
the oil drains completely .
3. Diseng ag e the po w er tak e off (PTO) and set
the parking brak e .
4. Stop the engine , remo v e the k ey , and w ait for
all mo ving par ts to stop before lea ving the
operating position.
5. Slide the drain hose o v er the oil drain v alv e .
6. Place a pan belo w the drain hose . R otate oil
drain v alv e to allo w oil to drain ( Figure 36 ).
7. W hen oil has drained completely , close the
drain v alv e .
8. R emo v e the drain hose ( Figure 36 ).
30