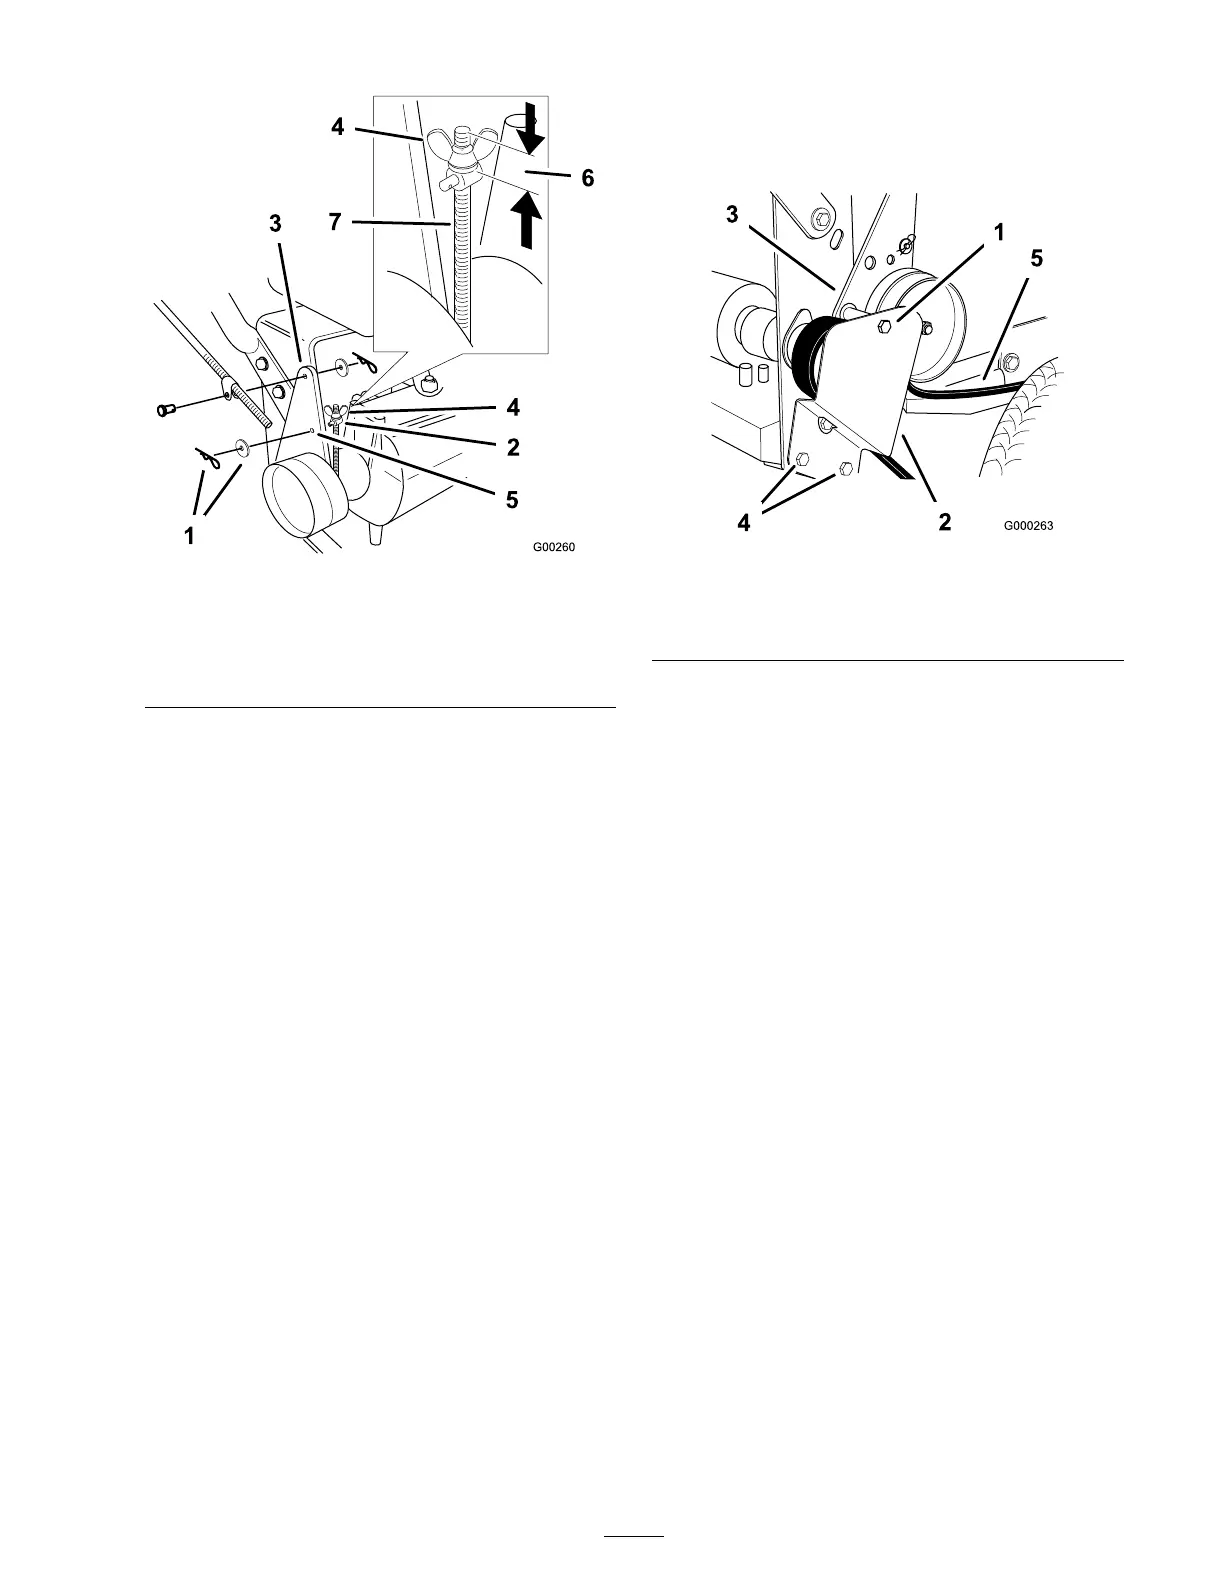
Figure 48
1. Hairpin cotter and washer 5. Hole F
2. Trunnion
6. Initial adjustment- 1-1/4
inch (32 mm)
3. Brake lever 7. Rod
4. Wing nut
6. R otate the wing n ut cloc kwise to increase the
braking pressure .
7. R otate the wing n ut countercloc kwise to
decrease the braking pressure .
8. Install the tr unnion into hole F ( Figure 48 ).
Tighten the wing n ut.
9. Secure tr unnion to brak e lev er with w asher and
hair pin cotter ( Figure 48 ).
10. Chec k the brak e operation ag ain; refer to
Chec king the Brak es .
Important: W ith the par king brak e
r eleased, the r ear wheels must r otate fr eel y
when y ou push the mo w er . If brak e action
and fr ee wheel r otation cannot be achiev ed
contact y our ser vice dealer immediatel y .
Belt Maintenance
Replacing the Traction Drive
Belt
Chec k all belts after ev er y 50 operating hours or
monthly , whic hev er occurs first. Look for crac ks ,
w ear , and signs of o v erheating .
1. R emo v e the top capscrew securing idler
suppor t and idler brac k et to rear frame
( Figure 49 ).
Figure 49
1. Top capscrew 4. Bottom capscrew
2. Idler bracket 5. Traction drive belt
3. Idler support
2. Loosen bottom tw o mounting screws enough
to allo w belt to pass betw een dri v e pulley and
idler suppor t ( Figure 49 ).
3. Raise the wheel off the g round, to allo w the
belt to be remo v ed, and remo v e the belt.
4. Install a new belt.
5. Install the top capscrew securing the idler
suppor t and idler brac k et to the rear frame
( Figure 49 ).
6. Tighten the bottom tw o mounting screws
enough to allo w the belt to pass betw een the
dri v e pulley and idler suppor t ( Figure 49 ).
Replacing the Transmission
Belt
1. Diseng ag e the PTO and set the parking brak e .
2. Stop the engine , remo v e the k ey , and w ait for
all mo ving par ts to stop before lea ving the
operating position.
3. R emo v e PTO dri v e belt. R efer to R e placing
the PTO Dri v e Belt in the Belt Maintenance ,
pag e 37 .
4. Raise the front of the mac hine and hold with
jac k stands .
37