CHASSIS
3-18
Toro 30” Aerator Service Manual
3
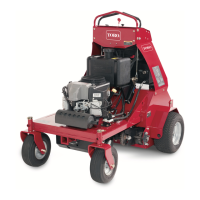
A. Sheel beraing mount E. Screw
B. Tapered roller bearing F. Wheel axle
C. Spacer G. Castle nut
D. Grease seal H. Cotter pin
Axle Bearing Assembly Installation
1. If installing an axle and bearing assembly, proceed
to step 3. Replacing a damaged wheel axle rst
remove it from the wheel bearing mount. Check to
make sure the grease seals are not damaged. You
will notice the grease seals are installed backwards
to allow grease to be purged when greasing the
unit. If either of these are damaged it will need to
be replaced. Mount a spacer, the bearing mount,
another spacer, and then install the castle nut and
cotter pin using the instructions in the next step (Fig.
060).
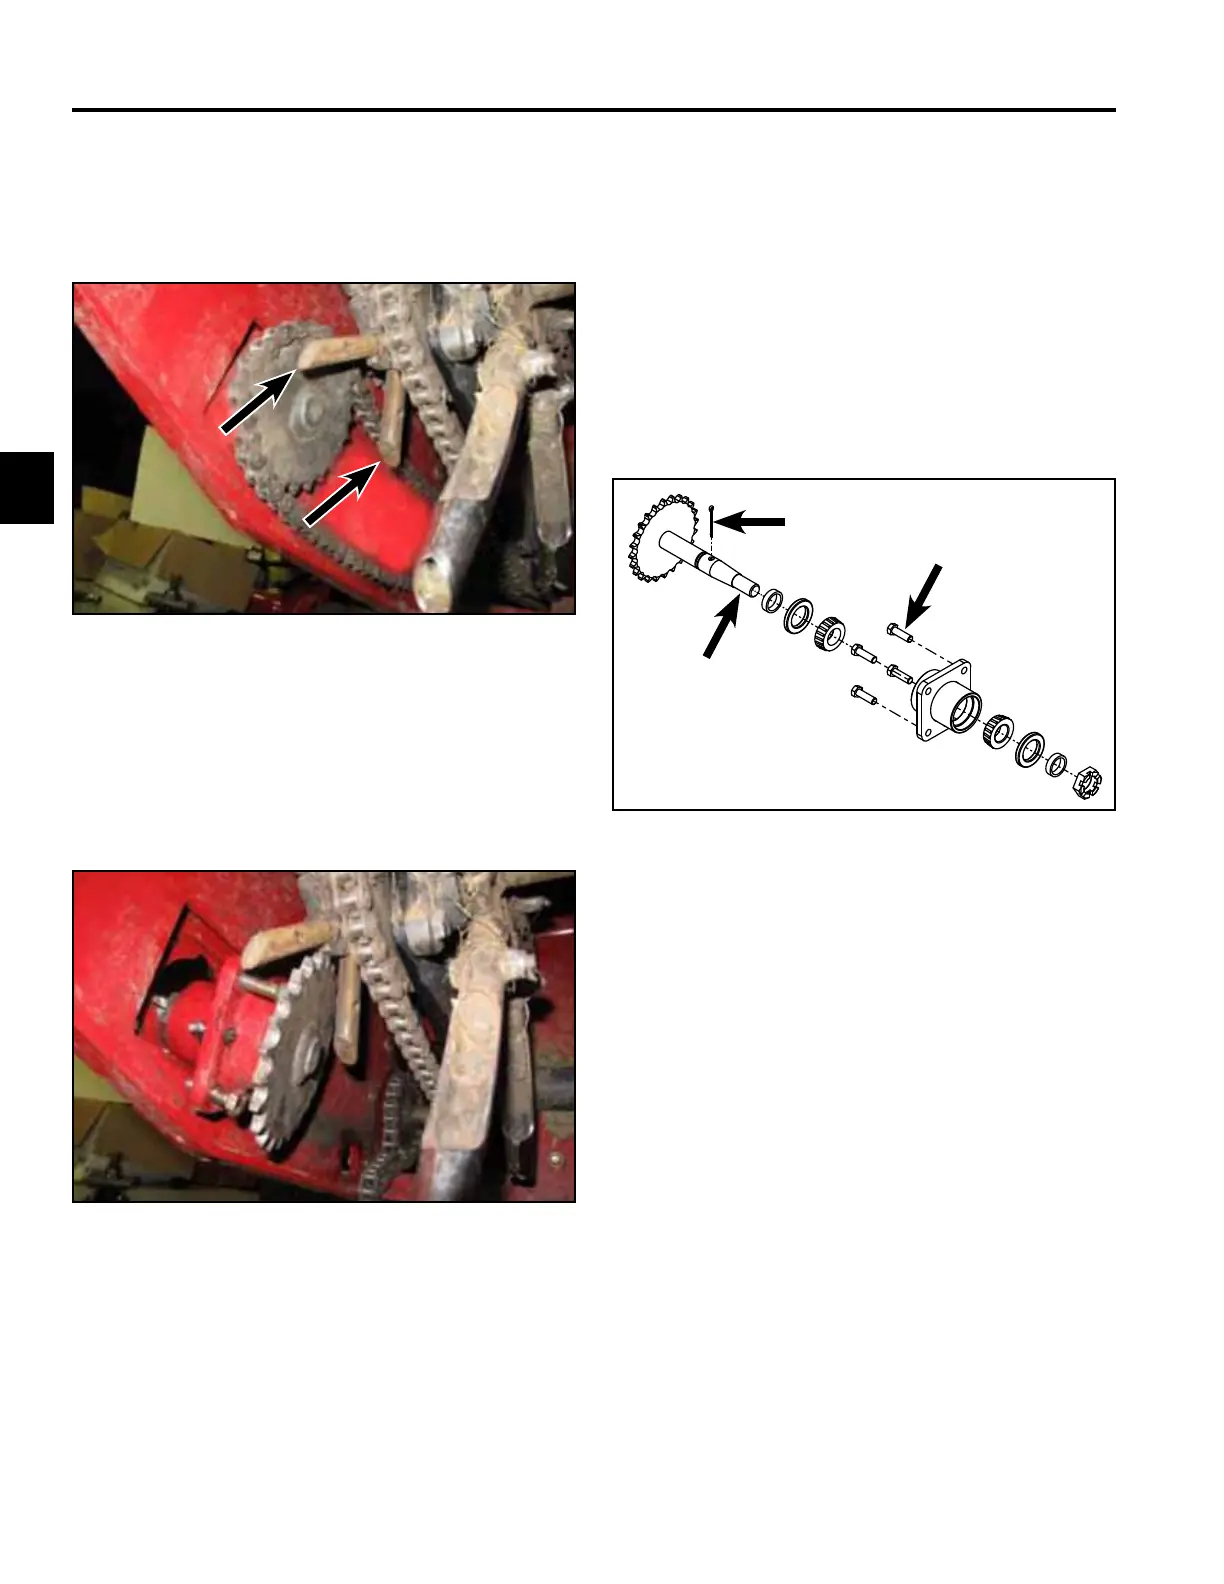
Fig. 058 IMG-1056a
7. Slide the axle sub assembly outward (it will be
necessary to cock the unit at an angle to get the
rear-tine stub shaft hooked behind the sprocket).
As you rotate the shaft counterclockwise using one
of the tines on the next set of tines, the unit can be
removed (Fig. 059).
Fig. 059 IMG-1059
Fig. 060 axle & bearing asm
6. Remove two tines from the outside spider that are
in-line to each other (Fig. 058). It is not necessary to
remove the connector link from the chain if it is not
being replaced. Work the chain off the sprocket and
let it drop down.
A
E
F
H
B
D
C
G
2. Install the castle nut and tighten it to 83 ft-lbs. (112.5
Nm) while turning the hub, loosen it, then re-torque
to 14 ft-lbs. (19.0 Nm). Loosen the castle nut to the
rst available slot that allows the cotter pin to be
inserted and bent open.