ElectricalSystem
Maintenance
ServicingtheBattery
ServiceInterval:Monthly
DANGER
Batteryelectrolytecontainssulfuricacid,whichisa
deadlypoisonandcausessevereburns.
Donotdrinkelectrolyteandavoidcontactwithskin,
eyes,orclothing.Wearsafetyglassestoshieldyour
eyesandwearrubberglovestoprotectyourhands.
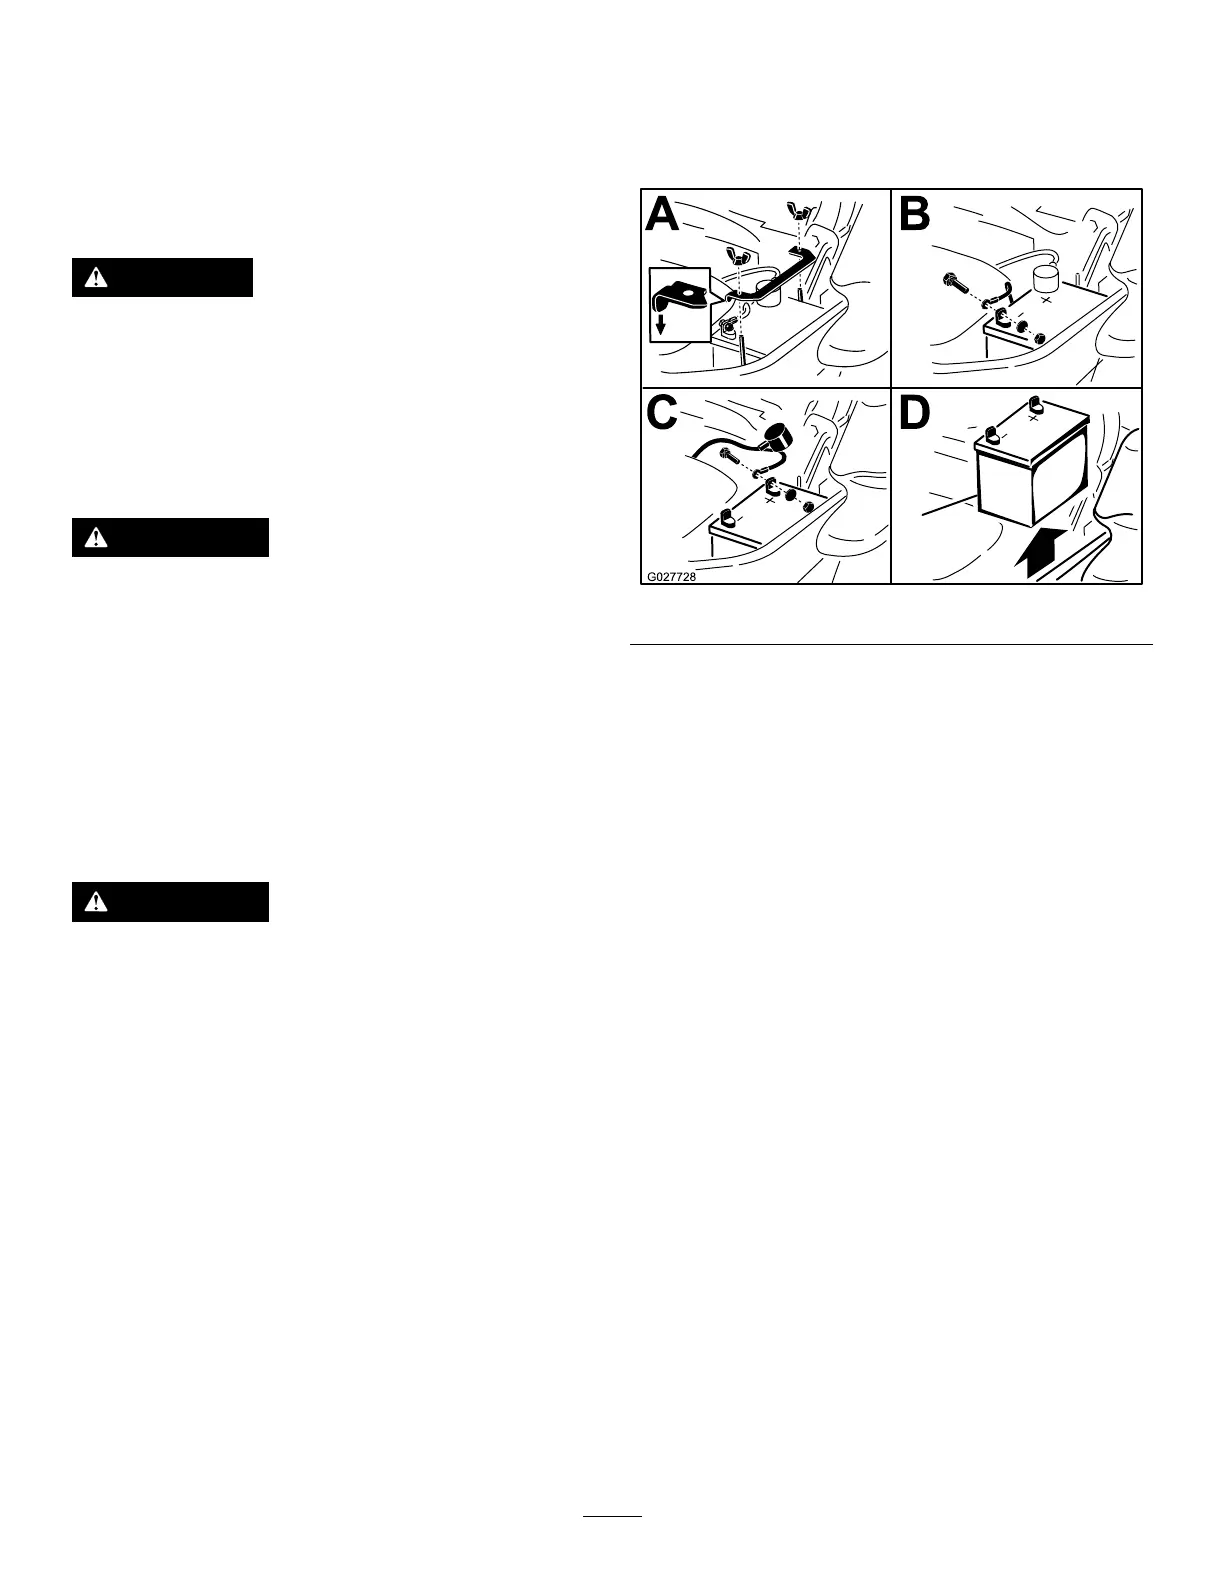
RemovingtheBattery
WARNING
Batteryterminalsormetaltoolscouldshortagainst
metalmachinecomponents,causingsparks.Sparks
cancausethebatterygassestoexplode,resulting
inpersonalinjury.
•Whenremovingorinstallingthebattery,donot
allowthebatteryterminalstotouchanymetal
partsofthemachine.
•Donotallowmetaltoolstoshortbetween
thebatteryterminalsandmetalpartsofthe
machine.
WARNING
Incorrectbatterycableroutingcoulddamagethe
machineandcables,causingsparks.Sparkscan
causethebatterygassestoexplode,resultingin
personalinjury.
•Alwaysdisconnectthenegative(black)battery
cablebeforedisconnectingthepositive(red)
cable.
•Alwaysconnectthepositive(red)batterycable
beforeconnectingthenegative(black)cable.
1.Disengagetheblade-controlswitch(PTO),movethe
motion-controlleverstotheNEUTRAL-LOCKposition,
andsettheparkingbrake.
2.Stoptheengine,removethekey,andwaitforallmoving
partstostopbeforeleavingtheoperatingposition.
3.Disconnectthenegativebatterycable(black)fromthe
negative(-)batteryterminal(Figure51).
4.Slidetheredterminalbootoffthepositive(+)battery
terminalandremovethepositive(red)batterycable
(Figure51).
5.Removethewingnutsecuringthebatteryclamp
(Figure51).
6.Removetheclamp(Figure51).
7.Removethebattery(Figure51).
Figure51
InstallingtheBattery
1.Positionbatteryinthetraywiththeterminalposts
oppositefromthehydraulictank(Figure51).
2.Installthepositive(red)batterycabletothepositive
(+)batteryterminal.
3.Installthenegative(black)batterycableandground
wiretothenegative(-)batteryterminal.
4.Securethecableswith2bolts,2washers,and2locknuts
(Figure51).
5.Slidetheredterminalbootontothepositive(+)battery
terminal.
6.Installtheclampandsecureitwiththewingnut(Figure
51).
40