RemovingtheBlades
Replaceabladeifithitsanobject,ifthebladeisoutofbalance,
orifthebladeisbent.Toensureoptimumperformanceand
continuedsafetyconformanceofthemachine,usegenuine
Tororeplacementblades.Replacementbladesmadebyother
manufacturersmayresultinnonconformancewithsafety
standards.
1.Holdthebladeendusingaragorathicklypadded
glove.
2.Removethebladebolt,curvedwasher,andbladefrom
thespindleshaft(Figure83).
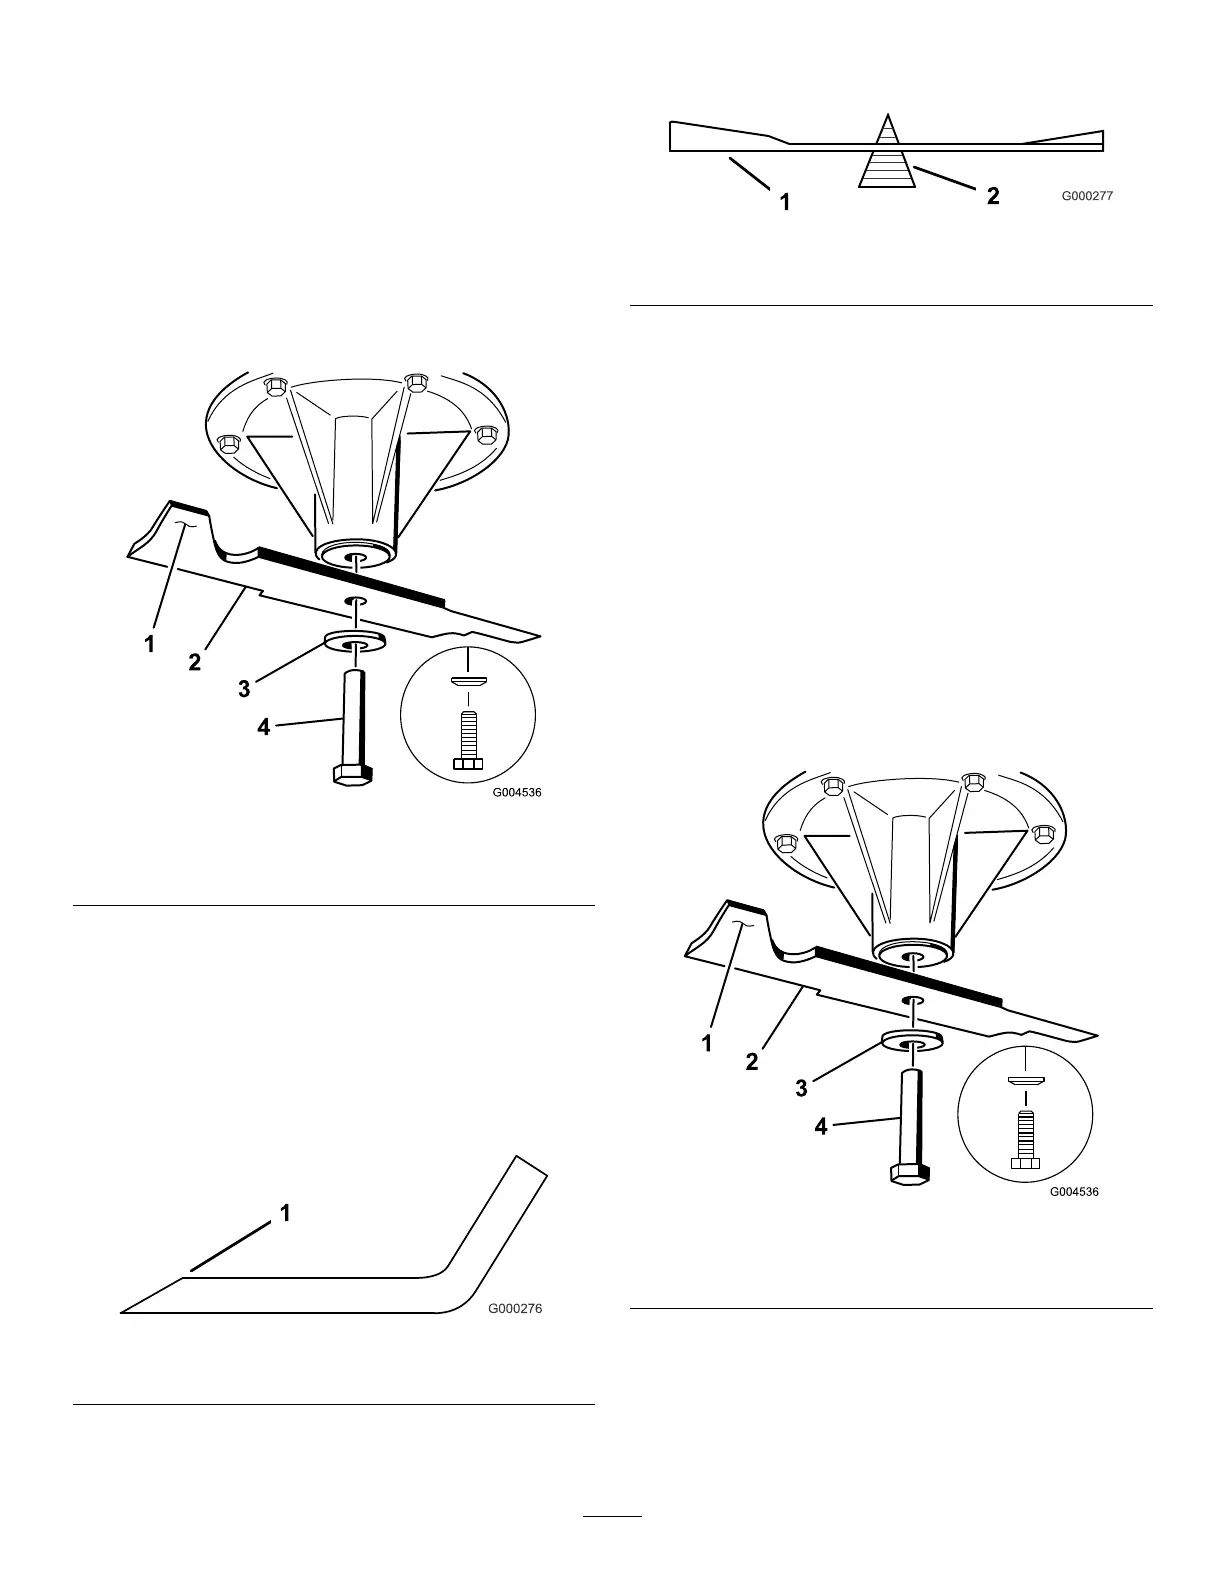
Figure83
1.Sailareaoftheblade3.Curvedwasher
2.Blade4.Bladebolt
SharpeningtheBlades
1.Usealetosharpenthecuttingedgeatbothendsof
theblade(Figure84).
Note:Maintaintheoriginalangle.
Note:Thebladeretainsbalanceifyouremovethe
sameamountofmaterialfrombothcuttingedges.
Figure84
1.Sharpenattheoriginalangle
2.Checkthebalanceofthebladebyputtingitonablade
balancer(Figure85).
Note:Ifthebladestaysinahorizontalposition,the
bladeisbalancedandreadytouse.
Figure85
1.Blade2.Balancer
3.Ifthebladeisnotbalanced,lesomemetalofftheend
ofthesailareaonly(Figure83).
4.Repeatthisprocedureuntilthebladeisbalanced.
InstallingtheBlades
1.Installthebladeontothespindleshaft(Figure86).
Important:Thecurvedpartoftheblademust
pointupwardtowardtheinsideofthemowerto
ensurepropercutting.
2.Installthespringdiskandbladebolt(Figure86).
Note:Installthespring-diskconetowardthebolt
head.
3.Torquethebladeboltto115to150N∙m(85to
110ft-lb).
Figure86
1.Sailareaoftheblade3.Springdisk
2.Blade4.Bladebolt
57