Setup
LooseParts
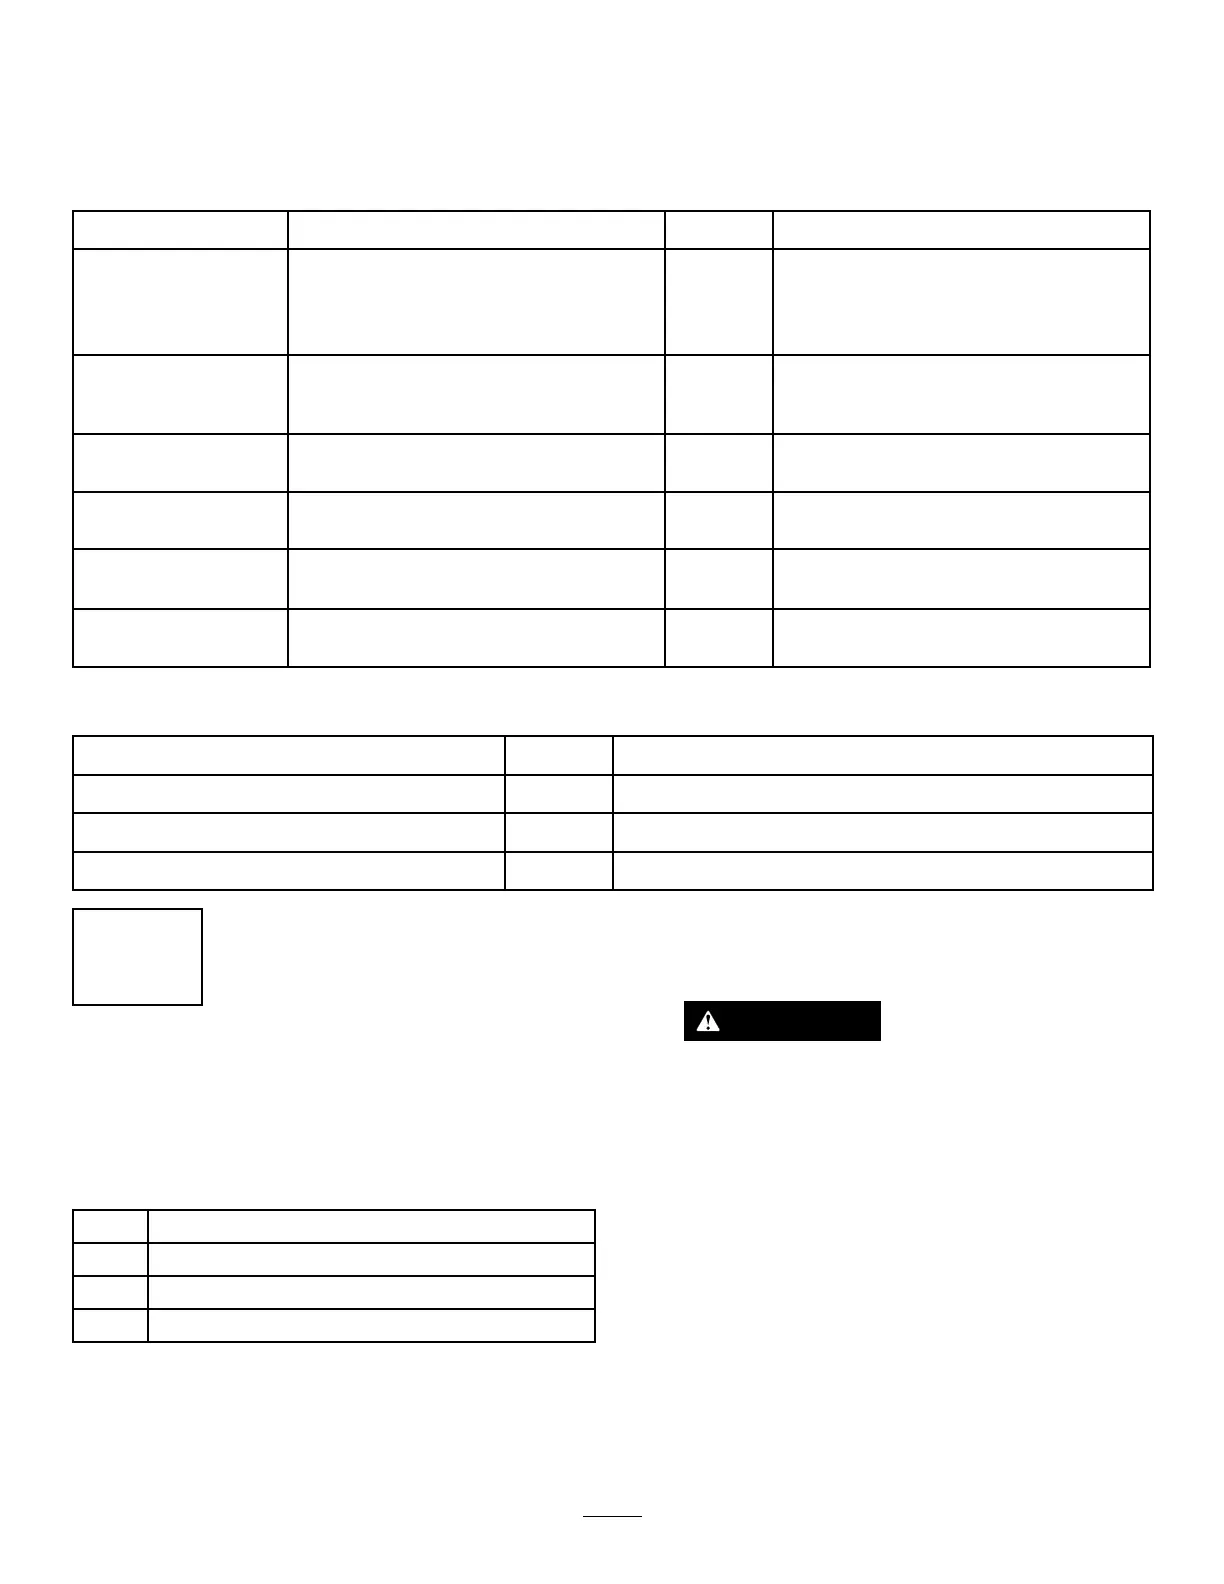
Usethechartbelowtoverifythatallpartshavebeenshipped.
ProcedureDescription
Qty.
Use
PTOdriveshaft
1
Bolt(5/16x1-3/4inches)
4
Locknut(5/16inch)
4
1
Rollpin(3/16x1-1/2inches)
2
InstallthePTOdriveshafttoaoptional
cuttingunitorQAS.
Retainerpin2
Greasetting
2
2
Washerheadscrew(5/16x7/8inch)
2
Usethehardwaretoinstalltheoptional
cuttingunit.
3
Nopartsrequired
–
Adjusttherollbar.
4
Nopartsrequired
–
Checkthetirepressure.
5
Nopartsrequired
–
Checkthehydraulicuid,engineoil,
andcoolantlevels.
6
Modelyeardecal1
Installthedecal(CEmachinesonly).
MediaandAdditionalParts
Description
Qty.
Use
Operator'sManual
1
Reviewitbeforeoperatingthemachine.
Engineowner'smanual1
Useittoreferenceengineinformation.
Ignitionkeys2
Starttheengine.
1
InstallingthePTO
DriveshafttoanOptional
CuttingUnitorQAS
Partsneededforthisprocedure:
1
PTOdriveshaft
4
Bolt(5/16x1-3/4inches)
4
Locknut(5/16inch)
2
Rollpin(3/16x1-1/2inches)
Procedure
Note:InstallingthePTOdriveshaftiseasierifyou
positionthemachineonahoist.
1.Parkthemachineonalevelsurface,engagethe
parkingbrake,shutofftheengine,andremove
thekey.
WARNING
IfyoustarttheengineandallowthePTO
torotate,seriouspersonalinjuryand
machinedamagecouldresult.
•Donotstarttheengineandengagethe
PTOswitchwhenthePTOdriveshaft
isdisconnectedfromthecuttingdeck.
•BeforeyoudisconnectthePTO
driveshaftfromthecutting
deck,disconnectthePTO
solenoid-valve-coilconnector
fromthewireharnesstoprevent
unintentionallyengagingthePTO
clutch.
2.Disconnectthewire-harnessconnectorfromthe
PTOsolenoid-valve-coilconnector(Figure3).
11

 Loading...


