4
Lynx® SmartHub Installation and User Guide
Wallmount
Selecting the proper installation site for the Lynx
SmartHub is essential to safe and reliable operation. The
SmartHub features a weather resistant cabinet designed
for indoor or outdoor installation.
Install the Lynx SmartHub:
• on a vertical wall or other sturdy structure
• so that the display is at or below eye level
• near a grounded power source
• so that it is in shade during the hottest hours of the
day
• with as much protection from direct sunlight, rain,
wind and snow as possible
IMPORTANT! Do not mount the controller
where it is exposed to direct spray from the
irrigation system.
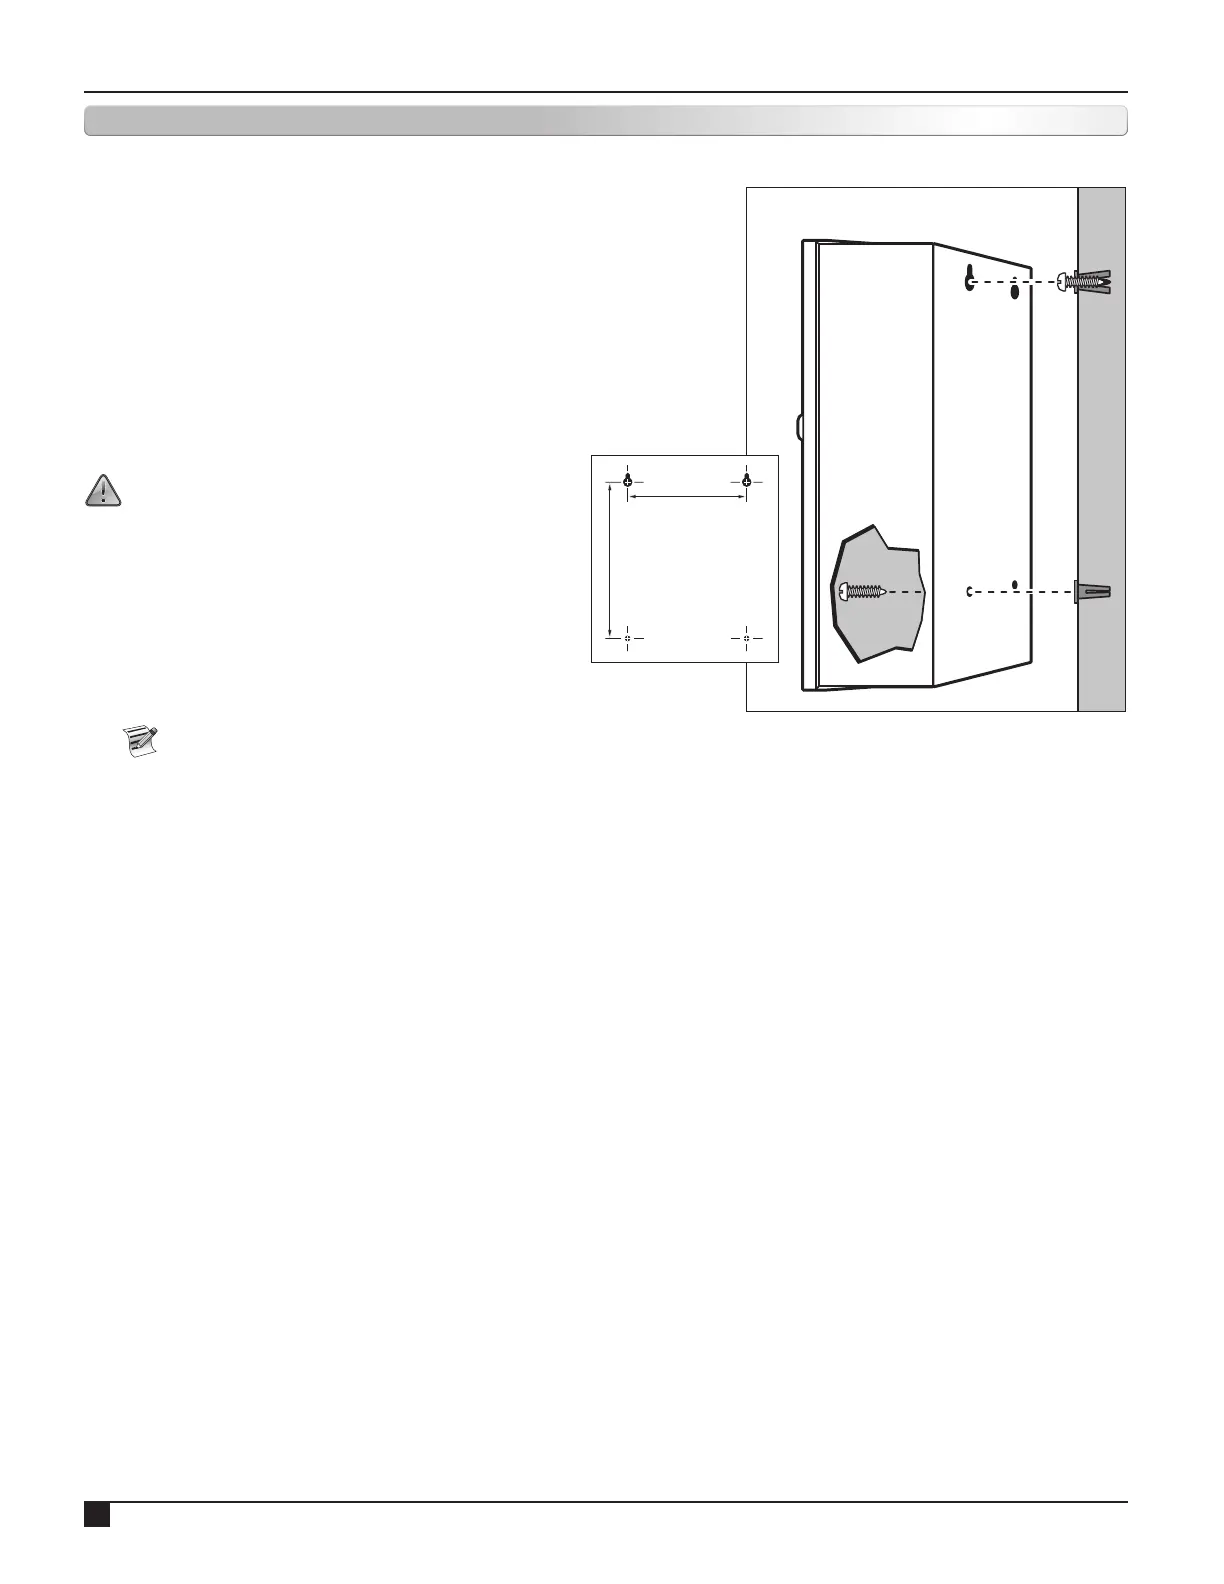
Steps:
1. Drill two pilot holes 6” (15.25cm) apart for the top
keyholes of the controller cabinet.
2. Install the top screws leaving approximately 1/4”
(5–6mm) of exposed screw to accommodate the
cabinet.
If mounting the cabinet on dry wall or
masonry, install the appropriate type of screw
anchors or fasteners to ensure secure
installation.
3. Hang the cabinet using the top keyhole slots.
See Figure 1.
4. Open the cabinet door and install the two bottom
screws to secure the cabinet.
6" (15.25cm)
9 1/8"
(23.175cm)
Figure 1
Cabinet Installation