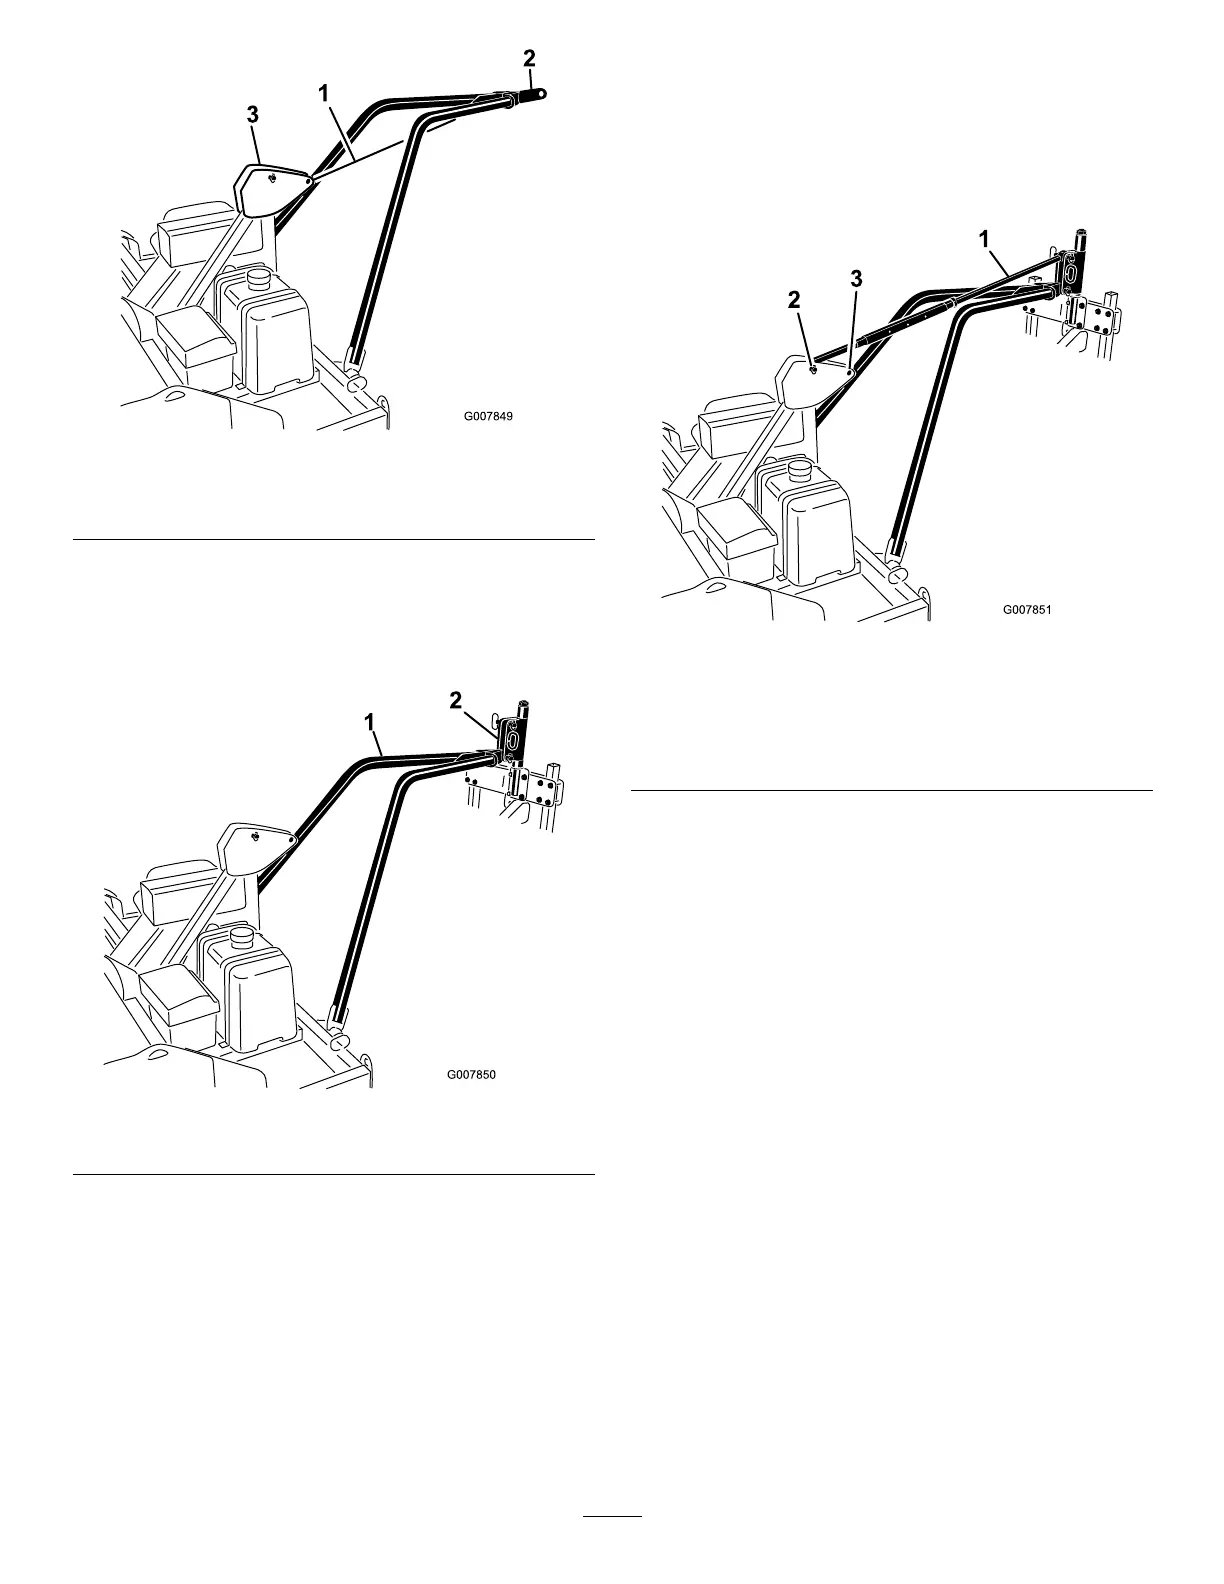
Figure12
1.Tiedownorrope3.Framehitchpivot
2.Towarmhitchplate
3.Backthetractor/aeratorintopositioninfrontofthe
coreprocessor.
4.Removethetiedownorropeandlowerthetowarm
hitchplateintotheaeratorhitchpivot(Figure13).
Figure13
1.Towarmhitchplate2.Aeratorhitchpivot
5.Aligntheholeinthetowarmhitchplatewiththe
lowerholesintheaeratorhitchpivotFigure14).
Securethetowarmhitchplatetotheaeratorhitch
pivotwithahitchpinandlynchpin.
6.Lowertheaeratortotheground
7.Securethepitchcontrollinktothetopholesinthe
aeratorhitchpivotandtheframehitchpivotwith
hitchpinsandlynchpins(Figure14).
•Connectthecontrollinktothefrontholesinthe
framehitchpivotwhenoperatingProCore864
and880aerators.
•Connectthecontrollinktotherearholesinthe
framehitchpivotwhenoperatingaProCore660
aerator.
Figure14
1.Pitchcontrollink3.Rearmountingholes
(ProCoreAerator)
2.Frontmountingholes
(ProCore880&864
Aerators)
8.Routethehydraulichosestothetractorandconnect
tothequickcouplers.Makesurethehydraulichoses
areproperlyconnectedtotheprocessorandthe
tractor.
9.Routethecontrolharnesstothetractoroperators
position.
10.Securethehydraulichosesandthewireharnessto
thetow-armswithcableties.
Important:Whenturningthetractortothe
rightorleft,makesurethehydraulichosesor
controlharnessdonotbecomedisconnectedor
damaged.
11.Operatethecoreprocessorandcheckthehydraulic
uidlevelinthetowvehicle.Replenishasrequired.
12.Removethestoragepinsfromthefronthole
positionandinsertintotherearholepositionduring
operation(Figure15).
15