2. MAIN UNIT REPLACEMENT
EO18-33017
2. MAIN UNIT REPLACEMENT
2- 1
2. MAIN UNIT REPLACEMENT
1. Turn the power off and disconnect the Power Cord.
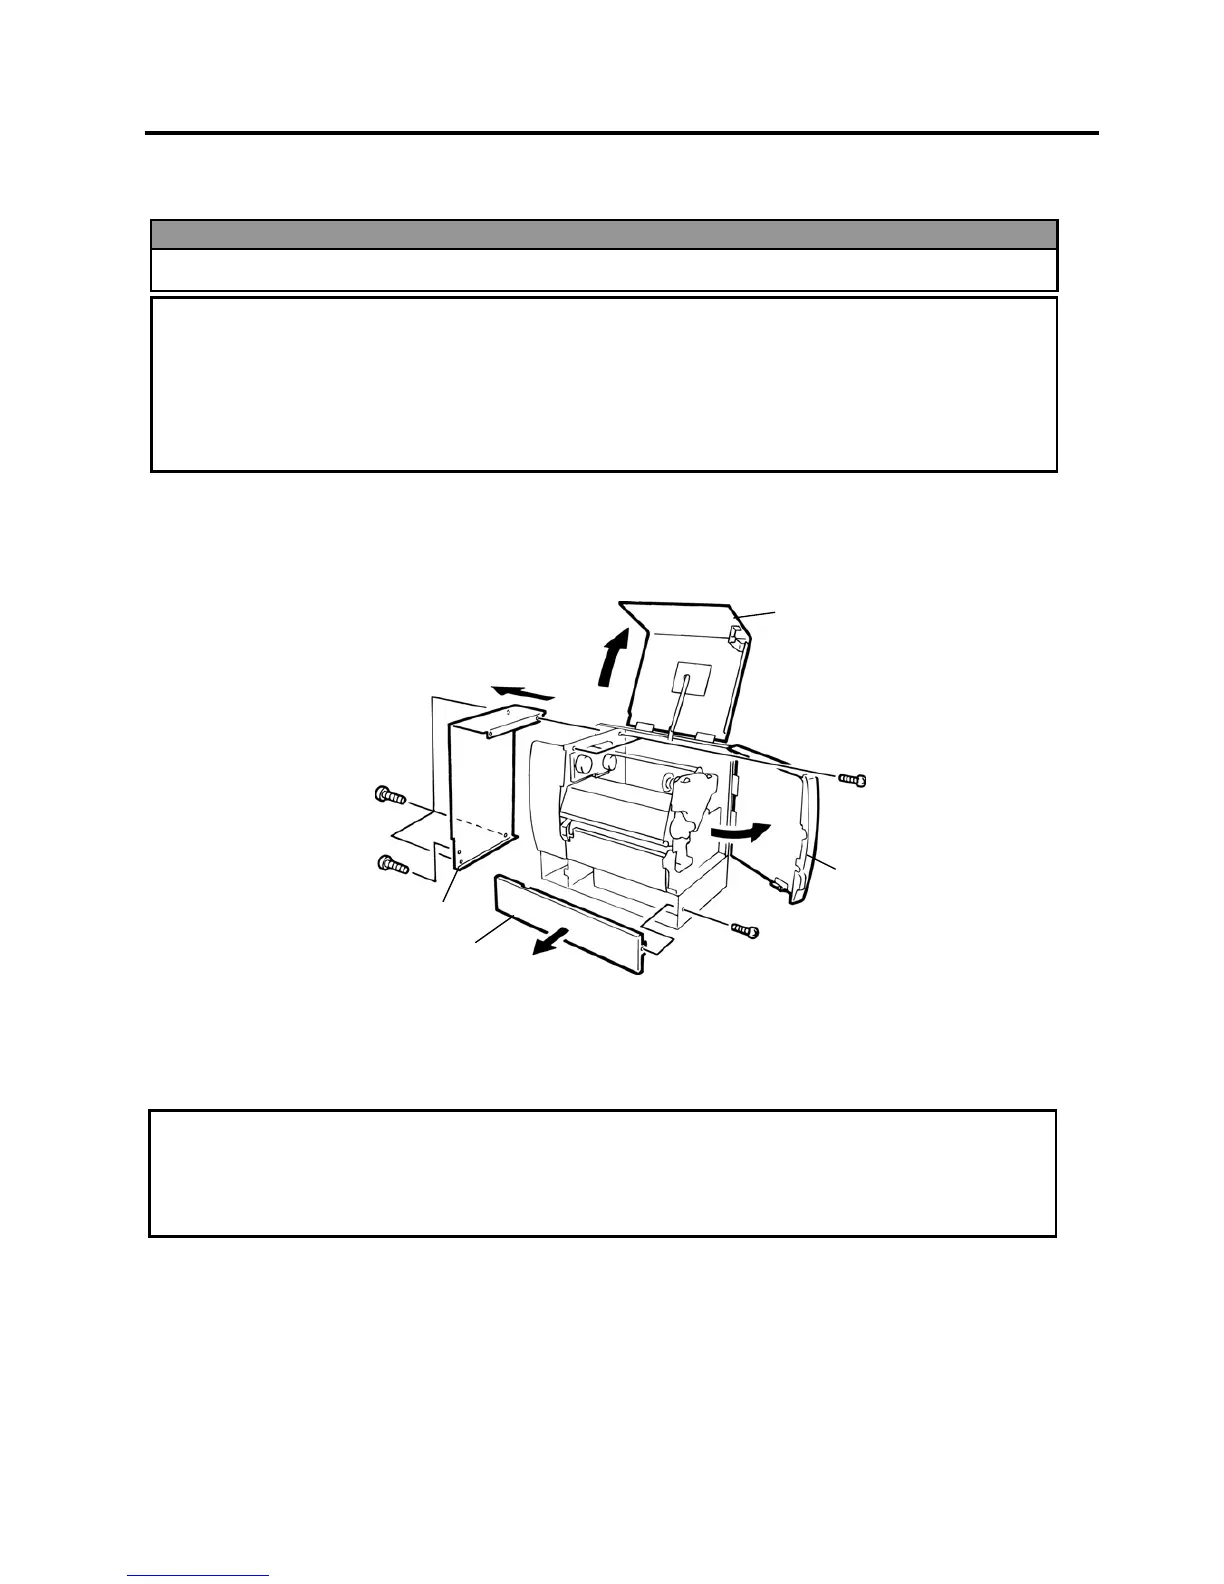
2. Open the Right Side Cover and Top Cover.
3. Remove the six screws (FL-4x6, B-4x6, and B-3x8) to detach the Left Side Cover.
4. Remove the B-3x8 screw to remove the Bottom Plate.
NOTE: Instructions to open the Top Cover and Right Side Cover and to remove the Left Side Cover are omitted
from each removal/installation procedure provided below.
Lubrication
All machines are generally delivered in their best condition. Efforts should be made to keep them that way.
Lack of oil, or the presence of debris or dust, may cause an unexpected failure. To maintain in optimal
operating condition, periodically clean the machine and apply the proper kinds of oil to each part in which
lubrication is needed.
Although the frequency of lubrication varies according to how often the machine is used, as a minimum it is
necessary to lubricate before any part becomes dry. It is also necessary to wipe off excessive oil or it will
collect dirt.
WARNING!
Turn the power off and disconnect the power cord before replacing the main parts.
CAUTION!
1. DO NOT separate the ribbon motors from the attachment plate (bracket), as doing so will change
their adjustment. (See Section 2.4 REPLACING THE RIBBON MOTORS.)
2. DO NOT remove the two screws painted in red on the side of the print block.
3. DO NOT remove screws unless directed to do so in this manual. Removing screws may change
pre-set adjustments.
B-4x6 Screw
B-3x8 Screw
Left Side Cover
Bottom Plate
Top Cover
FL-4x6 Screw
Right Side Cover
B-3x8 Screw
CAUTION!
1. Lubrication: During parts replacement
2. Kinds of oil: FLOIL G-488: 1kg can (Part No. 19454906001)
3. Do not spray the inside of the printer with lubricants. Unsuitable oil can damage the mechanism.

 Loading...