3. Scan to File
Scanning Guide — How to Perform Scan to File 33
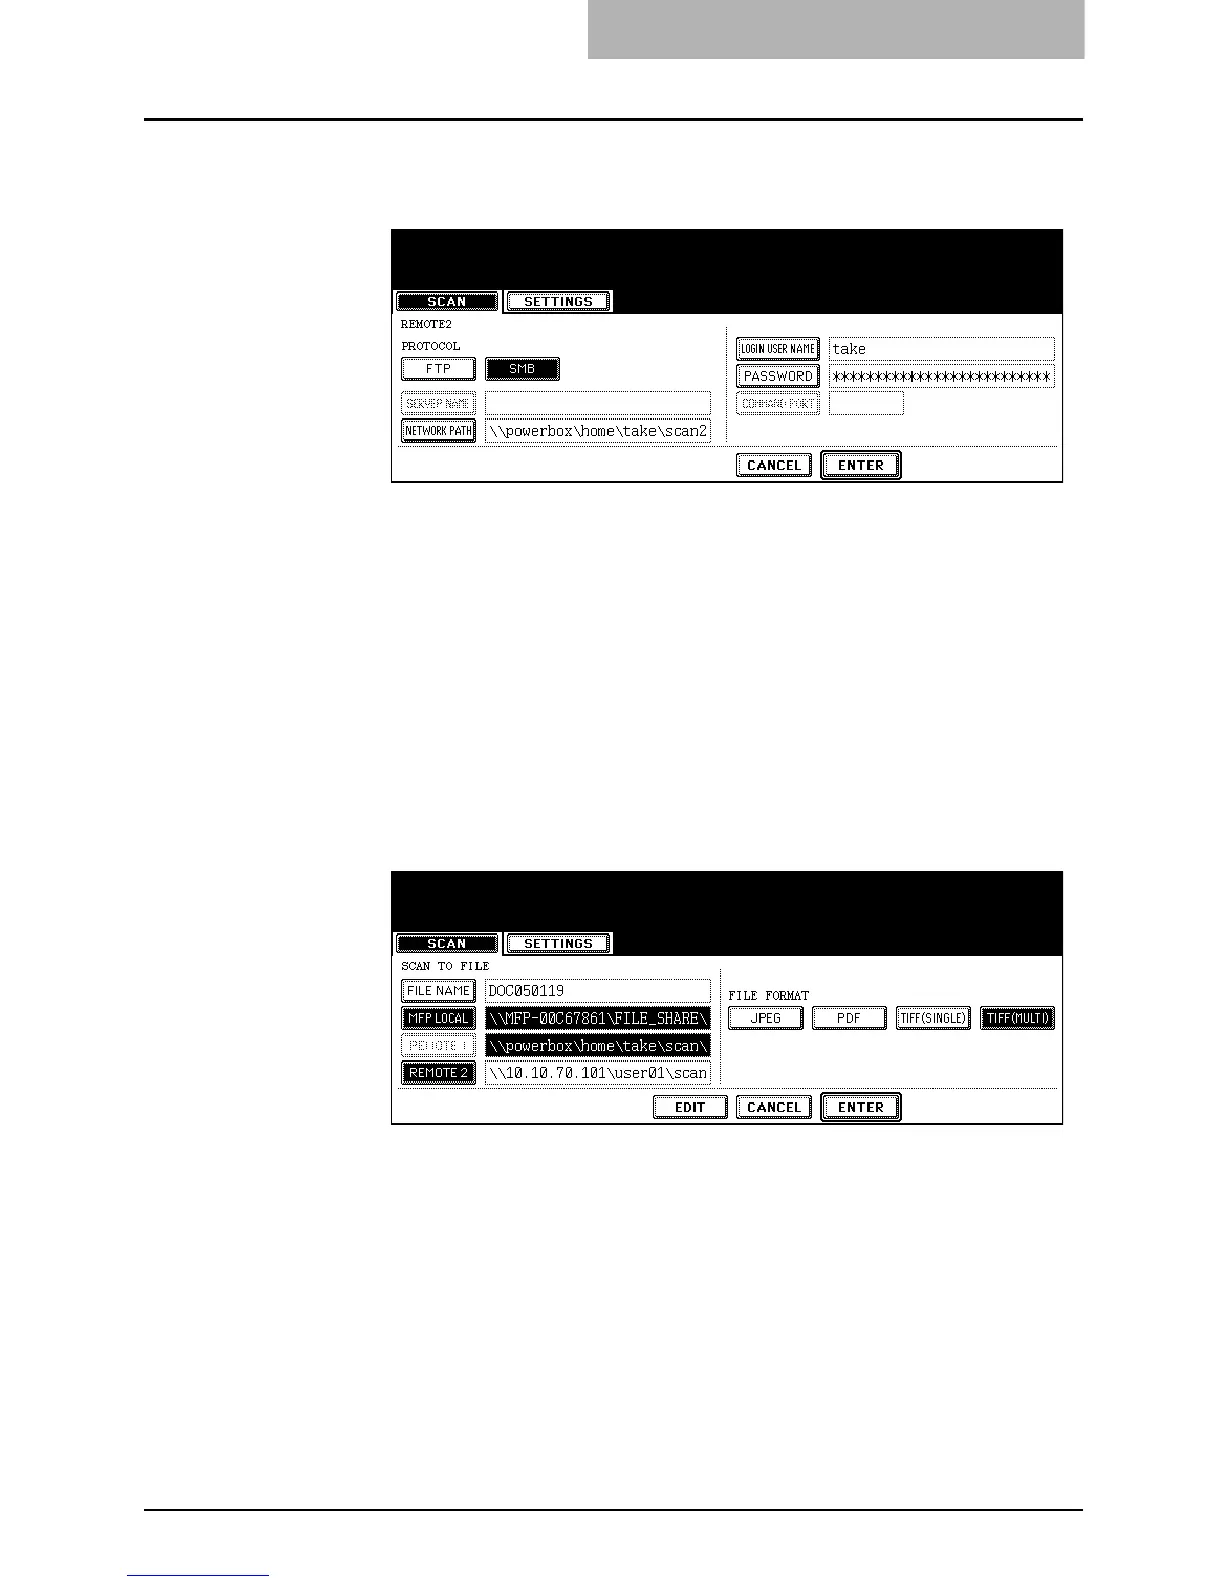
When you want to store the data using SMB, select the [SMB]
button and specify the following items as you require. Then
press the [ENTER] button.
z [NETWORK PATH]
Press this to enter the network path to the folder where you want to store the
data.
z [LOGIN USER NAME]
Press this to enter the user name to access the network folder if required.
z [PASSWORD]
Press this to enter the password to access the network folder if required.
SUPPLEMENT: When you press each button, the letter entry screen is displayed. Enter the value using
the keyboard and digital keys, and press the [ENTER] button to set the entry.
NOTE: [SERVER NAME] and [COMMAND PORT] are not required to set when selecting the
[SMB] button for protocol.
8. Select the file format in “FILE FORMAT” option.
[JPEG] — Press this to store the scanned data as a JPEG file. This can be
selected only when [GRAY SCALE] or [FULL COLOR] is selected in the
“COLOR MODE” option.
[PDF] — Press this to store the scanned data as a PDF file.
[TIFF (SINGLE)] — Press this to store the scanned data as a Single TIFF file.
When scanning several pages, this equipment will store each page as separate
TIFF file.
[TIFF (MULTI)] — Press this to store the scanned data as a Multiple page TIFF
file. When scanning several pages, this equipment will store all pages as one
TIFF file. This cannot be set when [AUTO COLOR] is selected in the “COLOR
MODE” option.
9. Press the [EDIT] button to set the scanning conditions.
• The screen to set the scan conditions is displayed.

 Loading...