J
Jamie SmithSep 15, 2025
What to do if Toshiba All in One Printer has a paper jam?
- JJody JacksonSep 16, 2025
To resolve a paper jam on your Toshiba All in One Printer, remove the jammed paper and resubmit the job.


What to do if Toshiba All in One Printer has a paper jam?
To resolve a paper jam on your Toshiba All in One Printer, remove the jammed paper and resubmit the job.
How to fix stained images from my Toshiba All in One Printer?
To resolve stained images from your Toshiba All in One Printer, ensure the cover or feeder is properly closed to block external light. Clean the platen sheet, Original Cover, and scanning area. Adjust the image density using the [AUTO] button or manual density buttons. If the other side of the originals is visible, lighten the image density with the background adjustment function. You can also place a blank sheet of paper of the same size or larger over the original.
How to fix high image density on my Toshiba All in One Printer?
To fix images with too high density on your Toshiba All in One Printer, use the manual density buttons or the background adjustment function to adjust the image density properly.
What to do if I cannot remember document password on Toshiba All in One Printer?
If you cannot remember the password for a Private Print job on your Toshiba All in One Printer, you must delete the job from the Touch Panel Display or through TopAccessDocMon and resubmit the Private Print job using a new password, as there is no way to recover the original password.
Why Toshiba All in One Printer requires attention?
If your Toshiba All in One Printer requires attention, go to the Touch Panel Display to see the type of error that has occurred.
What to do if the used toner container is full on Toshiba All in One Printer?
If the used toner container is full in your Toshiba All in One Printer, replace the toner bag.
How to resolve 'Setup Needs to Copy Windows NT Files' error on Toshiba All in One Printer?
If your Toshiba All in One Printer displays the error message “Setup Needs to Copy Windows NT Files” during driver installation, it indicates that the wrong port type was selected from the Printer Ports dialog. To resolve this, click Cancel until the Add Printer Wizard terminates. Then, double-click Add Printer from the Printers folder, and when prompted to select a port, choose Local Port.
What does 'Client Software CD Now Required' mean for Toshiba All in One Printer?
If your Toshiba All in One Printer displays the message 'Client Software CD Now Required' during driver installation, it means that you did not choose the Have Disk option and instead selected the printer name from the Add Printer list. To fix this, cancel the Add Printer Wizard. Double-click Add Printer from the Printers folder, and when prompted to locate the driver, click Have Disk. You can then select Use Existing Driver to add another copy of an existing driver or browse to the subdirectory that contains the appropriate *.inf file.
How to fix 'This Port is Currently in Use' error on Toshiba All in One Printer?
If your Toshiba All in One Printer displays the message 'This Port is Currently in Use', it means that the driver was either open, printing a job, or is in use by another printer or application. To resolve this, ensure that all print jobs have completed before deleting a port. If problems persist, exit all applications and try again. Also, check each driver to see if another driver is using the same port. If so, first change the driver’s port setting and then delete the port.
Why Toshiba E-studio 281c equipment does not start?
If your Toshiba All in One Printer does not start, ensure the power cord is fully inserted until it stops. Also, verify that the cover is properly closed.
Safety instructions and warnings for installation and moving procedures.
Precautions related to operation, handling liquids, and potential hazards during use.
Important warnings and precautions for maintenance and inspection procedures.
Detailed overview of the machine's main parts and their functions.
Procedures for turning the equipment on, off, and managing power settings.
Instructions for loading and setting various types and sizes of paper.
Information on acceptable original types and how to place them for copying.
Step-by-step guide on how to perform copying operations.
Instructions for copying using the bypass tray for special paper types or sizes.
How to select the appropriate paper for copying, including automatic and manual methods.
Instructions on how to select between Full Color, Black, and Auto Color modes.
Guide on how to enlarge or reduce copy sizes, including automatic magnification.
Options for post-copy processing like sorting, stapling, and hole punching.
Instructions for making 2-sided copies from 1-sided or 2-sided originals.
Feature to store, print, and manage documents using the equipment's hard disk.
Steps to save scanned original data to e-Filing, including copy mode settings.
How to print stored documents, including options for partial printing and setting changes.
How to check the status of print jobs, including options to delete, pause, or move.
Lists error codes and their corresponding problems and recommended actions.
Alerts the user when toner cartridges are low or empty, guiding replacement.
Visual indicators for paper misfeeds in different parts of the equipment.
Indicates the need for service assistance due to an error or malfunction.
Message indicating low or empty staples in the finisher's stapler.
Alert for low or empty staples specifically in the Saddle Stitch Unit stapler.
Message indicating jammed staples in the finisher, requiring inspection.
Message indicating jammed staples in the Saddle Stitch Unit, requiring inspection.
Basic troubleshooting steps for common issues like equipment not starting or paper jams.
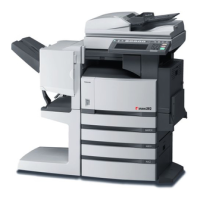
| Brand | Toshiba |
|---|---|
| Model | E-studio 281c |
| Category | All in One Printer |
| Language | English |