https://www.toshiba.com/tic/ 21
Electronic Operator Interface
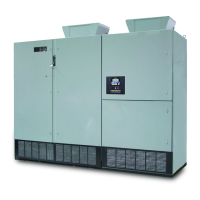
Q9 Plus ASD Install/Op Manual
Electronic Operator Interface
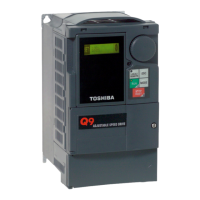
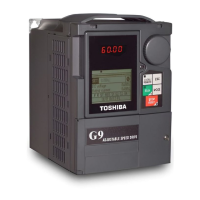
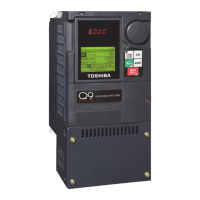
The Q9 Plus ASD Electronic Operator Interface
(EOI) is comprised of an LED screen, an LCD
screen, a rotary encoder, and five keys. These
items are shown on pg. 22.
EOI Operation
The EOI is the primary input/output device for the
user. The EOI may be used to monitor system
functions, input data into the system, perform
diagnostics, and view performance data (e.g.,
motor frequency, bus voltage, torque, etc.).
The software used with the Q9 Plus ASD is menu
driven; thus, making it a select and click
environment. The operating parameters of a motor
may be selected and viewed or changed using the
EOI (or via communications).
The EOI may be mounted remotely using the
optional ASD-MTG-KITQ9. The kit contains all of
the hardware required to mount the EOI of the 9-
Series ASD remotely. See the section titled EOI
Remote Mounting on pg. 25 for more information on
this feature.
System operation and EOI operation while using
the remotely-mounted EOI are the same as with the
ASD-mounted configuration.
Battery Backup
The EOI is equipped with a battery backup system.
The function of the backup system is to retain the
EOI SRAM programming in the event of a power
outage, or if an EOI removal and installation from
one system to another is required without the loss
of programming.
Listed below are the items retained by the battery
backup system:
Trip History,
EOI Contrast,
Real-Time Clock Information,
Monitored Items on pg. 38,
Password and Lockout Information,
Alarm Information,
Main Monitor Items,
Prohibited Items, and
Save User Settings Information (parameter settings
may be saved by the user).
The battery backup system must be activated by
the installer or maintenance personnel to use the
backup function.
To activate the battery backup system, remove the
Phillips screw from the front of the LED/LCD display
unit (see Figure 21. on pg. 22). Remove the LED/
LCD display unit from the ASD. From the circuit side
of the display unit, remove the jumper at J1, pins 2
and 3. Place the jumper at J1, pins 1 and 2. The
battery backup system is now configured for use.
Note: The Trip History and Real-Time Clock
information is cleared when the J1 jumper or
the battery is removed.
The expected battery life cycle is four and a half
years.
Note: The Battery backup system provides for
memory retention only — it does not supply
power to the LED/LCD display or any other
subsystems.
LED/LCD Screen Installation
Note
When installing the LED/LCD display unit of the
EOI, ensure that the left side of the display is
inserted first with the top and bottom catches (see
Phillips screws at underside of display) securely in
place. This ensures the proper alignment and
electrical connection of the CNX connector of the
LED/LCD display unit board. Gently hold the
display in place while securing the Phillips
mounting screw.
If improperly seated, the periphery of the LED/LCD
display unit will not be flush with the EOI surface
and the unit will not function properly.
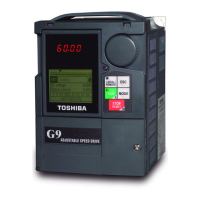
EOI Features
LED Screen — Displays the running frequency,
active Fault, or active Alarm information.
LCD Screen — Displays configuration information,
performance data (e.g., output frequency, bus
voltage, torque, etc.), diagnostic information, and
LED screen information in expanded normal text.
Rotary Encoder — Used to access the Q9 Plus
ASD menu selections, change the value of a
displayed parameter, and performs the Enter key
function. Turn the Rotary Encoder either clockwise
or counterclockwise to perform the Up or Down
 Loading...