Do you have a question about the Toshiba TE Series and is the answer not in the manual?
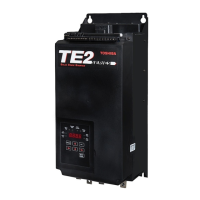
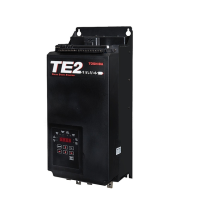
Overview of the TE Series digital programmable solid-state reduced voltage soft starter.
Details on programmable ramp types, dual ramp, deceleration, jog, kick start, and RTC features.
Details on thermal model, overload curves, reset, retentive memory, imbalance, PTC input, phase loss, etc.
Technical specifications including load type, voltage, power ratings, circuit, SCRs, cooling, inputs, outputs, and approvals.
Information on TE Series starter current ratings, max amp ratings, and proper sizing with motor FLA and Service Factor.
Guidance on selecting starters considering NEMA Service Factor ratings for continuous operation.
Considerations for sizing bypass contactors for Across-the-Line starting when TE Series electronics are out of service.
Details on connecting dry contact for bypass contactor coil control circuit for emergency bypass operation.
Procedure for inspecting the unit upon receipt, checking for damage, and verifying model number and ratings.
Guidelines for selecting an installation area considering ambient temperature, humidity, and environmental conditions.
Visual check for damage, loose assemblies, or broken wires. Verify unit and motor ratings match.
Crucial safety warning about disconnecting power before servicing to avoid fatal electrical shocks.
Instructions for mounting and cleaning the unit, including maintaining proper clearances for airflow.
Recommended clearances around the unit for cooling, wiring, and maintenance to ensure proper airflow.
Instructions for connecting power conductors to bus tabs, including lug types and local code standards.
Details on connection points, wire sizes, and tightening torques for factory-supplied connectors.
Information on remote mounting the keypad/operator interface unit using a kit.
Table and diagram showing overall and mounting dimensions and weights for TE series units.
Details on the built-in I²t Thermal Overload Protection feature for maximum motor protection.
Explanation of the sophisticated 'Thermal Register' that tracks motor heating/cooling over time, even without power.
Description of the Thermal Register display as a percentage of motor's remaining thermal capacity.
Instructions to enter motor FLA using Function F001; critical for unit operation.
Guidance on disabling built-in overload protection when external devices are used.
Explanation of the manual reset function for overload trips, requiring a physical reset after cooling.
Instructions for enabling automatic reset for overload conditions, with caution for 2-wire control.
Details on overload protection maintenance when using integral bypass contactors.
Explanation of the starter's ability to dynamically track thermal capacity needed for successful restart after overload.
Explanation of NEMA Class trip curves based on tripping point and time before trip.
Description of two separate overload trip curves for starting and running conditions.
Selection of NEMA Class trip curves from 5 to 30 for the start mode.
Selection of NEMA Class trip curves from 5 to 30 for the run mode.
A chart illustrating the TE Series Overload Trip Curves for various NEMA classes.
Instructions for connecting power conductors to L1, L2, L3 and motor leads to T1, T2, T3.
Information on integral bypass contactors and their control for TE versions.
Guidance on connecting PFC capacitors to the line side only, with a warning against load-side connection.
Instructions for connecting the ground cable to the unit's ground terminal per local codes.
Procedure for testing the TE Series with a smaller motor, noting Phase Current Loss considerations.
Recommendations for protecting against lightning surges using arrestors or isolation contactors.
Description of control connection points on TB1 (DC) and TB2 (AC) terminal blocks.
Details on connecting the 120VAC or 240VAC control power supply to TB-2 terminals A1 and A2.
Guidance on sizing control power transformers for TE...-BP Series starters.
Recommendations for protecting output relay contacts and fault output with fuses.
Wiring instructions for standard 3-wire control using Stop/Start push buttons on TB1.
Explanation of the internal pre-wired seal-in contact for the Start button.
Alternative connection for automated operation using a maintained contact closure between terminals 1 and 3.
Considerations for using 2-wire control with Auto-Reset functions.
Connection point for external normally closed interlock devices between terminals 4 and 5.
Provisions for enabling Dual Ramp and Jog features using external contact closures on TB1.
Connecting a contact between TB1 terminals 6 and 7 to enable Ramp 2.
Connecting a contact between TB1 terminals 7 and 8 to enable the Jog feature.
Wiring terminals 6 and 8 together to control Ramp 2 and Jog simultaneously.
Input terminals for connecting a PTC thermistor for motor winding temperature protection.
Connecting an external OLR's NC aux contact to the PTC input for fault indication.
Optically isolated Triac output on TB1 for fault indication, usable with PLCs or external relays.
Description of three programmable auxiliary relays on TB2 and their factory default settings.
Internal connection for automatic bypass contactor control on TE...-BP starters.
Controlling bypass contactors independently of starter electronics, requiring specific sizing and wiring.
Importance of operating the motor at full load starting conditions and programming motor FLA (F001).
Description of the digital keypad, LEDs, command keys, and display features of the soft starter.
Overview of the three display modes: Status, Program, and Fault.
Details on the seven screens of information displayed in Status Mode.
Procedure for entering Program Mode to view or change Function settings.
How to view function programming and values without making changes.
Instructions for enabling password protection to prevent unauthorized changes to parameters.
Step-by-step guide on how to alter function values using the keypad.
Method for changing function values by successively pressing UP or DOWN arrow keys.
Procedure for storing changed function values by pressing the READ/ENTER key.
Information on reviewing fault history and codes displayed in Fault Mode.
Methods for resetting faults, including keypad reset and power cycling.
How to accomplish remote reset using a NC remote contact or push-button.
Details on automatic reset for non-critical faults and overloads.
Explanation of lockout functions like Minimum Time Between Starts and Starts per Hour.
Procedure to access Status Screen from a Fault Screen to enable programming.
Detailed descriptions of all functions, including motor, starting, protection, and communication features.
Detailed descriptions of functions F001-F005 for motor FLA, service factor, and overload protection.
Descriptions of functions for selecting ramp type, initial torque, ramp time, and current limit.
Details on using the secondary ramp profile selected via contact closure.
Descriptions of functions for setting voltage, time, and current for the Jog mode.
Descriptions of functions for setting kick start voltage and time.
Guidance on using Kick Start for slow slack take-up in drive chains.
Descriptions of functions for Pump Flex Decel control, including begin level and ramp time.
Description of function F028 for setting restart delay time after a power loss.
Descriptions of functions F040-F047 for current imbalance, over/under current, and ground fault protection.
Details on Ground Fault protection using residual current method and CT ratio.
Descriptions of functions F048-F059 for lockouts, reset, and internal protection features.
Explanation of built-in protection features like Phase Rotation, SCR Lockout, and Shunt Trip.
Programming for automatic reset based on selected faults and number of attempts.
Readout functions F054-F059 for timer and register values for information only.
Descriptions of functions F060-F064 for programming auxiliary relays and delay timers.
Descriptions of functions F065-F069 for setting communications parameters and remote control.
Descriptions of functions F070-F084 for parameter lock, system clear, frame rating, CT value, and clock settings.
Functions F075-F080 for setting the system real time clock used for fault history stamping.
Descriptions of functions F085-F097 for viewing fault history and statistical data like run time.
Details on storing fault codes with time and date stamps for the three latest events.
Information on run time and run cycle counter data displayed via functions F094-F097.
Overview of the basic startup procedure for the TE Series Soft Starter.
The three essential steps for basic startup: power connections, control wiring, and FLA programming.
Guidance on initial testing using factory presets and adjusting advanced features.
A checklist to verify correct supply voltage, ratings, connections, and programming before startup.
Step-by-step description of the expected motor operation sequence during startup and running.
Explanation of three-character fault codes displayed and their corresponding numeric codes in history.
Detailed explanations of fault codes, probable causes, and recommended solutions for troubleshooting.
Description of voltage ramping as a reliable starting method for varying load conditions.
Voltage ramping with adjustable maximum current output, useful for limited power applications.
Smooth linear acceleration of output torque using PID feedback for applications with rapid torque changes.
Uses current limit exclusively for starting, useful for difficult loads or limited power supplies.
Guidance on configuring the Pump-Flex Decel feature for flexible deceleration process control.
Function to enable or disable deceleration, with options for overload trip behavior.
Sets the voltage level for noticeable motor torque effect during initial Decel mode.
Sets the voltage level where the starter turns off, corresponding to effective motor torque.
Sets the maximum time for deceleration ramp from Begin Decel Level to Shut Off Voltage.
Instructions for changing or disabling the parameter lock and user password feature.
Using external coordinated protection systems instead of internal TE Series overload protection.
Providing independent starting means using bypass contactors if TE Series starter becomes inoperable.
Suggested control schematic for using TE...-BP Series with external overload relay for bypass operation.
Considerations for special motor applications requiring external overload relays.
Using separate external OLRs for each motor when connected downstream from the TE Series starter.
Requirements for external OLRs for 2-speed/2-winding motor applications.
Record of settings for Motor FLA, Service Factor, and Overload Class.
Record of settings for Ramp Type, Initial Torque, Ramp Time, and Current Limit.
Record of settings for Voltage Jog, Time of Voltage Jog, and Current Jog.
Record of settings for Kick Start Voltage and Kick Start Time.
Record of settings for Pump Flex Control, Begin Decel Level, Shut Off Voltage, and Ramp Time.
Record of setting for Restart Delay Time.
Record of settings for Current Imbalance, Over/Under Current, and Ground Fault protection.
Record of settings for Lockouts, Auto Reset, and Internal Protection features.
Record of settings for Auxiliary Relay programming and delay timers.
Record of settings for Communications, Baud Rate, Modbus Address, and Remote Control.
Record of settings for Parameter Lock, System Clear, Frame Rating, CT Value, and Clock settings.
Record of settings for Fault History and Statistical Data like run time and counts.
| Brand | Toshiba |
|---|---|
| Model | TE Series |
| Category | Controller |
| Language | English |