Archer C50 AC1200 Wireless Dual Band Router
- 91 -
Schedule - Here displays the schedule selected in the corresponding rule.
Enable - Here displays the status of the rule, enabled or not. Check this option to enable a
specific entry.
Edit - Here you can edit or delete an existing rule.
Add New - Click the Add New button to add a new rule entry.
Enable Selected - Click the Enable Selected button to enable selected rules in the list.
Disable Selected - Click the Disable Selected button to disable selected rules in the list.
Delete Selected - Click the Delete Selected button to delete selected entries in the table.
How to add a new rule:
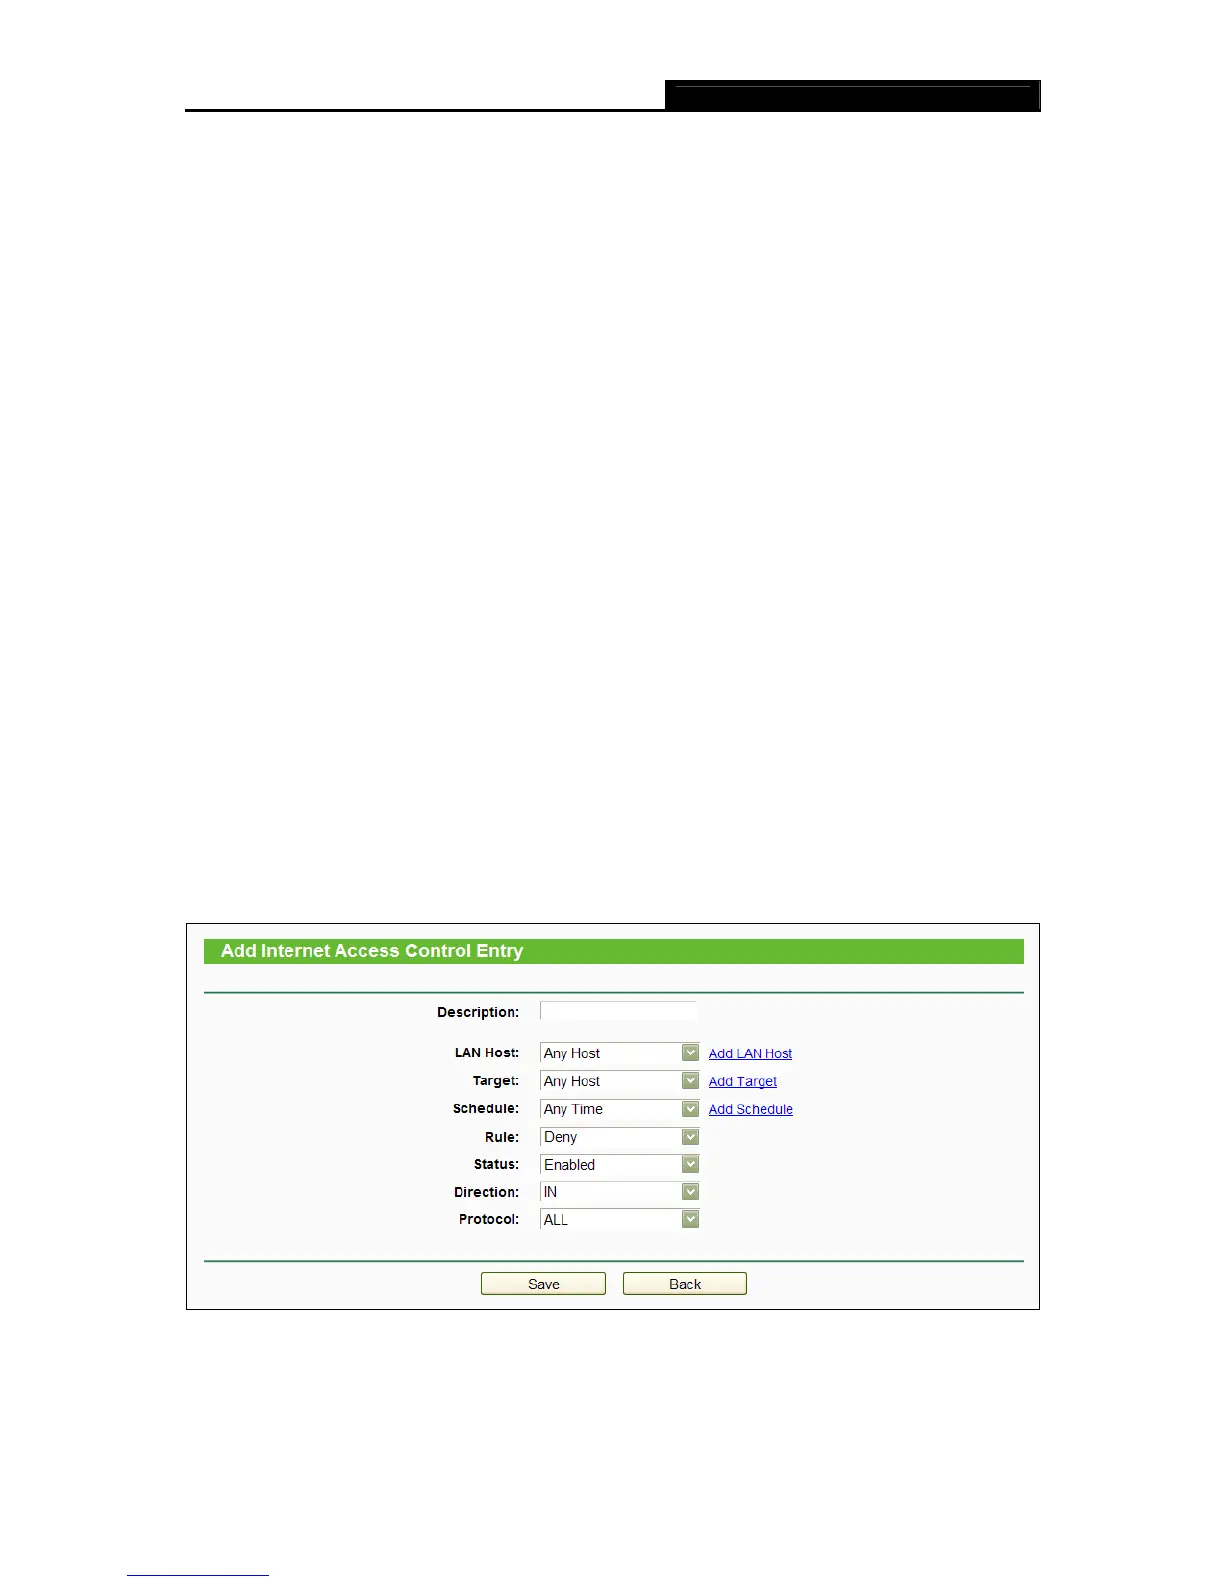
1. Click the Add New button and the next screen will pop up as shown in Figure 4-77.
2.
Give a name (e.g. Rule_1) for the rule in the Description field.
3. Select a host from the LAN Host drop-down list or click “Add LAN Host”.
4. Select a target from the Target drop-sown list or click “Add Target”.
5. Select a schedule from the Schedule drop-down list or click “Add Schedule”.
6. In the Status field, select Enabled or Disabled to enable or disable your entry.
7. In the Direction field, select IN or OUT.
8. Select a schedule from the Protocol drop-down list.
9. Click the Save button.
Figure 4-77 Add Internet Access Control Entry