104
Chapter 14
Specify Your Network Settings
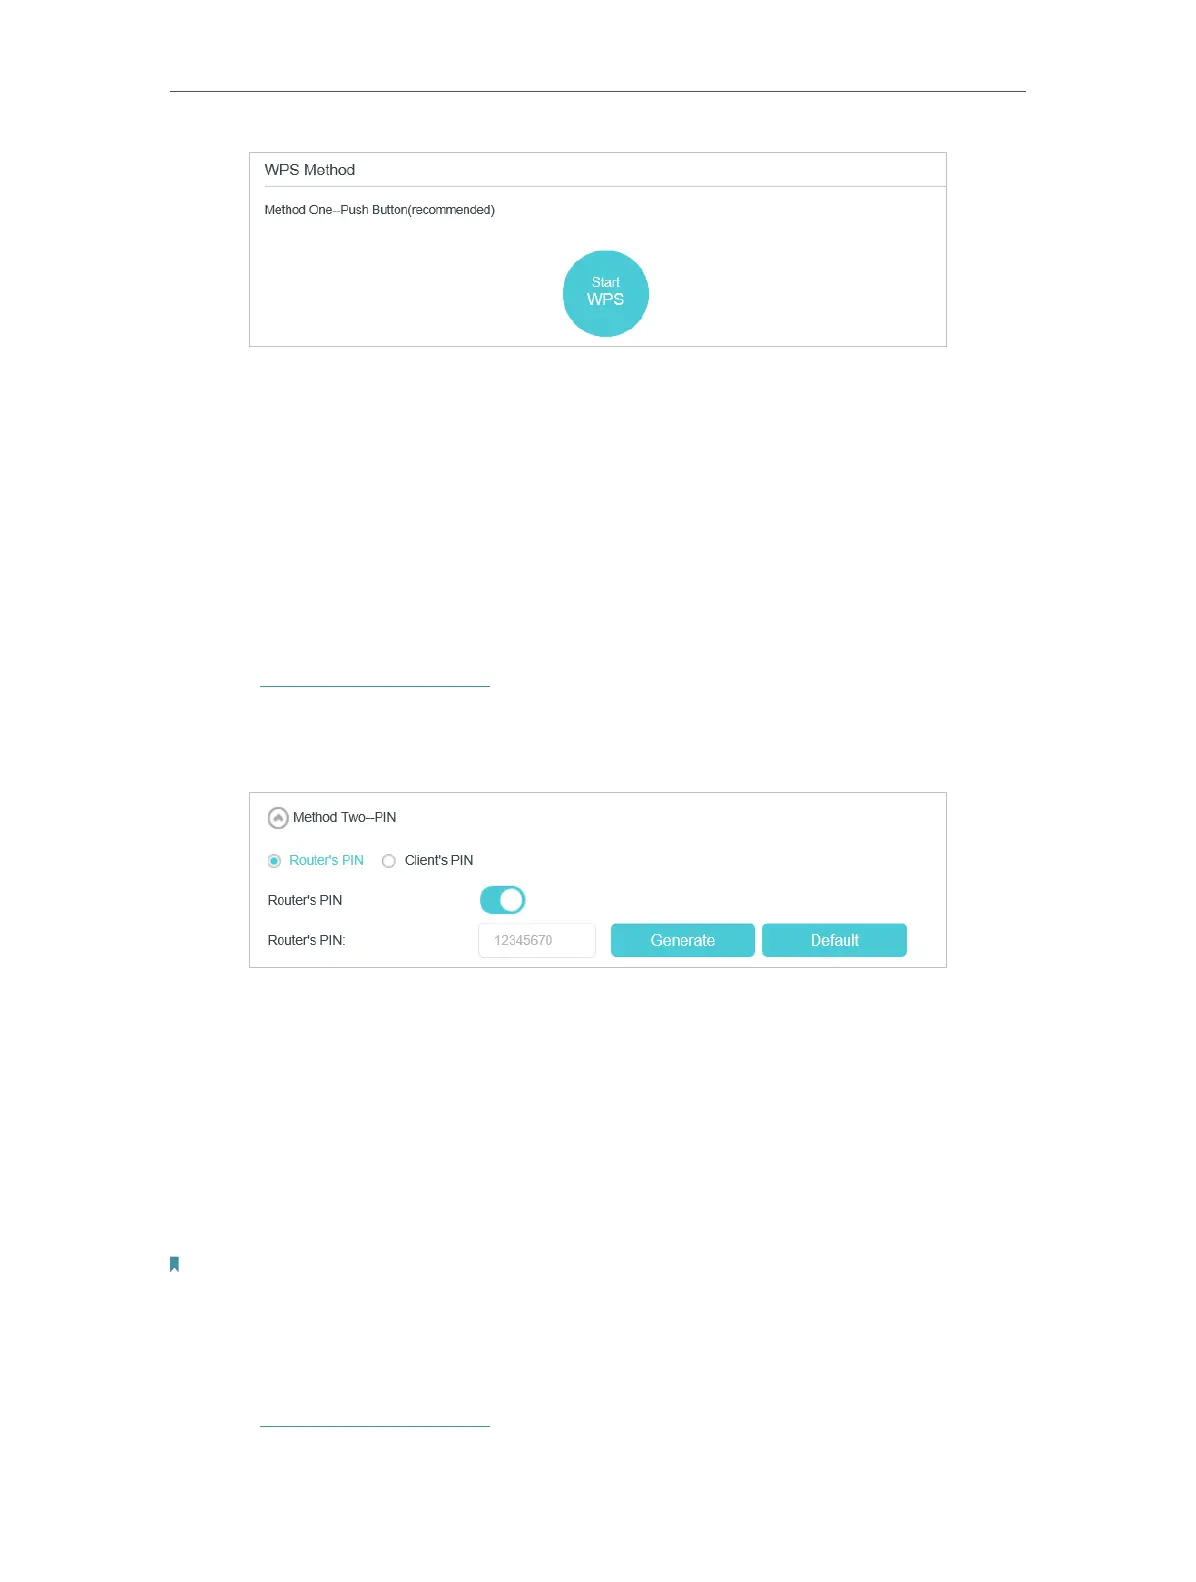
3. Click Start WPS on the page.
4. Press the WPS button of the client device directly.
5. The wireless LEDs of the router flash for about 2 minutes during the WPS process.
6. When the wireless LEDs stabilize and remain on, the client device has successfully
connected to the modem router.
Method 3 Enter the modem router’s PIN on your client device
Use this method if your client device asks for the modem router’s PIN.
1. Visit http://tplinkmodem.net, and log in with your TP-Link ID or the password you
set for the router.
2. Go to Advanced > Wireless > WPS page. Click Method Two--PIN.
3. Take a note of the Current PIN of the modem router. You can also click the Generate
button to get a new PIN.
4. On the client device, enter the modem router’s PIN. (The default PIN is also printed
on the label of the modem router.)
5. The wireless LED flash for about two minutes during the WPS process.
6. When the wireless LEDs stabilize and remain on, the client device has successfully
connected to the modem router.
Note:
The WPS function cannot be configured if the wireless function of the modem router is disabled. Please make sure the wireless
function is enabled before configuring the WPS.
Method 4 Enter the client device’s PIN on the modem router
1. Visit http://tplinkmodem.net, and log in with your TP-Link ID or the password you
set for the router.