- 8 -
- Assemble the mobile blade-guide end, the flywheel
guard, and fasten it with the relative knobs. Check
that the safety microswitch is activated otherwise
when electric connection will be restored the machine
will not start.
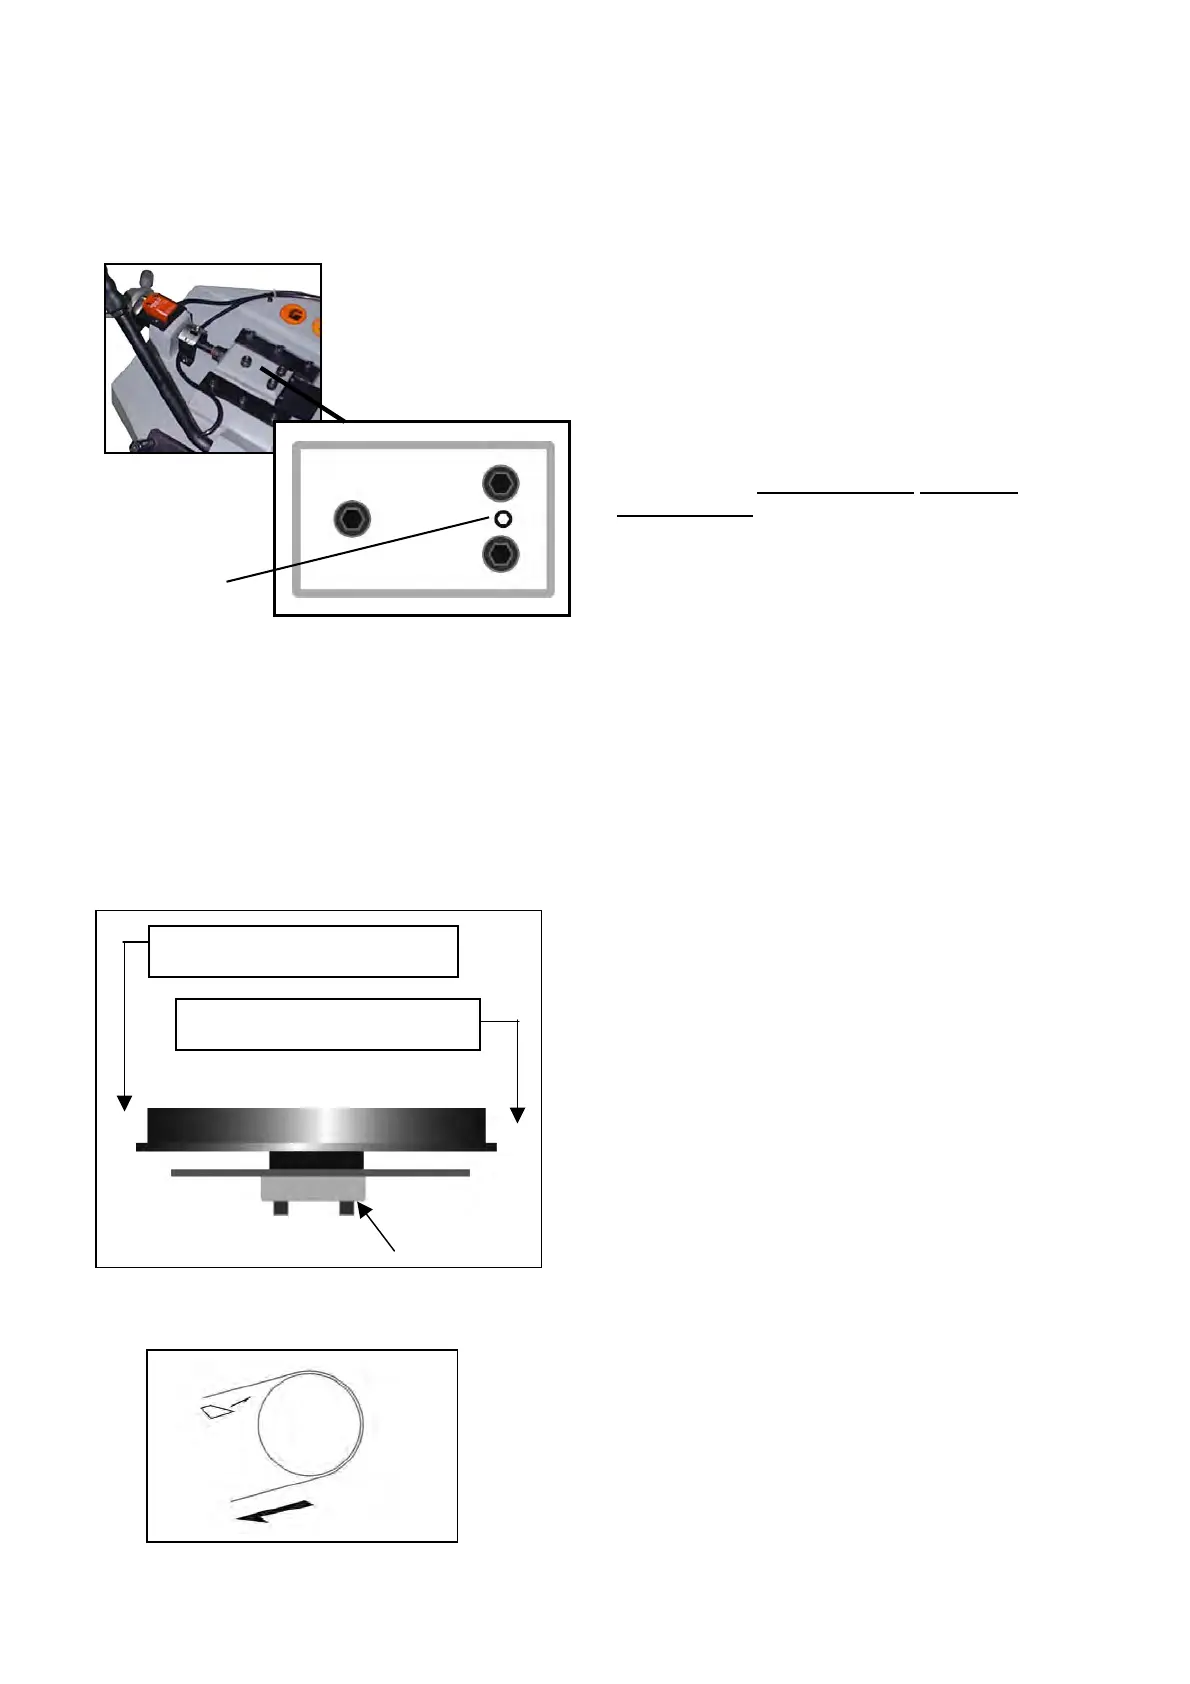
5.4 Adjusting the blade to the flywheels
1. Loosen the hex nut screws A, B, and C.
2. Use an Allen wrench on setscrew D to adjust the
tilt of the flywheel.
-Turning the setscrew, D clockwise will tilt flywheel so
that the blade will ride closer to the flange.
-Turning the setscrew, D counter-clockwise will tilt the
flywheels so the blade will ride away from the flange.
If the blade rides away too far then it will come off.
After the adjustment is finished, fasten the hex nut
screws in this order: A, B, and C.
Checking the adjustment of the blade
Use a strip of scrap paper and slide it between the
blade and the flywheel while it is running.
-if the paper is cut then the blade is riding too close to
the flange. Re-adjust.
-if you notice that the blade is riding away from the
flange. Then re-adjust.
WARNING: Always assemble blades having
dimensions specified in this manual and for which the
blade guide heads have been set; otherwise, see
chapter on "Description of the operating cycle" in the
section Starting-up.
6 ROUTINE AND SPECIAL
MAINTENANCE
THE MAINTENANCE JOBS ARE LISTED BELOW,
DIVIDED INTO DAILY, WEEKLY,
MONTHLY AND
SIX-MONTHLY
INTERVALS. IF THE FOLLOWING
OPERATIONS ARE NEGLECTED, THE RESULT
WILL BE PREMATURE WEAR OF THE MACHINE
AND POOR PERFORMANCE.
6.1 Daily maintenance
- General cleaning of the machine to remove
accumulated shavings.
- Clean the lubricating coolant drain hole to avoid
excess fluid.
- Top off the level of lubricating coolant.
- Check blade for wear.
- Rise of saw frame to top position and partial
slackening of the blade to avoid useless yield stress.
- Check functionality of the shields and emergency
stops.
6.2 Weekly maintenance
- Thorough cleaning of the machine to remove
shavings, especially from the lubricant fluid tank.
- Removal of pump from its housing, cleaning of the
suction filter and suction zone.
- Clean the filter of the pump suction head and the
suction area.
- Use compressed air to clean the blade guides (guide
bearings and drain hole of the lubricating cooling).
- Cleaning flywheel housings and blade sliding
surfaces on flywheels.
6.3 Monthly maintenance
- Check the tightening of the motor flywheel screws.
- Check that the blade guide bearings on the heads are
perfect running condition.
- Check the tightening of the screws of the gear motor,
pump, and accident protection guarding.
6.4 Six-monthly maintenance
- Continuity test of the equipotential protection circuit.
6.5 Maintenance of other machine parts
The worm drive gearbox mounted on the machine is
maintenance-free guaranteed by its manufacture.
6.6 Oils for lubricating coolant
Considering the vast range of products on the market,
the user can choose the one most suited to their own
TOP
A
C
B
Setscrew D
A Tilt in this direction will cause the
l
ri
w
r
h
fl
n
A Tilt in this direction will cause the
l
ri
w
fr
m
h
fl
n
Top view
Set screw D
paper
Blade direction
flywheel